Reebok Super Ramp Rl 7.0 Elliptical English Manual
Reebok Super Ramp Rl 7.0 Elliptical Manual
 |
View all Reebok Super Ramp Rl 7.0 Elliptical manuals
Add to My Manuals
Save this manual to your list of manuals |
Reebok Super Ramp Rl 7.0 Elliptical manual content summary:
- Reebok Super Ramp Rl 7.0 Elliptical | English Manual - Page 1
? If you have questions, or if parts are damaged or missing, DO NOT CONTACT manual) before contacting Customer Care. CALL TOLL-FREE: 1-877-994-4999 Mon.–-Fri., 6 a.m.–-6 p.m. MT Sat. 8 a.m.–-4 p.m. MT ON THE WEB: www.reebokservice.com CAUTION Read all precautions and instructions in this manual - Reebok Super Ramp Rl 7.0 Elliptical | English Manual - Page 2
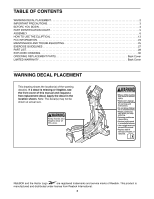
2 IMPORTANT PRECAUTIONS 3 BEFORE YOU BEGIN 4 PART IDENTIFICATION CHART 5 ASSEMBLY 6 HOW TO USE THE ELLIPTICAL 13 FCC INFORMATION 24 MAINTENANCE AND TROUBLESHOOTING 25 EXERCISE GUIDELINES 27 PART LIST 28 EXPLODED DRAWING 30 ORDERING REPLACEMENT PARTS Back Cover LIMITED WARRANTY Back Cover - Reebok Super Ramp Rl 7.0 Elliptical | English Manual - Page 3
IMPORTANT PRECAUTIONS WARNING: To reduce the risk of serious injury, read all important precautions and instructions in this manual and all warnings on your elliptical before using your elliptical. ICON assumes no responsibility for personal injury or property damage sustained by or through the use - Reebok Super Ramp Rl 7.0 Elliptical | English Manual - Page 4
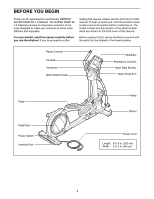
YOU BEGIN Thank you for selecting the revolutionary REEBOK® SUPER RAMP RL 7.0 elliptical. The SUPER RAMP RL 7.0 elliptical provides an impressive selection of features designed to make your workouts at home more effective and enjoyable. reading this manual, please see the front cover of this - Reebok Super Ramp Rl 7.0 Elliptical | English Manual - Page 5
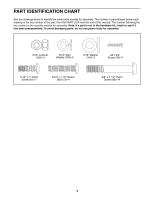
assembly. The number in parentheses below each drawing is the key number of the part, from the PART LIST near the end of this manual. The number following the key number is the quantity needed for assembly. Note: If a part is not in the hardware kit, check to see if it has been preassembled - Reebok Super Ramp Rl 7.0 Elliptical | English Manual - Page 6
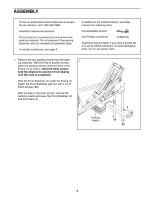
ASSEMBLY To hire an authorized service technician to assemble the elliptical, call 1-800-445-2480. Assembly requires two persons. Place all parts in a cleared area and remove the packing materials. Do not dispose of the packing materials until you complete all assembly steps. To identify small - Reebok Super Ramp Rl 7.0 Elliptical | English Manual - Page 7
2. With the help of another person, place the packing inserts under the rear of the Frame (1) as shown. Have the other person hold the elliptical to prevent it from tipping until this step is completed. Next, hold the Rear Stabilizer (3) under the Frame (1). Attach the Rear Stabilizer with four 3/8" - Reebok Super Ramp Rl 7.0 Elliptical | English Manual - Page 8
(12) with a 5/16" x 1" Patch Screw (81), an Upper Body Axle Cover (94), and a 5/16" Washer (104). Repeat this step on the other side of the elliptical. Grease 53 Wire Tie 104 94 81 12 5. Identify the Right Pedal Plate (107), which is attached to the Right Pedal (62). The Right 5 Pedal - Reebok Super Ramp Rl 7.0 Elliptical | English Manual - Page 9
right side of the Upright (6) and pull it upward out of the top of the Upright. Repeat this step on the other side of the elliptical. 9 12 71 71 Post 10 8 31 30 132 Wire Tie Pull 12 132 31 6 132 12 - Reebok Super Ramp Rl 7.0 Elliptical | English Manual - Page 10
8. Tip: Avoid pinching the wire. Attach the Right Upper Body Arm (31) to the Right Upper Body 8 Leg (12) with two 5/16" x 1 1/2" Button Bolts (73) and two 5/16" Locknuts (106). Make sure that the Locknuts are in the hexagonal holes. Slide the Arm Cover (30) downward over the Right Upper Body - Reebok Super Ramp Rl 7.0 Elliptical | English Manual - Page 11
10. Untie and discard the wire tie attached to the wires. 10 While another person holds the Console (60) near the Upright (6), connect the wires on the Console to the Wire Harness (54), the Pulse Wire (131), and the Grip Wires (132). Insert the excess wire downward into the Upright (6). 60 132 - Reebok Super Ramp Rl 7.0 Elliptical | English Manual - Page 12
). The Ramp (4) will then move downward to the lowest incline level. Attach the Upright (6) to the Frame (1) with four 5/16" x 1" Patch Screws (81) and four 5/16" Split Washers (105). 12 37 81 105 133 6 4 1 105 81 13. Make sure that all parts are properly tightened before you use the elliptical - Reebok Super Ramp Rl 7.0 Elliptical | English Manual - Page 13
. Pull on the upright and have a second person lift the handle on the rear of the frame until the elliptical will roll on the wheels. Carefully move the elliptical to the desired location, and then lower it to the floor. Pull on the upright DANGER: Improper connection of the equipment-grounding - Reebok Super Ramp Rl 7.0 Elliptical | English Manual - Page 14
can turn the pedal discs in the opposite direction. To dismount the elliptical, wait until the pedals come to a complete stop. Note: The elliptical does not have a freewheel; the pedals will continue to move until the flywheel stops. When the pedals are stationary, step off the higher pedal first - Reebok Super Ramp Rl 7.0 Elliptical | English Manual - Page 15
control the resistance of the pedals while the voice of a personal trainer coaches you through your workouts. iFit cards are available separately. To purchase iFit cards, go to www.iFit.com or see the front cover of this manual. iFit cards are also available at select stores. The console also - Reebok Super Ramp Rl 7.0 Elliptical | English Manual - Page 16
THE POWER IMPORTANT: If the elliptical has been exposed to cold temperatures workout, reselect the manual mode by pressing any of the Workouts buttons repeatedly until the word MANUAL appears in the lower left corner of the display. 3. Change the resistance of the pedals and the incline of the ramp - Reebok Super Ramp Rl 7.0 Elliptical | English Manual - Page 17
Profile—-When a workout is selected, this display will show a profile of the resistance settings for the workout. Change the Mode button for several seconds. Next, press the Quick Power Ramp decrease button to select the desired backlight option. Then, press elliptical may wear prematurely. 17 - Reebok Super Ramp Rl 7.0 Elliptical | English Manual - Page 18
in the center of the display for a few seconds. During the workout, the workout profile will show your progress (see the drawing above). The flashing segment for the current segment is too high or too low, you can manually override the setting by pressing the Quick Resistance buttons. IMPORTANT: When - Reebok Super Ramp Rl 7.0 Elliptical | English Manual - Page 19
in the center of the display for a few seconds. During the workout, the workout profile will show your progress (see the drawing above). The flashing segment for the current segment is too high or too low, you can manually override the setting by pressing the Quick Resistance buttons. IMPORTANT: When - Reebok Super Ramp Rl 7.0 Elliptical | English Manual - Page 20
Resistance buttons. To program a target rpm for the first segment, simply pedal at the desired pace. At the end of the first segment, the workout will store the current resistance level and your current pace in memory. Program a resistance level and a target rpm for the second segment as described - Reebok Super Ramp Rl 7.0 Elliptical | English Manual - Page 21
. The resistance level and the target rpm for the first segment will appear in the center of the display for a few seconds. During the workout, the workout profile will show your progress (see the drawing at the left). The flashing segment of the profile represents the current segment of the - Reebok Super Ramp Rl 7.0 Elliptical | English Manual - Page 22
IFIT WORKOUT iFit cards are available separately. To purchase iFit cards, go to www.iFit.com or see the front cover of this manual. iFit workout, the voice of a personal trainer will begin guiding you through your workout. iFit workouts function in the same way as timed workouts. To use the workout - Reebok Super Ramp Rl 7.0 Elliptical | English Manual - Page 23
HOW TO USE THE SOUND SYSTEM This product has been designed specifically to work with iPod and has been certified by the developer to meet Apple performance standards. To use the compatible music port for iPod, plug one end of the iFit universal iPod connector into the music port on the console and - Reebok Super Ramp Rl 7.0 Elliptical | English Manual - Page 24
comply with the limits for a Class B digital device, pursuant to part 15 of the FCC Rules. These limits are designed to provide reasonable protection energy and, if not installed and used in accordance with the instructions, may cause harmful interference to radio communications. However, there is - Reebok Super Ramp Rl 7.0 Elliptical | English Manual - Page 25
the Magnet. Then, retighten the #8 x 1/2" Screw (91). Press the Calorie Workouts button once. The ramp calibration instructions will appear in the display. Press the Quick Ramp increase or decrease button to calibrate the ramp. The ramp will move upward and downward as it calibrates. 91 134 47 - Reebok Super Ramp Rl 7.0 Elliptical | English Manual - Page 26
drive belt, you must first remove the screws attaching the left shield (see the instructions below). Remove the indicated #8 x 3/4" Screws (78) from the Right and Left in the drawing below; however, it is not necessary to remove these parts. 78 78 128 78 118 57 39 38 When the Drive Belt (57 - Reebok Super Ramp Rl 7.0 Elliptical | English Manual - Page 27
key to achieving results. You can use your heart rate as a guide to find the proper intensity level. The chart below shows recommended heart exercise problems. EXERCISE FREQUENCY To maintain or improve your condition, complete three workouts each week, with at least one day of rest between workouts. - Reebok Super Ramp Rl 7.0 Elliptical | English Manual - Page 28
PART LIST Key No. Qty. 1 1 2 1 3 1 4 1 5 1 6 1 7 1 8 1 9 1 Cover Crank Spacer Crank Flywheel Right Lift Arm Lift Arm Roller Idler Ramp Axle Ramp Axle Bushing Lift 2 96 2 97 1 98 4 Description Foot Stabilizer Wheel Left Pivot Cover Right Pivot Cover Wire Harness Lift Motor - Reebok Super Ramp Rl 7.0 Elliptical | English Manual - Page 29
C-magnet Bracket Motor Bracket Resistance Arm Resistance Bracket Resistance Wheel M6 Locknut Drive Belt Adjustment Screw M5 x 7mm 1 137 2 138 1 * –- * –- M3.5 x 12mm Screw Flywheel Axle M8 Jam Nut Idler Bolt Motor Bracket Screw C-magnet Bracket Bolt Resistance Manual Assembly Tool Note - Reebok Super Ramp Rl 7.0 Elliptical | English Manual - Page 30
EXPLODED DRAWING A 72 60 78 78 131 65 5 78 44 78 30 7 73 81 94 104 46 106 30 16 97 71 67 89 93 77 63 11 89 108 108 88 46 56 100 68 92 70 66 9 80 70 110 79 78 52 61 16 130 6 129 78 16 53 63 18 71 132 62 95 109 68 66 80 110 79 32 59 70 66 107 8 80 110 70 92 68 100 4 78 78 - Reebok Super Ramp Rl 7.0 Elliptical | English Manual - Page 31
31 103 99 78 41 102 78 13 59 83 87 78 101 83 78 64 25 14 20 39 78 78 21 40 19 17 120 119 116 114 136 98 137 134 122 115 137 98 90 124 70 58 123128 113 91 127 47 118 48 91 26 37 3 42 36 81 55 23 69 84 92 55 105 81 126 111 35 86 16 126 112 33113187 35 1 - Reebok Super Ramp Rl 7.0 Elliptical | English Manual - Page 32
part(s) (see the PART LIST and the EXPLODED DRAWING near the end of this manual) LIMITED WARRANTY IMPORTANT: You must register this product within 30 days of the purchase date to avoid added fees for service transported outside the USA, if all instructions in this manual are not followed, if the
-
 1
1 -
 2
2 -
 3
3 -
 4
4 -
 5
5 -
 6
6 -
 7
7 -
8
-
9
-
10
-
11
-
12
-
13
-
14
-
15
-
16
-
17
-
18
-
19
-
20
-
21
-
22
-
23
-
24
-
25
-
26
-
27
-
28
-
29
-
30
-
31
-
32
 |
 |
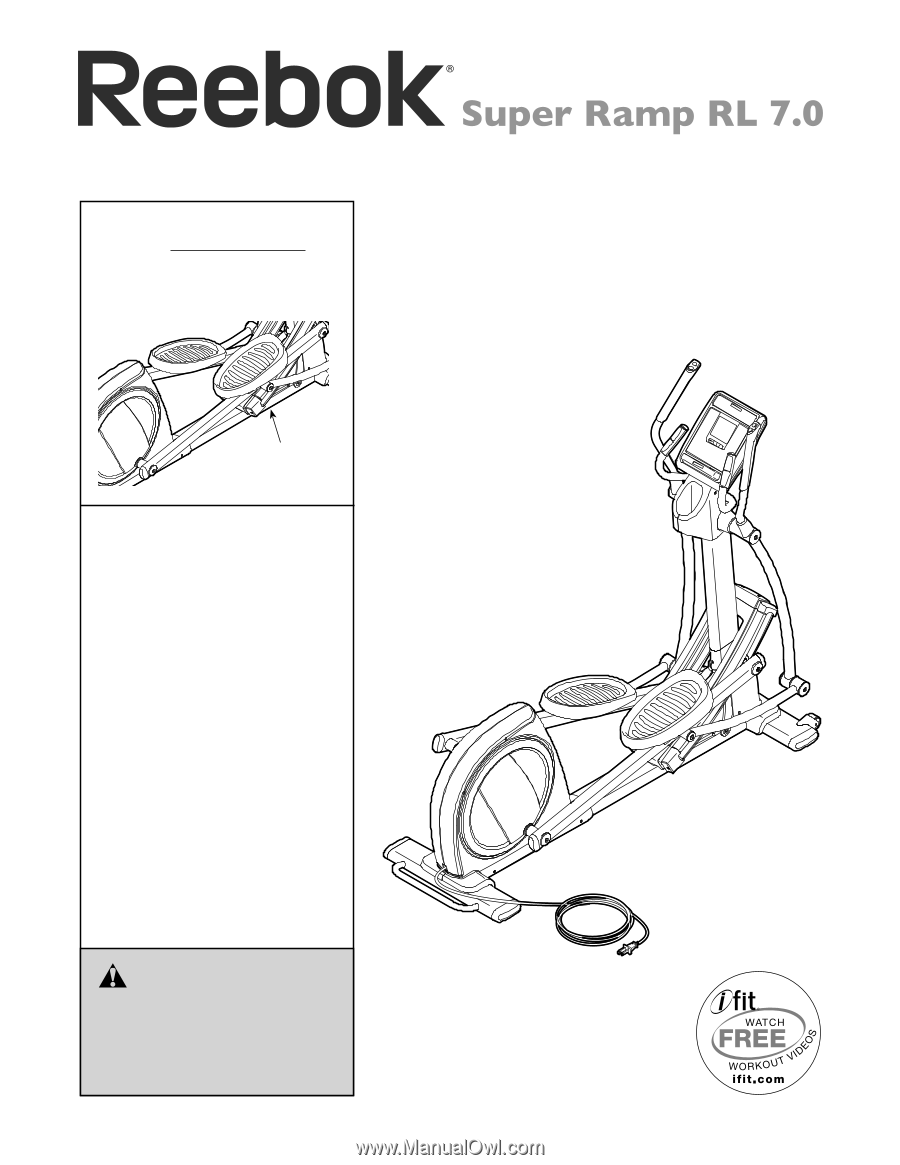
USER°S MANUAL
Serial Number
Decal
CAUTION
Read all precautions and instruc-
tions in this manual before using
this equipment. Keep this manual
for future reference.
Model No. RBEL78010.3
Serial No.
Write the serial number in the space
above for reference.
QUESTIONS?
If you have questions, or if parts
are damaged or missing,
DO NOT
CONTACT THE STORE; please
contact Customer Care.
IMPORTANT: Please register this
product (see the limited warranty
on the back cover of this manual)
before contacting Customer Care.
CALL TOLL-FREE:
1-877-994-4999
Mon.±Fri., 6 a.m.±6 p.m. MT
Sat. 8 a.m.±4 p.m. MT
ON THE WEB:
www.reebokservice.com
www.reebokfitness.com