Polk Audio DB522 User Guide - Page 10
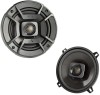
DB 5252, DB 6502
 |
View all Polk Audio DB522 manuals
Add to My Manuals
Save this manual to your list of manuals |
Page 10 highlights
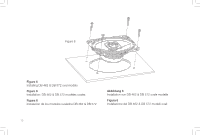
DB 5252, DB 6502 Figure 10 Figure 10 Flush mount tweeter mounting 1. Check for proper clearance: The flush mount kit is 1" (26mm) deep. 2. Mark the center of the spot and cut a 2" (50.8mm) diameter hole using a hole saw, drill bit or razor knife. 3. Assemble the cup, clamp and machine screw loosely as shown. 4. Route wires through the round opening in the bottom of the cup. 5. Press the assembly into the 2" (50.8mm) diameter hole until the clamp edge is below the mounting surface, then tighten the screw. The legs of the clamp can be bent outward by inserting a screwdriver through the holes in the cup while still mounted. 6. Connect wires from the tweeter terminals of the Crossover to the tweeter itself using the faston connectors. Connect the red wire from the (+) terminal of the Crossover tweeter output to the red (+) wire from the tweeter. 7. Mount the tweeter by snapping it into the mounting cup. 14
-
 1
1 -
2
-
3
-
4
-
 5
5 -
 6
6 -
 7
7 -
 8
8 -
 9
9 -
 10
10 -
 11
11 -
 12
12 -
 13
13 -
 14
14 -
 15
15 -
16
 |
 |
