Panasonic SC-UA3 Owners Manual - Page 13
Karaoke, Using a microphone, External equipment
 |
View all Panasonic SC-UA3 manuals
Add to My Manuals
Save this manual to your list of manuals |
Page 13 highlights
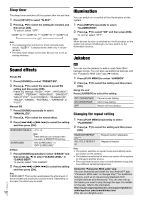
ENGLISH Karaoke Preparation Select the music source. Note: The Karaoke function is switched off when you switch off the system. Changing the Karaoke effect You can use the Karaoke effect function to add the sound effects. 1 Press [SOUND] repeatedly to select "KARAOKE EFFECT". 2 Press [R, T] to select the effect. VOCAL CANCEL ECHO KEY CONTROL Switch on or switch off the voice guide (depending on the source). Add echo effect to the sound. Change the key of a song. TEMPO BGM MIC EQ OFF Note: The setting is canceled when you switch to another source. CD USB Change the speed of a song. Change the background music level. Select a MIC EQ mode. Cancel the effect. To check the current setting, press [OK]. 3 Press [2/3] or [5/6] to select the setting and then press [OK]. Note: To use the Karaoke effect in D-IN or AUX source, set "D-IN MODE" or "AUX MODE" to "MODE 1". (Zpage 14) 1 Connect a microphone (not supplied) to the microphone jack. Plug type: Ø 6.3 mm monaural 2 Press [SOUND] repeatedly to select "MIC VOL". 3 Press [R, T] to adjust the volume of the microphone and then press [OK]. If you want to sing with the background music. 4 Play the music source and adjust the volume of the system. Note: • If a strange noise (howling) is emitted, move the microphone away from the speakers, or decrease the volume of the microphone. • When you do not use the microphone, disconnect it from the microphone jack, and decrease the volume of the microphone to its minimum. External equipment Preparation • Disconnect the AC mains lead. • Switch off all equipment and read the appropriate operating instructions. Note: • Components and cables are sold separately. • Sound distortion can occur when you use an adaptor. • If you want to connect equipment other than those described, refer to the audio dealer. Using the optical input You can connect a TV, VCR, DVD player etc., and listen to the audio through this system. TV (not supplied) Using a microphone Preparation Decrease the volume of the system to its minimum before you connect or disconnect a microphone. Rear panel of this unit Rear panel of this unit Optical digital audio cable (not supplied) Microphone (not supplied) 1 Connect the external equipment. 2 Press [RADIO/EXT-IN] repeatedly to select "D-IN". 3 Play the external equipment. Note: • This system can only detect linear PCM signals. • Sampling frequency: 32 kHz, 44.1 kHz, 48 kHz, TQBJ2015 up to 96 kHz. • The sound is muted if the signal format or frequency is not supported. • If there are sounds coming from the TV's speakers, decrease the volume of the TV to its minimum. 13 13
-
 1
1 -
2
-
3
-
4
-
5
-
6
-
7
-
 8
8 -
 9
9 -
 10
10 -
 11
11 -
 12
12 -
 13
13 -
 14
14 -
 15
15 -
 16
16 -
 17
17 -
 18
18 -
19
-
20
-
21
-
22
-
23
-
24
-
25
-
26
-
27
-
28
-
29
-
30
-
31
-
32
-
33
-
34
-
35
-
36
-
37
-
38
-
39
-
40
-
41
-
42
-
43
-
44
-
45
-
46
-
47
-
48
-
49
-
50
-
51
-
52
-
53
-
54
-
55
-
56
-
57
-
58
-
59
-
60
-
61
-
62
-
63
-
64
-
65
-
66
-
67
-
68
 |
 |
