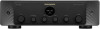
Marantz MODEL 40n Owners Manual
Marantz MODEL 40n Manual
 |
View all Marantz MODEL 40n manuals
Add to My Manuals
Save this manual to your list of manuals |
Marantz MODEL 40n manual content summary:
- Marantz MODEL 40n | Owners Manual - Page 1
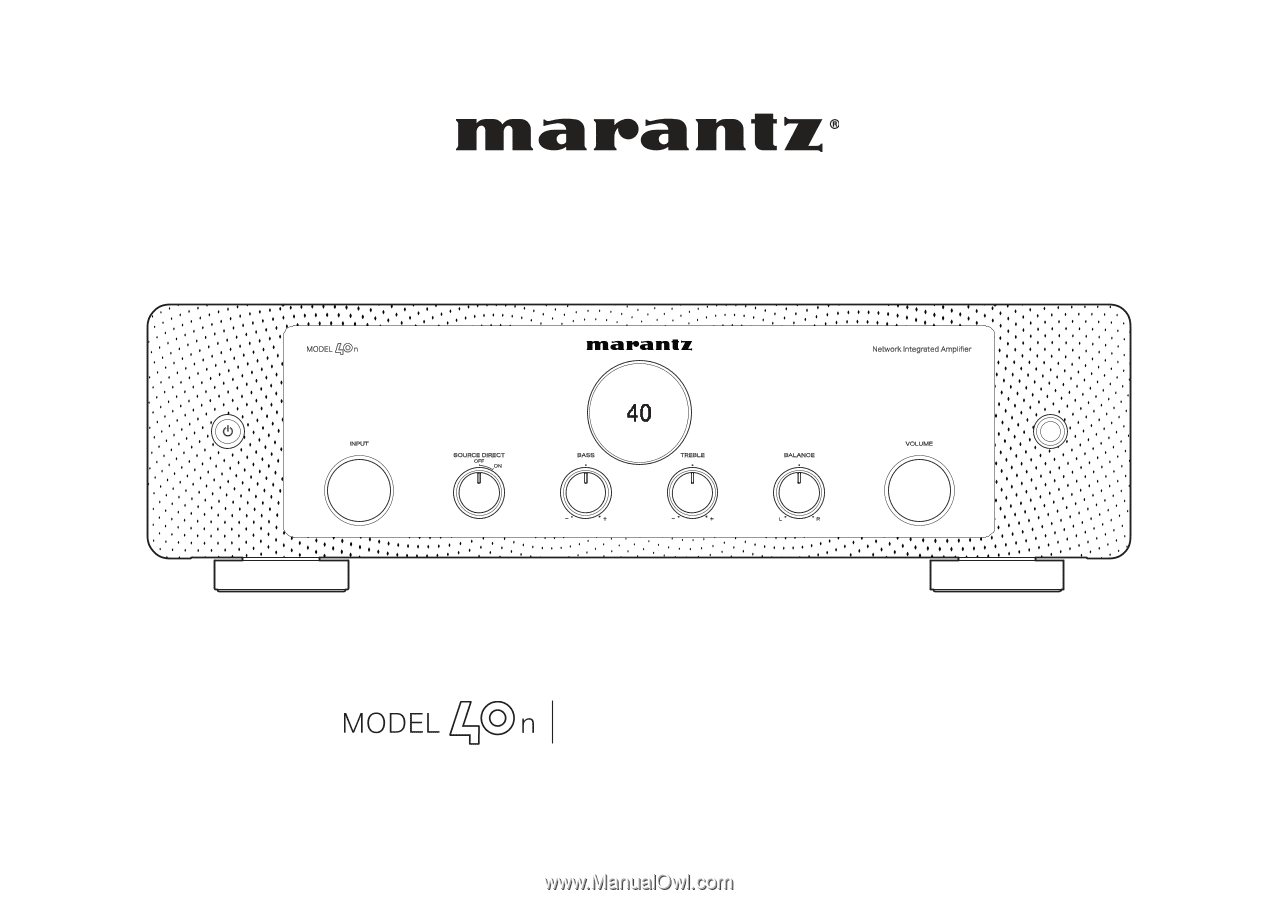
Network Integrated Amplifier OWNER'S MANUAL - Marantz MODEL 40n | Owners Manual - Page 2
Connecting a USB flash drive to the USB port 27 Connecting to a home network (LAN) 28 Wired LAN 28 Wireless LAN 29 Connecting a pre-amplifier 30 Connecting devices with remote control connectors 31 Performing operations by RC on this unit without visual contact 31 Remotely connecting - Marantz MODEL 40n | Owners Manual - Page 3
the tone and balance 60 Playing digital input 40 Playback in source direct mode 60 Getting the HEOS App 42 Switching the display's brightness App 44 Using this unit as a power amplifier 62 HEOS Account 45 Playing from streaming music services 46 Listening to the same music in multiple - Marantz MODEL 40n | Owners Manual - Page 4
Tips 76 Menu operation 65 Troubleshooting 78 Audio 66 Power does back (Music server) 90 Auto-Standby 69 Various online services cannot be played 91 Reset 70 Cannot connect to a USB-A 71 Coaxial/Optical) 93 Wi-Fi 71 The input source switches to "HDMI ARC", "Optical" or "Coaxial" - Marantz MODEL 40n | Owners Manual - Page 5
Contents Connections Appendix Playing back a USB flash drives D/A converter Playing back a Bluetooth device Playing back files stored on a PC and NAS Playing back Internet Radio Last function memory About HDMI Explanation of terms Trademark information Specifications Index Playback Settings 96 - Marantz MODEL 40n | Owners Manual - Page 6
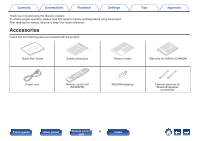
carefully before using the product. After reading this manual, be sure to keep it for future reference. Accessories Check that the following parts are supplied with the product. Tips Appendix Quick Start Guide Safety Instructions Notes on radio Warranty (for USA/for CANADA) Power cord Remote - Marantz MODEL 40n | Owners Manual - Page 7
Contents Connections Playback Inserting the batteries 1 Remove the rear lid in the direction of the arrow and remove it. 2 Insert two batteries correctly into the battery compartment as indicated. Batteries Settings Tips Appendix NOTE 0 To prevent damage or - Marantz MODEL 40n | Owners Manual - Page 8
Contents Connections Playback Settings Tips Appendix Part names and functions Front panel q w er t wy u i o Q0 Q1 Q2 For details, see the next page. Front panel Rear panel Remote control 8 unit Index - Marantz MODEL 40n | Owners Manual - Page 9
Contents qw Connections er t Playback wy A Power operation button (X) This turns the power on/off (standby). (v p. 34) B Lighting LED This illuminates when the power is turned on. Brightness can be changed and lighting turned off. (v p. 69) C Display This displays various pieces of information. - Marantz MODEL 40n | Owners Manual - Page 10
Contents Connections Playback u i o Q0 Q1 Q2 G INPUT selector knob This switches input sources. (v p. 35) H SOURCE DIRECT switching knob This turns source direct mode on/off. (v p. 60) Settings Tips Appendix I BASS control knob This setting adjusts the volume level for the bass. (v p. 60) J - Marantz MODEL 40n | Owners Manual - Page 11
Contents Connections Rear panel q w e rt y Playback Settings u Bluetooth / Wi-Fi ANTENNA 5V/1A NETWORK PHONO COAXIAL OPTICAL HDMI ARC DIGITAL AUDIO IN SIGNAL GND AUDIO IN CD LINE RECORDER RECORDER SUBWOOFER IN AUDIO IN OUT AUDIO OUT PRE OUT POWER AMP IN REMOTE CONTROL i o Q0 Q1 - Marantz MODEL 40n | Owners Manual - Page 12
Contents Connections q w ert y u Bluetooth / Wi-Fi ANTENNA 5V/1A NETWORK PHONO COAXIAL OPTICAL HDMI ARC DIGITAL AUDIO IN SIGNAL GND AUDIO IN CD LINE RECORDER RECORDER SUBWOOFER IN AUDIO IN OUT AUDIO OUT PRE OUT POWER AMP IN REMOTE CONTROL SPEAKERS Playback q AC IN Bluetooth / Wi - Marantz MODEL 40n | Owners Manual - Page 13
a subwoofer with a built-in amplifier. (v p. 21) Settings Tips Appendix K Power amplifier connectors (POWER AMP IN) Used to connect a pre-amplifier when this unit is used as a power amplifier. (v p. 30) L REMOTE CONTROL connectors Used to connect to a Marantz audio device that is compatible with - Marantz MODEL 40n | Owners Manual - Page 14
Settings Tips Appendix The remote control provided with this unit can control a Marantz CD player. 0 "CD player operations" (v p. 17) o Operating this stop during playback. 0 Depending on the input source and online service, the operation cannot be performed. Front panel Rear panel Remote control - Marantz MODEL 40n | Owners Manual - Page 15
Playback o Q0 r t Q1 y u i Settings Tips Appendix D CONNECT button Used for Wi-Fi setup. (v p. 74) E Input source select button (INPUT) This switches input sources. (v p. 35) F ENTER button This determines the selection. G Cursor buttons These select items. H BACK button Returns to the - Marantz MODEL 40n | Owners Manual - Page 16
Q4 Settings Tips L OPTION button This displays the option menu on the display. Appendix 0 An option menu is not displayed for some input sources. M MUTE button (:) This mutes the output audio. (v p. 35) N SETUP button The setting menu is displayed on the display. (v p. 65) O SLEEP button This - Marantz MODEL 40n | Owners Manual - Page 17
CD player operations A Marantz CD player can be operated. To operate CD player, press REMOTE MODE CD button to switch the remote control to the CD player operation mode. A Power operation button (CD X) B Remote mode select button (REMOTE MODE CD) C System buttons D Input source select button (INPUT - Marantz MODEL 40n | Owners Manual - Page 18
Contents Connections Playback Settings Tips L OPTION (MODE) button M SETUP button N CLEAR button O DIMMER button Appendix 0 The remote control may not operate some products. Q2 Q3 Q4 Q5 Front panel Rear panel Remote control 18 unit Index - Marantz MODEL 40n | Owners Manual - Page 19
device Connecting to a device with digital audio connectors Connecting a USB flash drive to the USB port Connecting to a home network (LAN) Connecting a pre-amplifier Connecting devices with remote control connectors Connecting the power cord Playback 20 23 24 25 27 28 30 31 32 NOTE 0 Do not plug - Marantz MODEL 40n | Owners Manual - Page 20
Contents Connections Connecting speakers Playback NOTE 0 Disconnect this unit's power plug from the power outlet before connecting the speakers. Also, turn off the subwoofer. 0 Connect so that the speaker cable core wires do not protrude from the speaker terminal. The protection circuit may be - Marantz MODEL 40n | Owners Manual - Page 21
Contents Connections Playback 4 Turn the speaker terminal clockwise to tighten it. Spade lug connector Settings Tips Appendix Connecting the subwoofer Use a subwoofer cable to connect the subwoofer. RECORDER SUBWOOFER AUDIO OUT PRE OUT POWER AMP IN When using a banana plug Tighten the - Marantz MODEL 40n | Owners Manual - Page 22
Contents Connections Connecting speakers SPEAKERS Playback Settings Tips Appendix wq wq (R) (L) Front panel Rear panel Remote control 22 unit Index - Marantz MODEL 40n | Owners Manual - Page 23
low output moving coil (MC) cartridge, use a commercially available MC head amp or a step-up transformer. If you set this unit's input source to "PHONO" and accidentally increase the volume without connecting a turntable, you may hear a humming noise from the speakers. Turntable Tuner AUDIO OUT RL - Marantz MODEL 40n | Owners Manual - Page 24
Contents Connections Playback Connecting a recording device Recording device AUDIO OUT AUDIO IN RL RL RL RL RL RL Settings Tips Appendix Bluetooth / Wi-Fi ANTENNA 5V/1A NETWORK PHONO COAXIAL OPTICAL HDMI ARC DIGITAL AUDIO IN SIGNAL GND AUDIO IN CD LINE RECORDER RECORDER - Marantz MODEL 40n | Owners Manual - Page 25
Contents Connections Playback Settings Tips Appendix Connecting to a device with digital audio connectors Use this connection to input digital audio signals to this unit, and convert the signals for playback using the D/A converter of this unit. (v p. 40) TV HDMI IN (ARC) Satellite receiver - Marantz MODEL 40n | Owners Manual - Page 26
turn off the audio output of the TV's internal speakers. See the owner's manual of your TV for details. 0 When connecting the HDMI ARC terminal of the HDMI input terminal of your TV that supports the ARC function. 0 When connecting to a TV that does not support the ARC function or a TV that does - Marantz MODEL 40n | Owners Manual - Page 27
Connecting a USB flash drive to the USB port For operating instructions see "Playing music from a USB flash drive" (v p. OUT POWER AMP IN REMOTE CONTROL SPEAKERS AC IN Bluetooth / Wi-Fi ANTENNA 0 Marantz does not guarantee that all USB flash drives will operate or receive power. When using - Marantz MODEL 40n | Owners Manual - Page 28
to this unit as shown in the figure below. NAS (Network Attached PC Storage) Internet Modem For connections to the Internet, contact an ISP (Internet Service Provider) or a computer shop. 0 When is displayed on the display of this unit, this unit is not connected to a network. Router To WAN - Marantz MODEL 40n | Owners Manual - Page 29
is required if your contracted line is not set using PPPoE. 0 Do not connect a NETWORK connector directly to the LAN port/ Ethernet connector on your computer. 0 Various online services may be discontinued without prior notice. Bluetooth / Wi-Fi ANTENNA 5V/1A NETWORK PHONO COAXIAL OPTICAL HDMI - Marantz MODEL 40n | Owners Manual - Page 30
RECORDER SUBWOOFER IN AUDIO IN OUT AUDIO OUT PRE OUT POWER AMP IN REMOTE CONTROL SPEAKERS Tips 0 When connecting a pre-amplifier and using this unit as a power amplifier, switch the input source to "PWR AMP". (v p. 62) Appendix Front panel Rear panel Remote control 30 unit Index - Marantz MODEL 40n | Owners Manual - Page 31
contact. This might be necessary if the unit is hidden in a cupboard or corner, so you can't directly point with the remote control unit to the device. Infrared retransmitter Infrared sensor Remotely connecting Marantz audio devices You can transmit remote control signals simply by connecting - Marantz MODEL 40n | Owners Manual - Page 32
Contents Connections Playback Settings Connecting the power cord After completing all the connections, insert the power plug into the power outlet. Tips Appendix SPEAKERS AC IN Bluetooth / Wi-Fi ANTENNA To household power outlet (AC 120 V, 60 Hz) Power cord (supplied) Front panel Rear - Marantz MODEL 40n | Owners Manual - Page 33
the input source 35 Adjusting the volume 35 Turning off the sound temporarily (Muting) 35 Playback network audio/service Getting the balance Playback in source direct mode Switching the display's brightness Using the sleep timer Recording Using this unit as a power amplifier Appendix 36 - Marantz MODEL 40n | Owners Manual - Page 34
Contents Connections Basic operation Playback Input source select buttons AMP X INPUT VOLUME Settings Tips Appendix Turning the power on 1 Press AMP X to turn on. 0 You can also press X on the main unit - Marantz MODEL 40n | Owners Manual - Page 35
the HEOS App. (v p. 42) 0 If you playback from the HEOS App when the power of this device is on, it automatically switches to the input source that is playing. 0 You can also adjust the volume by turning VOLUME on the main unit. Turning off the sound temporarily (Muting) 1 Press :. "Mute" is - Marantz MODEL 40n | Owners Manual - Page 36
connection, then turn on this units. ("Connecting a playback device" (v p. 23)) 2 Press AMP X to turn the power on. 3 Press the input source select button (CD) to switch the input source to "CD". "CD" is displayed on the display. 4 Playback the CD. 5 Use VOLUME no to adjust the volume. Front panel - Marantz MODEL 40n | Owners Manual - Page 37
. Communication is possible up to a range of about 98.4 ft/30 m. Bluetooth NOTE 0 To play back music from a Bluetooth device, the Bluetooth device needs to support the A2DP profile. Front panel Rear panel Remote control 37 unit Index - Marantz MODEL 40n | Owners Manual - Page 38
Contents Connections Playback Settings Tips Appendix Listening to music on a Bluetooth device In order to enjoy music from a Bluetooth device on this unit, the Bluetooth device must first be paired with this unit. Once the Bluetooth device has been paired, it does not need to be paired again. - Marantz MODEL 40n | Owners Manual - Page 39
with the remote control of this unit, the Bluetooth device needs to support the AVRCP profile. 0 The remote control of this unit is not unit and the Bluetooth function of this unit are turned on, the input source will be automatically switched to "Bluetooth" if a Bluetooth device is connected and - Marantz MODEL 40n | Owners Manual - Page 40
connectors" (v p. 25)) 2 Press HDMI ARC, COAXIAL or OPTICAL to switch the input source to "HDMI ARC", "COAXIAL" or "OPTICAL". 3 Play the component connected to this unit when audio signals that are not supported by this unit are input. Front panel Rear panel Remote control 40 unit Index - Marantz MODEL 40n | Owners Manual - Page 41
p. 97). o HDMI control function Connect this unit to a TV that supports the HDMI control function with an HDMI cable and enable the HDMI control setting on the TV to perform basic operations on this unit (changing the input source, turning the power on and off, adjusting the volume) with the remote - Marantz MODEL 40n | Owners Manual - Page 42
Contents Connections Playback Settings Tips Appendix Getting the HEOS App You can use many online music streaming services from the HEOS App. Depending upon your geographical location, there are several options to choose from. Download the HEOS App for iOS or Android by - Marantz MODEL 40n | Owners Manual - Page 43
to join your network. 2 Launch the HEOS App on your mobile device. 3 Tap the "Setup Now" button at the top of the screen. 4 Follow the instructions to add this unit to your wireless network and to select an input on this unit. Front panel Rear panel Remote control 43 unit Index - Marantz MODEL 40n | Owners Manual - Page 44
can add additional wireless HEOS built-in devices to your HEOS system by selecting "Add Device" from the HEOS App's settings menu and follow the instructions: 1 Music 2 Add Device Settings Front panel Rear panel Remote control 44 unit Index - Marantz MODEL 40n | Owners Manual - Page 45
to signup for a HEOS Account the first time you try to access any music service from the main "Music" menu of the HEOS App. Follow the instructions in the HEOS App to complete the operation. Settings Tips Appendix o Changing your HEOS Account 1 Tap the "Music" tab. 2 Select the Settings - Marantz MODEL 40n | Owners Manual - Page 46
may be added or discontinued from time to time based on decisions of the music service providers or others. o Selecting a room/device 1 Tap the "Rooms" tab. Select "Marantz MODEL 40n" if there are multiple HEOS devices. 0 Tap the Pencil icon displayed name. at the top right to switch edit mode - Marantz MODEL 40n | Owners Manual - Page 47
Contents Connections Playback o Selecting the music track or station from music sources 1 Tap the "Music" tab and select a music source. 0 All music services displayed may not be available in your location. Settings Tips Music Appendix Rooms Music Now Playing Front panel Rear panel - Marantz MODEL 40n | Owners Manual - Page 48
Contents Connections Playback 2 Browse the music to play. After selecting a music track or radio station the app will automatically change to the "Now Playing" screen. 0 When you select a music track to play you will be asked how you want to queue up your music. Play Now: Play Now & Replace - Marantz MODEL 40n | Owners Manual - Page 49
Contents Connections Playback Settings Tips Listening to the same music in multiple Rooms rooms Drag one room into another to group them Dining Song Name 1 The HEOS system is a true multi-room audio system that automatically synchronizes audio playback between multiple HEOS devices so - Marantz MODEL 40n | Owners Manual - Page 50
Contents Connections Playback o Ungrouping rooms 1 Press and hold your finger on room that you want to remove from the group. 2 Drag it out of the group and lift your finger. NOTE 0 You can not remove the first room that started playing the music before grouping. Settings Tips 1 Rooms Drag - Marantz MODEL 40n | Owners Manual - Page 51
Contents Connections Playback o Grouping all rooms (party mode) You can easily group 16 rooms together into Party Mode by using a "pinch" gesture. 1 Place two fingers on the screen over the list of rooms. 2 Quickly pinch your two fingers together and release. 3 All of your rooms will be joined - Marantz MODEL 40n | Owners Manual - Page 52
Contents Connections Playback o Ungrouping all rooms You can easily ungroup all of your rooms and exit Party Mode by using a "spread" gesture. 1 Place two fingers close together on the screen over list of rooms. 2 Quickly spread your two fingers apart from each other and release. 3 All of your - Marantz MODEL 40n | Owners Manual - Page 53
popular categories and select a station that appeals to your mood. 0 If you have a TuneIn account, you can sign into the TuneIn service under "Settings" - "Music Sources" - "TuneIn", and access all of your "My Favorites" TuneIn stations. 0 For the types and specifications of audio formats that can - Marantz MODEL 40n | Owners Manual - Page 54
Contents Connections Playback Playing back files stored on a PC or NAS Perform this operation on the HEOS App. Download the HEOS App in advance to your iOS or Android device. (v p. 42) 1 Select "Music Servers" from the "Music" tab. 2 Select the name of your networked PC or NAS (Network Attached - Marantz MODEL 40n | Owners Manual - Page 55
audio formats that can be played back on this unit,see "Playing back a USB flash drives" (v p. 96). NOTE 0 Note that Marantz will accept no responsibility whatsoever for any problems arising with the data on a USB memory device when using this unit in conjunction with the USB memory device. 0 When - Marantz MODEL 40n | Owners Manual - Page 56
playback is started. 0 You can stop AirPlay playback by choosing other input source. 0 For information about how to use iTunes, also see the Help level. This device supports AirPlay 2. Sync multiple AirPlay 2 compatible devices/speakers for simultaneous playback. 0 This unit supports AirPlay 2 and - Marantz MODEL 40n | Owners Manual - Page 57
or later, you can stream music stored in your "iPhone/iPod touch/iPad" directly to this unit. 1 Connect your iPhone, iPod touch or iPad Wi-Fi to the same network as this unit. 0 For details, see your device's manual. 2 Play the song on your iPhone, iPod touch or iPad. AirPlay icon is - Marantz MODEL 40n | Owners Manual - Page 58
iPad operating iOS 11.4 or later can be synced with multiple AirPlay 2 supported devices for simultaneous playback. 1 Play the song on your iPhone, iPod circle is displayed to the right of AirPlay 2 compatible devices. iPhone Marantz xxxxxxxx Speakers 3 Tap the devices/speakers you want to use. 0 - Marantz MODEL 40n | Owners Manual - Page 59
Contents Connections Playback Settings Tips Appendix Spotify Connect function Spotify is all the music you'll ever need. Millions of songs available instantly. Just search for the music you love, or let Spotify play you something great. Spotify works on your phone, tablet, computer and home - Marantz MODEL 40n | Owners Manual - Page 60
Contents Connections Convenience functions Playback AMP X Settings Tips Appendix Adjusting the tone and balance 1 Turn the SOURCE DIRECT knob of the main body and set it to "SOURCE DIRECT OFF". 2 Turn the BASS, TREBLE and BALANCE on the main unit to adjust the tone and balance. Playback in - Marantz MODEL 40n | Owners Manual - Page 61
Tips Appendix Switching the display's brightness The display brightness can be adjusted between four levels. Switching the display off reduces a source of noise that affects sound quality, enabling higher sound quality playback. 1 Press DIMMER. 0 The brightness of the display switches each - Marantz MODEL 40n | Owners Manual - Page 62
display. 3 Recording starts. 0 For information on operations, see the owner's manual of the recording device. Using this unit as a power amplifier When connecting a pre-amplifier and using this unit as a power amplifier, switch the input source of this unit to "PWR AMP". 1 Turn the INPUT selector - Marantz MODEL 40n | Owners Manual - Page 63
according to your speakers and subwoofer. TV TV Input Set the input source to be used when playing audio from the TV through this unit. Auto setting of the "Auto-Play" function that automatically switches the input source when the audio signal specified in "TV Input" is input and playback - Marantz MODEL 40n | Owners Manual - Page 64
the sound quality. The Wi-Fi function can be stopped to prevent noise that affects the sound quality. Stopping Bluetooth function reduces a source of noise that affects sound quality, enabling higher sound quality playback. Performs the On/Off settings for the network function when in standby - Marantz MODEL 40n | Owners Manual - Page 65
Contents Connections Playback BACK Cursor Up/Down ENTER SETUP Settings Tips Appendix Menu operation 1 Press SETUP. The menu is displayed on the display. 2 Use Cursor Up/Down buttons to select the menu to be set or operated, then press ENTER. 3 Use Cursor Up/Down buttons to change to desired - Marantz MODEL 40n | Owners Manual - Page 66
allows users to enjoy the desired playback sound quality. The unit supports PCM signal. Filter 1 (Default): Filter 2: Offers a short amount of audio information clearly reproduces deep stereo imaging and the relative position of the sound source. This characteristic is known as asymmetrical - Marantz MODEL 40n | Owners Manual - Page 67
Contents Connections Playback Volume Limit Make a setting for maximum volume. The volume cannot be increased above this setting. Off (Default): Do not set a maximum volume. (100) 95 / 90 / 85 / 80 Settings Tips Appendix Low Pass Filter Sets the low pass filter for the subwoofer output. - Marantz MODEL 40n | Owners Manual - Page 68
to standby. All (Default) : HDMI ARC: Off: Regardless of the input source of this device, if the power of the TV is turned off, the power of this device automatically becomes standby. If the input source is HDMI ARC and you power off the TV, the power of this device - Marantz MODEL 40n | Owners Manual - Page 69
be adjusted between 4 levels. The brightness can also be synchronized to the brightness of the display. Switching the display off reduces a source of noise that affects sound quality, enabling higher sound quality playback. Sync (Default): Bright / Dim / Dark / Off The brightness is synchronized - Marantz MODEL 40n | Owners Manual - Page 70
Contents Connections Playback Reset Perform this procedure if the display is abnormal or if operations cannot be performed. Restores the contents of each setting to the factory settings. Make settings again. Cancel: Unit is not initialized. OK: Unit is initialized. Settings Tips Appendix - Marantz MODEL 40n | Owners Manual - Page 71
sound quality. On (Default) : Off: Enables the Wi-Fi function. Disables the Wi-Fi function. Bluetooth Stopping Bluetooth function reduces a source of noise that affects sound quality, enabling higher sound quality playback. On (Default) : Enables the Bluetooth function. Off: Disables the - Marantz MODEL 40n | Owners Manual - Page 72
with the "Network Control" setting set to "On". NOTE 0 When "Network Control" is set to "On", the unit consumes more standby power. 0 When the input source is set to "PWR AMP" and this unit is switched to standby mode, the network function of this unit is disabled during standby even though - Marantz MODEL 40n | Owners Manual - Page 73
setup screen for iOS devices, select "Marantz MODEL 40n" from "SET UP NEW AIRPLAY SPEAKER...". 0 Make sure the iOS device is connected to the wireless LAN (WiFi) router. 4 Select a network to connect this device and press "Next". 5 Follow the on-screen instructions to complete the connection. When - Marantz MODEL 40n | Owners Manual - Page 74
Contents Connections Playback Connecting by using the WPS button on the router If you are using a wireless router that supports WPS (Wi-Fi Protected Setup™), connect to the network with the "push button method". (Wi-Fi Protected Setup™ is trademarks of Wi-Fi Alliance.) 1 Press - Marantz MODEL 40n | Owners Manual - Page 75
Marantz CD player with this unit's remote Various online services amplifier 77 Audio from digital devices cannot be played back (HDMI ARC/ I want to prevent this unit from going into standby by linking to the Coaxial/Optical) 93 power off operation of an HDMI connected TV 77 The input source - Marantz MODEL 40n | Owners Manual - Page 76
ARC terminal of this device and switch the input source to HDMI ARC. (v p. 25) 0 If you are using a TV that does not support the ARC function or a TV that does not is faithful to the original sound 0 Set the source direct mode on. (v p. 60) Front panel Rear panel Remote control 76 unit Index - Marantz MODEL 40n | Owners Manual - Page 77
remote control 0 Marantz CD players can be operated with this unit's remote control. Refer to the instruction manual of the CD player too. (v p. 17) I want to use this unit as a power amplifier 0 Connect a pre-amplifier to the POWER AMP IN connectors of this unit and switch the input source to "PWR - Marantz MODEL 40n | Owners Manual - Page 78
Contents Connections Playback Troubleshooting If a problem should arise, first check the following: 1. Are the connections correct? 2. Is the set being operated as described in the owner's manual? 3. Are the other devices operating properly? Settings Tips Appendix 0 If steps 1 to 3 above do - Marantz MODEL 40n | Owners Manual - Page 79
control. (v p. 34) 0 When the input source is set to "PWR AMP" and this unit When this unit and a Marantz audio device compatible with the problem is not solved by turning the power off and on again, this unit's amplifier circuit has failed. Unplug the power cord and contact our customer service - Marantz MODEL 40n | Owners Manual - Page 80
device, and then turn the power off and on again. 0 If the problem is not solved by turning the power off and on again, this unit's amplifier circuit or power circuit has failed. Unplug the power cord and contact our customer service center. Front panel Rear panel Remote control 80 unit Index - Marantz MODEL 40n | Owners Manual - Page 81
unit may not function due to effects of infrared communications between units (such as TV and glasses for 3D viewing). In this case, adjust the direction of units with the 3D communications function and their distance to ensure they do not affect operations from the remote control unit of this unit - Marantz MODEL 40n | Owners Manual - Page 82
with the metal part on speaker terminals. (v p. 20) 0 Securely tighten the speaker terminals. Check speaker terminals for looseness. (v p. 20) 0 Check that the proper input source is selected. (v p. 35) 0 Adjust the volume. (v p. 35) 0 Cancel the mute mode. (v p. 35) 0 Check that the correct input - Marantz MODEL 40n | Owners Manual - Page 83
power supply to devices that cause interference. - Change the settings of the router channel to which this unit is connected to. (See the instruction manual of the wireless router for details on how to change the channel.) - Switch to a wired LAN connection. 0 Particularly when you play back large - Marantz MODEL 40n | Owners Manual - Page 84
Contents Connections Playback Settings Tips Appendix Sound is interrupted or noise occurs. 0 The "Lock Range" setting in the menu is too narrow. Broaden the "Lock Range" setting while listening to music until the music sounds normal. (v p. 66) When playing a record, the sound is distorted. 0 - Marantz MODEL 40n | Owners Manual - Page 85
of the BASS, TREBLE and BALANCE knobs are not applied to the subwoofer output. 0 Press the SOURCE DIRECT button to turn off source direct mode. (v p. 60) The left and right of stereo sound is reversed. 0 Check whether the left and right speakers are connected to the correct speaker terminals - Marantz MODEL 40n | Owners Manual - Page 86
Contents Connections Playback Settings Tips Appendix AirPlay cannot be played back The AirPlay icon is not displayed on iTunes / iPhone / iPod touch / iPad. 0 This unit and PC / iPhone / iPod touch / iPad are not connected to the same network (LAN). Connect it to the same LAN as this unit. (v - Marantz MODEL 40n | Owners Manual - Page 87
0 Disconnect and reconnect the USB flash drive. (v p. 27) 0 Mass storage class compatible USB flash drives are supported. 0 This unit does not support a connection through a USB hub. Connect the USB flash drive directly to the USB port. 0 The USB flash drive must be formatted to FAT32 or NTFS. 0 Not - Marantz MODEL 40n | Owners Manual - Page 88
back Bluetooth devices cannot be connected to this unit. 0 The Bluetooth function in the Bluetooth device has not been enabled. See the Owner's Manual of the Bluetooth device to enable the Bluetooth function. 0 Bring the Bluetooth device near to this unit. 0 The Bluetooth device cannot connect with - Marantz MODEL 40n | Owners Manual - Page 89
. 0 The selected radio station is broadcasting in a format that is not supported by this unit. Formats that can be played back in this unit are WMA p. 53) 0 The selected radio station is not in service. Select a radio station in service. You cannot connect to a radio station that is registered - Marantz MODEL 40n | Owners Manual - Page 90
unit. Change the settings to allow this unit. For details, see the owner's manual of the server or NAS. Server is not found, or it is not App does not show the files in the computer or NAS. 0 Files of a type not supported by this unit are not displayed. (v p. 99) Music stored on a NAS cannot be - Marantz MODEL 40n | Owners Manual - Page 91
services cannot be played Various online services cannot be played. 0 The online service the HEOS App should recognize this unit and you can manually move it to your wireless network using "Settings" becomes disabled. When you switch to another input source from "PWR AMP", this device is restarted, - Marantz MODEL 40n | Owners Manual - Page 92
settings via a wireless connection, iOS 10.0.2 or later needs to be supported. Cannot connect to the network during standby. 0 Set "Network Control" the network function is suspended during standby. (v p. 72) 0 When the input source is set to "PWR AMP" and this unit is switched to standby mode, the - Marantz MODEL 40n | Owners Manual - Page 93
is displayed when audio signals that are not supported by this unit are input. Check the the TV settings. The input source switches to "HDMI ARC", "Optical" or "Coaxial" The input source automatically switches to "HDMI this case, operate the external device directly. 0 Check that the HDMI control - Marantz MODEL 40n | Owners Manual - Page 94
X on the main unit for more than 5 seconds, or remove and re-insert the power cord. The update restarts automatically. Please contact customer service in your area. This unit may be broken. Contact our Customer Service Center in your area. Front panel Rear panel Remote control 94 unit Index - Marantz MODEL 40n | Owners Manual - Page 95
takes time because it requires reconnecting to the network, restoring and updating the firmware. 0 If this operation does not improve the problem, contact our customer service center. NOTE 0 Do not turn off the power until the firmware restore is complete. Front panel Rear panel Remote control - Marantz MODEL 40n | Owners Manual - Page 96
album artwork exceeds 500 × 500 (WMA/MP3/Apple Lossless/DSD) or 349 × 349 (MPEG-4 AAC), then music may not be played back properly. o Specifications of supported files Sampling frequency Bit rate Extension WMAz1 32/44.1/48 kHz 48 - 192 kbps .wma MP3 32/44.1/48 kHz 32 - 320 kbps .mp3 WAV - Marantz MODEL 40n | Owners Manual - Page 97
number of files may differ according to the USB flash drive capacity and the file size. Settings Tips Appendix D/A converter o Specifications of supported audio formats n HDMI ARC/Coaxial/Optical Linear PCM (2-channel) Sampling frequency 32/44.1/48/88.2/96/ 176.4/192 kHz Bit length 16 - Marantz MODEL 40n | Owners Manual - Page 98
Contents Connections Playback Playing back a Bluetooth device This unit supports the following Bluetooth profile. 0 A2DP(Advanced Audio Distribution Profile): When a Bluetooth device that supports this standard is connected, monaural and stereo sound data can be streamed at a high quality. 0 - Marantz MODEL 40n | Owners Manual - Page 99
Server or jRiver Media Server, needs to be installed on your computer or NAS for full support. There are other server software available too. Please check supported formats. o Specifications of supported files Sampling frequency Bit rate Extension WMAz1 32/44.1/48 kHz 48 - 192 kbps .wma MP3 - Marantz MODEL 40n | Owners Manual - Page 100
Contents Connections Playback Playing back Internet Radio o Playable broadcast station specifications WMA MP3 MPEG-4 AAC Sampling frequency 32/44.1/48 kHz 32/44.1/48 kHz 32/44.1/48 kHz Bit rate 48 - 192 kbps 32 - 320 kbps 48 - 320 kbps Extension .wma .mp3 .aac/ .m4a Last function memory - Marantz MODEL 40n | Owners Manual - Page 101
Connections Playback Settings Tips Appendix About HDMI This unit supports the following HDMI functions. 0 ARC (Audio Return TV. 0 Some functions may not operate depending on the connected TV. 0 When the input source is "HDMI ARC", you can use the TV's remote control to adjust the volume of the - Marantz MODEL 40n | Owners Manual - Page 102
60 - 70 % can be decompressed to exactly the same original data. DSD (Direct-Stream Digital) One of the audio data recording methods, it is the signal aspect used that the following conditions are met: 0 Redistributions of source code must retain the above copyright notice, this list of - Marantz MODEL 40n | Owners Manual - Page 103
. IN NO EVENT SHALL THE FOUNDATION OR CONTRIBUTORS BE LIABLE FOR ANY DIRECT, INDIRECT, INCIDENTAL, SPECIAL, EXEMPLARY, OR CONSEQUENTIAL DAMAGES (INCLUDING, BUT NOT LIMITED TO, PROCUREMENT OF SUBSTITUTE GOODS OR SERVICES; LOSS OF USE, DATA, OR PROFITS; OR BUSINESS INTERRUPTION) HOWEVER CAUSED AND - Marantz MODEL 40n | Owners Manual - Page 104
WEP key must be set on both devices in order for communications to be established between them. Wi-Fi® Wi-Fi Certification assures tested and proven interoperability by the Wi-Fi Alliance, a group certifying interoperability among wireless LAN devices. WPA (Wi-Fi Protected Access) This is a security - Marantz MODEL 40n | Owners Manual - Page 105
the wireless LAN access point and client. Network Names (SSID: Service Set Identifier) When forming wireless LAN networks, groups are formed simplified network. Settings Tips Appendix o Other Source direct Playback with higher fidelity to the source becomes possible, as input audio signals are - Marantz MODEL 40n | Owners Manual - Page 106
-Fi CERTIFIED logo is a registered trademark of the Wi-Fi Alliance. Wi-Fi Certification provides assurance that the device has passed the interoperability test conducted by the Wi-Fi Alliance, a group that certifies interoperability among wireless LAN devices. The terms HDMI and HDMI High-Definition - Marantz MODEL 40n | Owners Manual - Page 107
Contents Connections Playback Settings Tips Specifications o Audio amplifier RMS Power output (20 Hz - 20 kHz simultaneous drive of both channels) : 70 W x 2 (8 Ω/ohms load) 100 W x 2 (4 Ω/ohms load) Total harmonic distortion (20 Hz - 20 kHz - Marantz MODEL 40n | Owners Manual - Page 108
Contents Connections Playback Settings Tips o Wireless LAN section Network type (wireless LAN standard): Security: Used frequency range: Conforming to IEEE 802.11a/b/g/n/ac (Wi-Fi® compliant) z1 WEP 64 bit, WEP 128 bit WPA/WPA2-PSK (AES) WPA/WPA2-PSK (TKIP) 2.4 GHz, 5 GHz z1 The Wi-Fi® - Marantz MODEL 40n | Owners Manual - Page 109
Appendix o Bluetooth section Communications system: Transmission power: Maximum communication range: Used frequency range: Modulation scheme: Supported profiles: Corresponding codec: Transmission range (A2DP): Bluetooth Specification Version 4.2 Bluetooth Specification Power Class 1 Approx. 98 - Marantz MODEL 40n | Owners Manual - Page 110
Contents Connections Playback Settings o General Operating temperature: Power supply: Power consumption: Power consumption in standby modes : Power consumption in "Network Control" - "On" mode: 41 °F - 95 °F (5 °C - 35 °C) AC 120 V, 60 Hz 220 W 0.3 W 2 W 0 For purposes of improvement, - Marantz MODEL 40n | Owners Manual - Page 111
Contents Connections o Dimensions (Unit : in. (mm)) Playback Settings Tips Appendix 1 3/8 (32) 2 1/8 (51) 10 1/2 (265) 15 1/8 (382) 17 1/8 (432) 2 5/8 (66) (18) 3/4 17 1/2 (443) 7 3/4 (194) 5 1/8 (130) (15) 4 5/8 (115) 5/8 2 1/2 (61) 12 3/4 (321) o Weight : 36 lbs 13 oz (16.7 kg - Marantz MODEL 40n | Owners Manual - Page 112
Index v A AirPlay 56 Auto Standby 69 v B Bluetooth device 37 v D Display's brightness 61 v F Front panel 8 v H HEOS Account 45 HEOS Favorites 48 v I Input source 35 Internet Radio 53 v M Menu map 63 v N NAS 54, 99 Network settings 71 v P Pairing 37 PC 28, 54, 99 v Q Queue 48 Front - Marantz MODEL 40n | Owners Manual - Page 113
14 v S Sleep timer 61 Spotify 59 v U USB flash drive 27, 54 v W Wi-Fi settings 71 Wired LAN 28, 71 Wireless LAN 29, 71 v T Tips 76 Troubleshooting 78 Tips Appendix Front panel Rear panel Remote control 113 unit Index - Marantz MODEL 40n | Owners Manual - Page 114
114 3520 10833 00AM ©2021 Sound United. All Rights Reserved.
-
 1
1 -
 2
2 -
 3
3 -
 4
4 -
 5
5 -
 6
6 -
 7
7 -
8
-
9
-
10
-
11
-
12
-
13
-
14
-
15
-
16
-
17
-
18
-
19
-
20
-
21
-
22
-
23
-
24
-
25
-
26
-
27
-
28
-
29
-
30
-
31
-
32
-
33
-
34
-
35
-
36
-
37
-
38
-
39
-
40
-
41
-
42
-
43
-
44
-
45
-
46
-
47
-
48
-
49
-
50
-
51
-
52
-
53
-
54
-
55
-
56
-
57
-
58
-
59
-
60
-
61
-
62
-
63
-
64
-
65
-
66
-
67
-
68
-
69
-
70
-
71
-
72
-
73
-
74
-
75
-
76
-
77
-
78
-
79
-
80
-
81
-
82
-
83
-
84
-
85
-
86
-
87
-
88
-
89
-
90
-
91
-
92
-
93
-
94
-
95
-
96
-
97
-
98
-
99
-
100
-
101
-
102
-
103
-
104
-
105
-
106
-
107
-
108
-
109
-
110
-
111
-
112
-
113
-
114
 |
 |
OWNER’S MANUAL
Network Integrated Amplifier