Lexmark B2236 Quick Reference - Page 4
Clearing jams
 |
View all Lexmark B2236 manuals
Add to My Manuals
Save this manual to your list of manuals |
Page 4 highlights
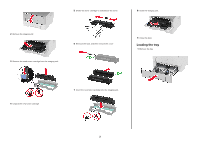
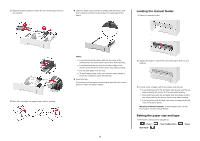
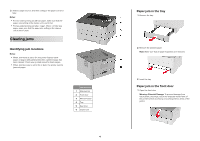
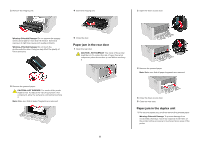
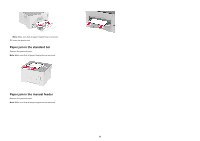
2 Select a paper source, and then configure the paper size and type. Notes: • For two-sided printing on A4‑size paper, make sure that the paper size setting in the duplex unit is set to A4. • For two-sided printing on letter‑, legal‑, Oficio‑, or folio‑size paper, make sure that the paper size setting in the duplex unit is set to Letter. Clearing jams Identifying jam locations Notes: • When Jam Assist is set to On, the printer flushes blank pages or pages with partial prints after a jammed page has been cleared. Check your printed output for blank pages. • When Jam Recovery is set to On or Auto, the printer reprints jammed pages. Jam locations 1 Standard bin 2 Front door 3 Manual feeder 4 Tray 5 Rear door 6 Duplex unit 4 Paper jam in the tray 1 Remove the tray. 2 Remove the jammed paper. Note: Make sure that all paper fragments are removed. 3 Insert the tray. Paper jam in the front door 1 Open the front door. Warning-Potential Damage: To prevent damage from electrostatic discharge, touch any exposed metal frame of the printer before accessing or touching interior areas of the printer.
-
 1
1 -
 2
2 -
 3
3 -
 4
4 -
 5
5 -
 6
6
 |
 |
