Hikvision DS-7204HQHI-K1 User Manual - Page 165
Status, Camera, Enable, Schedule, Upload Type, Enable Event Upload, Apply
 |
View all Hikvision DS-7204HQHI-K1 manuals
Add to My Manuals
Save this manual to your list of manuals |
Page 165 highlights
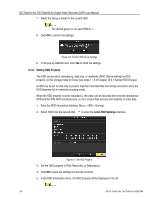
DS-72xxHUI-Kx, DS-72xxHQI-Kx Digital Video Recorder (DVR) User Manual 7. Enter the cloud storage interface again about 20s later. When the Status shows online, it indicates successful registration. 8. Configure the recording schedule. a) Go back to enter the record interface. b) Choose a camera from the Camera drop-down list. c) Check the Enable Schedule checkbox to enable the schedule recording. For detailed recording schedule information, refer to 5.2 Configuring Recording Schedule. Figure 215, Record Schedule 9. Upload the event triggered recording files to the cloud storage. a) Go back to enter the cloud storage interface. b) Select the camera you have set in the recording schedule interface. c) Select the upload type in the Upload Type text filed. d) Check the Enable Event Upload checkbox. e) Click Apply to finish the settings. UM DS-72xxHUI-Kx, DS-72xxHQI-Kx 062817NA 163
-
 1
1 -
2
-
3
-
4
-
5
-
6
-
7
-
8
-
9
-
10
-
11
-
12
-
13
-
14
-
15
-
16
-
17
-
18
-
19
-
20
-
21
-
22
-
23
-
24
-
25
-
26
-
27
-
28
-
29
-
30
-
31
-
32
-
33
-
34
-
35
-
36
-
37
-
38
-
39
-
40
-
41
-
42
-
43
-
44
-
45
-
46
-
47
-
48
-
49
-
50
-
51
-
52
-
53
-
54
-
55
-
56
-
57
-
58
-
59
-
60
-
61
-
62
-
63
-
64
-
65
-
66
-
67
-
68
-
69
-
70
-
71
-
72
-
73
-
74
-
75
-
76
-
77
-
78
-
79
-
80
-
81
-
82
-
83
-
84
-
85
-
86
-
87
-
88
-
89
-
90
-
91
-
92
-
93
-
94
-
95
-
96
-
97
-
98
-
99
-
100
-
101
-
102
-
103
-
104
-
105
-
106
-
107
-
108
-
109
-
110
-
111
-
112
-
113
-
114
-
115
-
116
-
117
-
118
-
119
-
120
-
121
-
122
-
123
-
124
-
125
-
126
-
127
-
128
-
129
-
130
-
131
-
132
-
133
-
134
-
135
-
136
-
137
-
138
-
139
-
140
-
141
-
142
-
143
-
144
-
145
-
146
-
147
-
148
-
149
-
150
-
151
-
152
-
153
-
154
-
155
-
156
-
157
-
158
-
159
-
 160
160 -
 161
161 -
 162
162 -
 163
163 -
 164
164 -
 165
165 -
 166
166 -
 167
167 -
 168
168 -
 169
169 -
 170
170 -
171
-
172
-
173
-
174
-
175
-
176
-
177
-
178
-
179
-
180
-
181
-
182
-
183
-
184
-
185
-
186
-
187
-
188
-
189
-
190
-
191
-
192
-
193
-
194
-
195
-
196
-
197
-
198
-
199
-
200
 |
 |
