HP D2D4009fc HP StoreOnce VSA Deployment and Configuration Guide (TC458-96014, - Page 26
Deployment using vSphere client, Introduction, Before you start, Deployment process
 |
View all HP D2D4009fc manuals
Add to My Manuals
Save this manual to your list of manuals |
Page 26 highlights
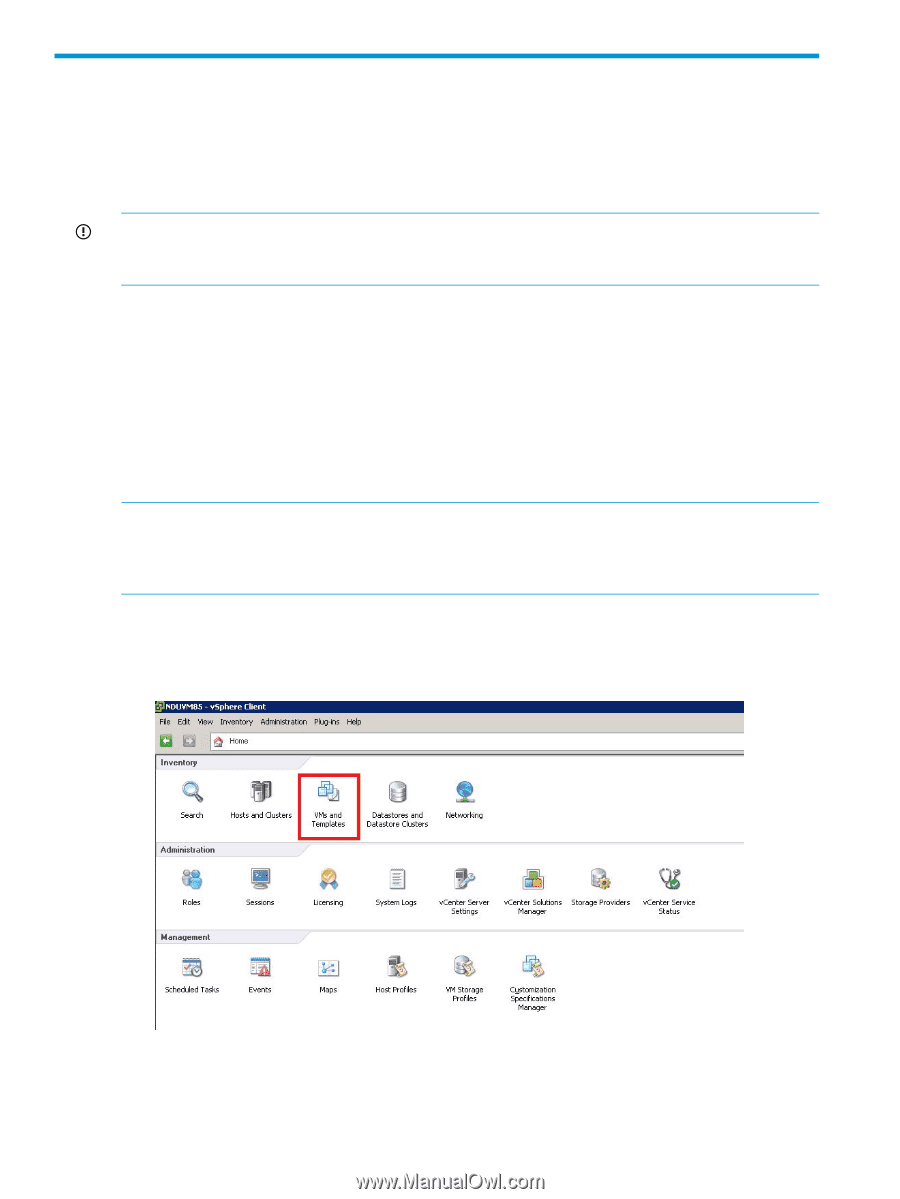
3 Deployment using vSphere client Introduction This deployment option is available for experienced VMware administrators who prefer to use vSphere client or for whom SEM is not available. This process is also supported on a vSphere web client. IMPORTANT: SEM is the recommended deployment option because it guides the user through the steps and incorporates a number of checks and processes that ensure an elegant deployment or clean failback should deployment fail. Before you start This deployment method requires you to ensure that all deployment pre-requisites have been met; there are no in-built checks within the deployment process, as there are with SEM. For more details, refer to StoreOnce VSA system requirements (page 5) and make sure you have downloaded the latest StoreOnceVSA OVF package to a network location where it can be accessed by the vSphere client. (For optimum performance, download the StoreOnce OVF package to the vSphere client.) Before starting the process make sure you that you have available a datastore with a minimum of 1 TB free space and that you know the name of the network interface on which the StoreOnce VSA is to be deployed. NOTE: vSphere client deployment always defaults to DHCP on both eth0 and eth1. If static IP addressing is required, or you wish to manually configure eth0 or eth1 or both, this must be done after deployment using the StoreOnce CLI. See To amend the network configuration after deployment (page 38) for further details about network configuration. Deployment process 1. Login to the vSphere client and select VMs and Templates from the Inventory section of the Home page. 2. Select the appropriate vCenter server in the Navigation pane and display the Virtual Machines tab. 26 Deployment using vSphere client
-
 1
1 -
2
-
3
-
4
-
5
-
6
-
7
-
8
-
9
-
10
-
11
-
12
-
13
-
14
-
15
-
16
-
17
-
18
-
19
-
20
-
 21
21 -
 22
22 -
 23
23 -
 24
24 -
 25
25 -
 26
26 -
 27
27 -
 28
28 -
 29
29 -
 30
30 -
 31
31 -
32
-
33
-
34
-
35
-
36
-
37
-
38
-
39
-
40
-
41
-
42
-
43
-
44
-
45
-
46
-
47
-
48
-
49
-
50
-
51
-
52
-
53
-
54
-
55
-
56
-
57
-
58
-
59
 |
 |