Harbor Freight Tools 44914 User Manual - Page 11
Workpiece and Work Area Set Up, General Operating Instructions
 |
View all Harbor Freight Tools 44914 manuals
Add to My Manuals
Save this manual to your list of manuals |
Page 11 highlights
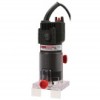
SAFETy SETUp Installing the Trim Guide Asm. Use the Trim Guide to trim in relation to both the workpiece's top surface and its edge surface, so the Router must be adjusted to cut accurately in two dimensions. 1. Assemble the Trim Guide as shown in Figure c, and attach to the Router Base. 2. Adjust the Router Base so the cutting depth will be flush with the surface that you will be trimming to match. 3. Loosen the Attachment Knob and adjust the Trim Guide so that its Guide Wheel is below the bit by approximately 3/4" to 1". Tighten it in position using Attachment Knob. 4. Center the cutting bit over the edge to be trimmed by loosening Lock Knob and sliding the Guide Block into position. Tighten Lock Knob. Note: To make fine adjustments, partially loosen Lock Knob and use Edge Knob. When the adjustments are finalized, tighten Lock Knob. 5. Make a test cut on a piece of scrap material to ensure that the adjustment is correct. Attachment Knob Edge Knob Guide Wheel Lock Knob Guide Block Figure c: Trim Guide Asm. Workpiece and Work Area Set Up 1. Designate a work area that is clean and well lit. The work area must not allow access by children or pets to prevent distraction and injury. 2. Route the power cord along a safe route to reach the work area without creating a tripping hazard or exposing the power cord to possible damage. The power cord must reach the work area with enough extra length to allow free movement while working. 3. Secure loose workpieces using a vise or clamps (not included) to prevent movement while working. 4. There must not be objects, such as utility lines, nearby that will present a hazard while working. General Operating Instructions 1. Make sure that the Power Switch is in the off-position, then plug in the tool. 2. Turn the Power Switch on and run the tool or about 10 seconds before routing to ensure that all moving parts are running smoothly, and there are no loose parts, rattles, or sparking that would indicate damage. 3. When using the Fence: Cut parallel to the edge of the workpiece with the Fence following the edge. 4. When using a Temporary Guide: Cut with the Fence following the edge of the temporary guide. 5. When making a circle cut: With the pin located in the pilot hole, plunge the router bit into the workpiece, and rotate the router in a circle around the pilot hole. Note: The router bit rotates clockwise. Adjust for this while cutting: a. For most materials it is best to move the Router from left to right as facing the workpiece. b. When cutting outside edges, move the Router counterclockwise. When cutting inside edges, move the Router clockwise. 6. To prevent accidents, turn off the tool and disconnect its power supply after use. Clean, then store the tool indoors out of children's reach. OpERATION MAINTENANcE Item 44914 For technical questions, please call 1-800-444-3353. Page 11
-
 1
1 -
2
-
3
-
4
-
5
-
 6
6 -
 7
7 -
 8
8 -
 9
9 -
 10
10 -
 11
11 -
 12
12 -
 13
13 -
 14
14 -
 15
15 -
 16
16
 |
 |
