Electrolux EW30CC55GW Complete Owner's Guide (English) - Page 20
Operating The Induction Cooking Zones
 |
UPC - 057112096742
View all Electrolux EW30CC55GW manuals
Add to My Manuals
Save this manual to your list of manuals |
Page 20 highlights
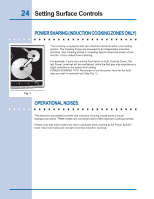
20 Setting Surface Controls OPERATING THE INDUCTION COOKING ZONES - lo hi + - lo hi + Fig. 1 The cooktop has two induction Cooking Zones designed for cookware of various sizes. Be sure to place cookware that meets the minimum and maximum pan size requirements (Fig. 2, page 14) for the Cooking Zone desired and is best for the amount of food being prepared. Place the cookware with the prepared food on the Cooking Zone BEFORE setting any of the Cooktop controls. To Turn ON one or more of the Cooking Zones: 1. Place the prepared food using the correct type and size cookware on the desired Cooking Zone. Be sure to center the cookware on Cooking Zone completely covering the minimum ring marked on the Zone surface. PLEASE NOTE: If the cookware requirements for the Cooking Zone (See Fig. 1, page 15) are not met the sensors will detect a problem and display the letter F in timer the affected Cooking Zone LED. Any problems must be corrected before proceeding. 2. Touch and hold the key pad for a few seconds or until a beep sounds. The Power POWER Indicator light located above the key pad will turn ON. NOTE: If no other key pad is POWER touched within 20 seconds the request to Power ON the cooktop will clear. 3. To start one or more Cooking Zones lightly touch the key pad for the Cooking ON OFF Zones needed. A beep will sound and the chosen Cooking Zone power level digital display will show 0 indicating no power level for the Zone has been set yet. NOTE: If no other key pad is touched within 10 seconds the request to Power ON the Cooktop Zone will clear. 4. Set the desired power level for the Cooking Zone by touching either the or key pad. If the key pad is touched the Cooking Zone will start at a "Power Boost" maximum power level (the Cooking Zone LED will display P and the control will beep once). If the key pad is touched once the Cooking Zone will start at 1 (the Cooking Zone LED will display 1 and the control will beep once). NOTE: Touch once, or repeatedly touch the or key pads to adjust or scroll through power levels at any time during the cooking process (To scroll through the power levels quickly touch and hold the or key pads until the power level desired is reached). Once the Cooking Zone power level has been set the food will begin to heat at that level until the power level is manually changed. For more information about the available Cooktop Zones power levels available see "Power Level Settings" section below. Setting Recommended Surface Settings Chart Type of Cooking P (Power Boost) MEDIUM HIGH (8-9) MEDIUM (6) MEDIUM LOW (2 - 4) LOW (L) Start most foods; bring water to a boil and pan broiling. Continue a rapid boil; frying, deep fat frying. Maintain a slow boil; thicken sauces and gravies; steaming vegetables. Keep foods cooking; poaching and stewing. Keep warm, melting and simmering.
-
 1
1 -
2
-
3
-
4
-
5
-
6
-
7
-
8
-
9
-
10
-
11
-
12
-
13
-
14
-
 15
15 -
 16
16 -
 17
17 -
 18
18 -
 19
19 -
 20
20 -
 21
21 -
 22
22 -
 23
23 -
 24
24 -
 25
25 -
26
-
27
-
28
-
29
-
30
-
31
-
32
 |
 |
