Dell SE2419HR Monitor Users Guide
Dell SE2419HR Manual
 |
View all Dell SE2419HR manuals
Add to My Manuals
Save this manual to your list of manuals |
Dell SE2419HR manual content summary:
- Dell SE2419HR | Monitor Users Guide - Page 1
Dell SE2419HR/SE2719HR User's Guide Monitor Model: SE2419HR/SE2719HR Regulatory model: SE2419Hf, SE2719Hf - Dell SE2419HR | Monitor Users Guide - Page 2
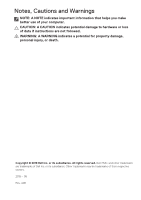
A CAUTION indicates potential damage to hardware or loss of data if instructions are not followed. WARNING: A WARNING indicates a potential for property death. Copyright © 2019 Dell Inc. or its subsidiaries. All rights reserved. Dell, EMC, and other trademarks are trademarks of Dell Inc. or its - Dell SE2419HR | Monitor Users Guide - Page 3
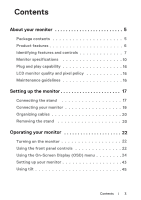
quality and pixel policy 16 Maintenance guidelines 16 Setting up the monitor 17 Connecting the stand 17 Connecting your monitor 19 Organizing cables 20 Removing the stand 20 Operating your monitor 22 Turning on the monitor 22 Using the front panel controls 22 Using the On-Screen Display - Dell SE2419HR | Monitor Users Guide - Page 4
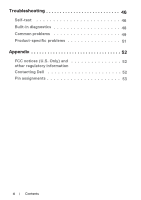
Troubleshooting 46 Self-test 46 Built-in diagnostics 48 Common problems 49 Product-specific problems 51 Appendix 52 FCC notices (U.S. Only) and 52 other regulatory information Contacting Dell 52 Pin assignments 53 4 | Contents - Dell SE2419HR | Monitor Users Guide - Page 5
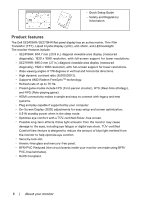
optional and may not ship with your monitor. Some features may not be available in certain countries. NOTE: To set up with any other stand, see the documentation that shipped with the stand. Component image Component description Monitor Stand riser Stand base Power cable (varies by country) HDMI - Dell SE2419HR | Monitor Users Guide - Page 6
Crystal Display (LCD), anti-static, and LED backlight. The monitor features include: SE2419HR: 604.7 mm (23.8 in.) diagonal viewable area display (measured diagonally). 1920 x 1080 resolution, with full-screen support for lower resolutions. SE2719HR: 686.0 mm (27 in.) diagonal viewable area display - Dell SE2419HR | Monitor Users Guide - Page 7
access the On-screen Display (OSD) menu and change the settings if required. (For more information, see Using the front panel controls) To turn the monitor On or Off. About your - Dell SE2419HR | Monitor Users Guide - Page 8
, serial number, and Service Tag label With monitor stand Use To secure the monitor using a security lock (purchased separately). List the regulatory approvals. See this label if you need to contact Dell for technical support. The Service Tag is a enables Dell service technicians to identify the - Dell SE2419HR | Monitor Users Guide - Page 9
Bottom view, without monitor stand 1 Label Description 1 Power port 2 HDMI port 3 VGA port 2 3 Use To connect the monitor power cable. For connection to your computer using HDMI cable. For connection to your computer using VGA cable. About your monitor | 9 - Dell SE2419HR | Monitor Users Guide - Page 10
Monitor speci cations Model SE2419HR SE2719HR Screen type Active matrix-TFT LCD Panel FreeSync support frame 48-75Hz freq uency (HDMI port only) Dell display manager Yes compatibility Connectivity One VGA port and one HDMI 1.4 (HDCP 1.4) port Bezel width (edge of monitor to active - Dell SE2419HR | Monitor Users Guide - Page 11
SE2419HR/SE2719HR Display Mode VESA, 720 x 400 VESA, 640 x 480 VESA, 640 x 480 VESA, 800 x 600 VESA, 800 x 600 VESA, 1024 x 768 VESA, 1024 x 768 VESA, 1152 x 864 VESA, 1280 x 1024 VESA, 1280 x 1024 VESA, 1600 x 900 VESA Vertical Graphic cards that support Radeon FreeSync technology For - Dell SE2419HR | Monitor Users Guide - Page 12
input signals AC input voltage/ frequency/current Inrush current SE2419HR / SE2719HR Analog RGB: 0.7 Volts ± 5 %, 75 ohm Digital Dimensions (with stand): Height Width Depth Dimensions (without stand): Height Width Depth SE2419HR / SE2719HR D-Sub (VGA), 15 pins; HDMI, 19 pins SE2419HR 413.6 mm (16 - Dell SE2419HR | Monitor Users Guide - Page 13
stand assembly and cables Without stand assembly and cables Weight of stand assembly SE2419HR 171.6 mm (6.76 in.) 249.0 mm (9.80 in.) 152.8 mm (6.02 in.) SE2419HR 5.59 kg (12.32 lb) 3.91 kg (8.62 lb) 3.13 kg (6.90 lb) 0.52 kg (1.15 lb) SE2719HR ) 78.5 BTU/hour (typical) About your monitor | 13 - Dell SE2419HR | Monitor Users Guide - Page 14
from the monitor. SE2419HR VESA modes Normal operation mode Horizontal sync Vertical sync Video Active Active Active Power indicator White Inactive Inactive - Blanked White (Glowing) Power consumption 22 W (maximum) 17 W (typical) Less than 0.5 W SE2719HR VESA modes Normal operation - Dell SE2419HR | Monitor Users Guide - Page 15
in the Active-off mode, one of the following messages will be displayed: SE2419HR Dell 24 Monitor ? No VGA Cable The display will go into Power Save Mode in 4 minutes. www.dell.com/SE2419HR SE2419HR SE2719HR Dell 27 Monitor ? No VGA Cable The display will go into Power Save Mode in 4 minutes - Dell SE2419HR | Monitor Users Guide - Page 16
on Dell Monitor Quality and Pixel Policy, see Dell Support site at www.dell.com/support/monitors. Maintenance guidelines Cleaning your monitor WARNING: Before cleaning the monitor, unplug the monitor power cable from the electrical outlet. CAUTION: Read and follow the Safety Instructions before - Dell SE2419HR | Monitor Users Guide - Page 17
from the factory. NOTE: The following procedure is applicable for the stand that shipped with your monitor. To attach the monitor stand: 1. Connect the stand riser to the stand base, and then tighten the screw on the stand base. 2. Align the stand-riser bracket with the grooves at the back of the - Dell SE2419HR | Monitor Users Guide - Page 18
3. Slide the stand assembly until it snaps into place. 18 | Setting up the monitor - Dell SE2419HR | Monitor Users Guide - Page 19
in this section, follow the Safety Instructions. NOTE: Do not connect all cables to the computer at the same time. It is recommended to route the cables through the cable-management slot before you connect them to the monitor. To connect your monitor to the computer: 1. Turn o your computer - Dell SE2419HR | Monitor Users Guide - Page 20
cable-management slot to the cables connected to your monitor. Removing the stand NOTE: To prevent scratches on the screen when removing the stand, ensure that the monitor is placed on a soft and clean surface. To remove the stand: 1. Place the monitor on a soft cloth along the desk. 2. Tilt the - Dell SE2419HR | Monitor Users Guide - Page 21
3. Using a long screwdriver press the release button. 4. Keeping the release button pressed, pull the stand out. Setting up the monitor | 21 - Dell SE2419HR | Monitor Users Guide - Page 22
. Using the front panel controls Use the control buttons at the bottom edge of the monitor to adjust the image being displayed. 1 2345 The following table describes the control buttons: Control Buttons Description 1 Use this button to choose from a list of - Dell SE2419HR | Monitor Users Guide - Page 23
. For Menu more information, see Accessing the OSD menu. 4 To exit or return to the OSD main menu. Exit 5 To turn the monitor on or off. Solid white light indicates the monitor is turned on Power button and functioning normally. Blinking white light indicates (with power-status light) the - Dell SE2419HR | Monitor Users Guide - Page 24
. 1. Press the button to display the OSD main menu. Main menu for HDMI input Dell 24 Monitor Brightness / Contrast Auto Adjust Input Source Color Display Menu Personalize Others 75% 75% Dell 27 Monitor Brightness / Contrast Auto Adjust Input Source Color Display Menu Personalize Others 75% 75 - Dell SE2419HR | Monitor Users Guide - Page 25
/ Contrast Description Use this option to control the brightness or contrast settings. Dell 24 Monitor Brightness / Contrast Auto Adjust 75% Input Source 75% Color Display Menu Personalize Others Dell 27 Monitor Brightness / Contrast Auto Adjust 75% Input Source 75% Color Display Menu Personalize - Dell SE2419HR | Monitor Users Guide - Page 26
Brightness / Contrast Auto Adjust Input Source Color Display Menu Personalize Others Press to adjust the screen automatically Dell 27 Monitor Brightness / Contrast Auto Adjust Input Source Color Display Menu Personalize Others Press to adjust the screen automatically The following dialog appears - Dell SE2419HR | Monitor Users Guide - Page 27
. SE2419HR: one VGA and one HDMI input Dell 24 Monitor Brightness / Contrast VGA Auto Adjust HDMI Input Source Auto Select On Color Reset Input Source Display Menu Personalize Others SE2719HR: one VGA and one HDMI input Dell 27 Monitor Brightness / Contrast VGA Auto Adjust HDMI - Dell SE2419HR | Monitor Users Guide - Page 28
to scan for available input signals. Select this option to restore default input source. Use color to adjust the color setting mode. Dell 24 Monitor Brightness / Contrast Auto Adjust Input Source Color Display Menu Personalize Others Preset Modes Input Color Format Reset Color Standard RGB - Dell SE2419HR | Monitor Users Guide - Page 29
appears cooler with a blue tint. Custom Color: Allows you to manually adjust the color settings. Press the and buttons to adjust the three colors (R, G, B) values and create your own preset color mode. Dell 24 Monitor Brightness / Contrast Auto Adjust Input Source Color Display Menu Personalize - Dell SE2419HR | Monitor Users Guide - Page 30
is connected to a computer or DVD player using the HDMI cable. YPbPr: Select this option if your DVD player supports only YPbPr output. Dell 24 Monitor Brightness / Contrast Auto Adjust Input Source Color Display Menu Personalize Others Preset Modes Input Color Format Reset Color RGB YPbPr - Dell SE2419HR | Monitor Users Guide - Page 31
only when you select Movie, FPS Game, RTS Game or RPG Game preset modes. Reset your monitor color settings to the factory settings. Use the display to adjust image. Dell 24 Monitor Brightness / Contrast Auto Adjust Input Source Color Display Menu Personalize Others Aspect Ratio Horizontal Position - Dell SE2419HR | Monitor Users Guide - Page 32
Display Menu Personalize Others Aspect Ratio Horizontal Position Vertical Position Sharpness Pixel Clock Phase Dynamic Contrast Wide 16:9 50 Dell 27 Monitor Brightness / Contrast Auto Adjust Input Source Color Display Menu Personalize Others Response Time Reset Display Normal Aspect Ratio - Dell SE2419HR | Monitor Users Guide - Page 33
Brightness / Contrast Auto Adjust Input Source Color Display Menu Personalize Others Language Transparency Timer Reset Menu English 20 20 s Dell 27 Monitor Brightness / Contrast Auto Adjust Input Source Color Display Menu Personalize Others Language Transparency Timer Reset Menu English 20 20 - Dell SE2419HR | Monitor Users Guide - Page 34
1, Shortcut key 2, Power Button LED or Reset Personalization, Preset Modes or Brightness/Contrast and set it as a shortcut key. Dell 24 Monitor Brightness / Contrast Auto Adjust Input Source Color Display Menu Personalize Others Shortcut Key 1 Shortcut Key 2 Power Button LED Reset Personalization - Dell SE2419HR | Monitor Users Guide - Page 35
Color Display Menu Personalize Others Display Info DDC/CI LCD Conditioning Service Tag Reset Others Factory Reset On O ABCDEFG Display Info Press to display the information about the display. SE2419HR: Dell 24 Monitor Brightness / Contrast Auto Adjust Input Source Color Display Menu Personalize - Dell SE2419HR | Monitor Users Guide - Page 36
Personalize Others Display Info DDC/CI LCD Conditioning Service Tag Reset Others Factory Reset Model: Dell SE2719HR Input Source: HDMI Current: 1920x1080, 60Hz DDC/CI DDC/CI (Display Data Channel/Command Interface) allows you to adjust the monitor settings using software on your computer. Select - Dell SE2419HR | Monitor Users Guide - Page 37
Adjust Input Source Color Display Menu DDC/CI LCD Conditioning On Service Tag O Reset Others Factory Reset Personalize Others Service Tag Display the Service Tag number of the monitor. Dell 24 Monitor Brightness / Contrast Auto Adjust Input Source Color Display Menu Personalize Others - Dell SE2419HR | Monitor Users Guide - Page 38
Dell 27 Monitor Brightness / Contrast Auto Adjust Input Source Color Display Menu Personalize Others Display Info DDC/CI LCD Conditioning Service Tag Reset Others Factory Reset On O ABCDEFG Reset Other Factory Reset Reset all settings under the Others setting menu to the factory default. Reset - Dell SE2419HR | Monitor Users Guide - Page 39
Game preset modes.), the manual brightness adjustment is disabled. SE2419HR Dell 24 Monitor To allow manual adjustment of brightness, the Dynamic Contrast will be switched o . Do you want to continue? Yes No SE2419HR SE2719HR Dell 27 Monitor To allow manual adjustment of brightness, the Dynamic - Dell SE2419HR | Monitor Users Guide - Page 40
function is disabled, the following message is displayed. SE2419HR Dell 24 Monitor The function of adjusting display setting using PC application will be disabled. Do you wish to disable DDC/CI function? Yes No SE2419HR SE2719HR Dell 27 Monitor The function of adjusting display setting using PC - Dell SE2419HR | Monitor Users Guide - Page 41
When the monitor enters Power Save Mode, the following message appears. SE2419HR Dell 24 Monitor Entering Power Save Mode. SE2419HR SE2719HR Dell 27 Monitor Entering Power Save Mode. SE2719HR Operating your monitor | 41 - Dell SE2419HR | Monitor Users Guide - Page 42
this state. SE2419HR Dell 24 Monitor ? No VGA Cable The display will go into Power Save Mode in 4 minutes. www.dell.com/SE2419HR SE2419HR SE2719HR Dell 27 Monitor ? No VGA Cable The display will go into Power Save Mode in 4 minutes. www.dell.com/SE2719HR SE2719HR See Troubleshooting for more - Dell SE2419HR | Monitor Users Guide - Page 43
of the following methods to update the graphics driver: Dell computer 1. Go to www.dell.com/support, enter your service tag, and download the latest driver for your graphics x 1080 please contact Dell to inquire about a graphics adapter that supports these resolutions. Operating your monitor | 43 - Dell SE2419HR | Monitor Users Guide - Page 44
Non-Dell computer In Windows 7: 1. Right-click on the desktop and click Personalization. 2. Click Change Display Settings. 3. resolution, please contact the manufacturer of your computer or consider purchasing a graphics adapter that supports the video resolution. 44 | Operating your monitor - Dell SE2419HR | Monitor Users Guide - Page 45
Using tilt You can tilt the monitor for the most comfortable viewing angle. NOTE: The stand is not attached when the monitor is shipped from the factory. Operating your monitor | 45 - Dell SE2419HR | Monitor Users Guide - Page 46
LED remains white. SE2419HR Dell 24 Monitor ? No VGA Cable The display will go into Power Save Mode in 4 minutes. www.dell.com/SE2419HR SE2419HR SE2719HR Dell 27 Monitor ? No VGA Cable The display will go into Power Save Mode in 4 minutes. www.dell.com/SE2719HR SE2719HR 46 | Troubleshooting - Dell SE2419HR | Monitor Users Guide - Page 47
NOTE: This box also appears during normal operation, when the video cable is disconnected or damaged. 4. your computer and the monitor. If your monitor remains dark after you reconnect the cables, check your video controller and computer. Troubleshooting | 47 - Dell SE2419HR | Monitor Users Guide - Page 48
problem with your monitor, or with your computer and video card. NOTE: You can run the built-in diagnostics only when the video cable is unplugged and the monitor back of the computer or monitor. The monitor then goes into the self- Button 1 on the bottom of the monitor again. The color of the screen - Dell SE2419HR | Monitor Users Guide - Page 49
Brightness problems Geometric distortion Horizontal/Vertical lines Possible Solutions ∞ Ensure that the video cable connecting the monitor and technology. ∞ For more information on Dell Monitor Quality and Pixel Policy, see Dell Support site at: www.dell.com/support/monitors. ∞ Cycle power On-off. ∞ - Dell SE2419HR | Monitor Users Guide - Page 50
the video cable connector. ∞ Restart the computer in safe mode. Safety related issues ∞ Do not perform any troubleshooting step. ∞ Contact Dell immediately. Intermittent problems ∞ Ensure that the video cable connecting the monitor to the computer is connected properly and is secure. ∞ Reset the - Dell SE2419HR | Monitor Users Guide - Page 51
properly. Disconnect and reconnect the video cable if necessary. ∞ Reset the computer or video player. ∞ Due to different video formats (aspect ratio) of DVDs, the monitor may display in full screen. ∞ Run the built-in diagnostics. Troubleshooting | 51 - Dell SE2419HR | Monitor Users Guide - Page 52
on safety instructions, see the Product Information Guide. FCC Notices services may not be available in your area. To get online Monitor support content: 1. Visit www.dell.com/support/monitors. To contact Dell for sales, technical support, or customer servi ce issues: 1. Visit www.dell.com/support - Dell SE2419HR | Monitor Users Guide - Page 53
Pin assignments D-Sub 15-pin connector Pin Number 1 2 3 4 5 6 7 8 9 10 11 12 13 14 15 Signal Assignment Video-Red Video-Green Video-Blue GND Self-test GND-R GND-G GND-B DDC +5 V GND-sync GND DDC data H-sync V-sync DDC clock Appendix | 53 - Dell SE2419HR | Monitor Users Guide - Page 54
Pin assignments HDMI 19-pin connector Pin Number 1 2 3 4 5 6 7 8 9 10 11 12 13 14 15 16 17 18 19 Signal Assignment TMDS DATA 2+ TMDS DATA 2 SHIELD TMDS DATA 2TMDS DATA 1+ TMDS DATA 1 SHIELD TMDS DATA 1TMDS DATA 0+ TMDS DATA 0 SHIELD TMDS DATA 0TMDS CLOCK+ TMDS CLOCK SHIELD TMDS CLOCKCEC Reserved
-
 1
1 -
 2
2 -
 3
3 -
 4
4 -
 5
5 -
 6
6 -
 7
7 -
8
-
9
-
10
-
11
-
12
-
13
-
14
-
15
-
16
-
17
-
18
-
19
-
20
-
21
-
22
-
23
-
24
-
25
-
26
-
27
-
28
-
29
-
30
-
31
-
32
-
33
-
34
-
35
-
36
-
37
-
38
-
39
-
40
-
41
-
42
-
43
-
44
-
45
-
46
-
47
-
48
-
49
-
50
-
51
-
52
-
53
-
54
 |
 |

Dell SE2419HR/SE2719HR
User’s Guide
Monitor Model: SE2419
/SE2 19
Regulatory model: SE2419Hf, SE2719Hf
HR
7
HR