Dell C7017T Users Guide - Page 33
Wall Mounting, Setting Up the Monitor, INSTALLATION INSTRUCTIONS - manual
 |
View all Dell C7017T manuals
Add to My Manuals
Save this manual to your list of manuals |
Page 33 highlights
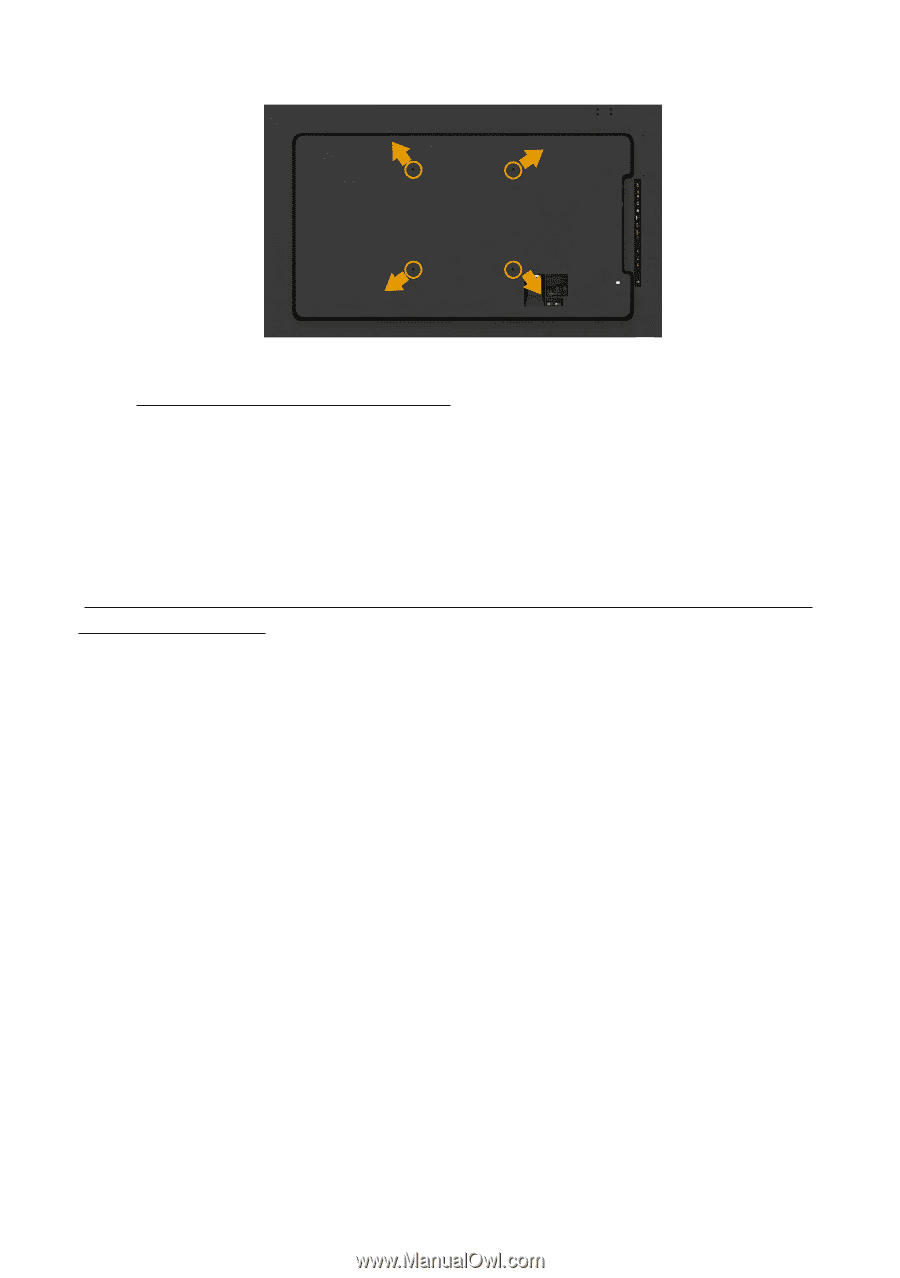
Wall Mounting (Screw dimension: M8 x 20 ~ 30 mm). Refer INSTALLATION INSTRUCTIONS to that come with LSA1U Wall Mount kit and the VESA-compatible base mounting kit (400 x 400 mm distance). 1. Install Wall Plate to Wall. 2. Place the monitor panel on a soft cloth or cushion on a stable flat table 3. Attach the mounting brackets from the wall mounting kit to the monitor. 4. Install Display to Wall Plate. For more information, see the Wall Mount provider website located at http://www.milestone.com/~/media/Files/Chief/Manuals/MSA1U_MTA1U_ LSA1U_LTA1U-I.pdf. Setting Up the Monitor 33
-
 1
1 -
2
-
3
-
4
-
5
-
6
-
7
-
8
-
9
-
10
-
11
-
12
-
13
-
14
-
15
-
16
-
17
-
18
-
19
-
20
-
21
-
22
-
23
-
24
-
25
-
26
-
27
-
 28
28 -
 29
29 -
 30
30 -
 31
31 -
 32
32 -
 33
33 -
 34
34 -
 35
35 -
 36
36 -
 37
37 -
 38
38 -
39
-
40
-
41
-
42
-
43
-
44
-
45
-
46
-
47
-
48
-
49
-
50
-
51
-
52
-
53
-
54
-
55
-
56
-
57
-
58
-
59
-
60
-
61
-
62
-
63
-
64
-
65
-
66
-
67
-
68
-
69
 |
 |
Setting Up the Monitor
33
Wall Mounting
(Screw dimension: M8 x 20 ~ 30 mm).
Refer
INSTALLATION INSTRUCTIONS
to that come with LSA1U Wall Mount
kit
and the VESA-compatible base mounting kit (400 x 400 mm distance).
1.
Install Wall Plate to Wall.
2.
Place the monitor panel on a soft cloth or cushion on a stable flat table
3.
Attach the mounting brackets from the wall mounting kit to the monitor.
4.
Install Display to Wall Plate.
For more information, see the Wall Mount provider website located at
LSA1U_LTA1U-I.pdf
.