Canon REALiS WUX450 D Pro AV User Manual - Page 95
Specifying the Image Mode
 |
View all Canon REALiS WUX450 D Pro AV manuals
Add to My Manuals
Save this manual to your list of manuals |
Page 95 highlights
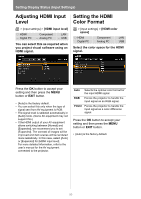
Adjusting Image Quality (Image Adjustment) Specifying the Image Mode > [Image adjustment] > [Image mode] HDMI Digital PC Component Analog PC LAN USB You can select an image mode (P68) suitable for the projected image. You can also select it with the IMAGE button on the remote control. (P69) • [Standard] is the factory default for Analog PC-1 or 2, Digital PC, or HDMI (when [HDMI In] is [Computer]), LAN or USB, and [Photo/sRGB] is the default for HDMI (when [HDMI In] is [Auto]) or Component. • You can adjust the image quality by adjusting the following items in each image mode: [Brightness], [Contrast], [Sharpness], [Gamma], [Color adjustment], [Advanced adjustment] and [Lamp mode] • The adjustment you have made is stored as each combination of input signals and an image mode. • When a user memory that was saved in [Create profile] is selected, [Baseline image mode] appears in the menu. This indicates the image mode that was the base when the user memory was saved. Operation Setting Functions from Menus Standard Presentation Dynamic Video Photo/ sRGB User 1-5 Suitable for projecting a computer screen or watching video in a brightish room. This image mode emphasizes white tones. Suitable for viewing text-based images in a brightish room. Suitable for watching video in a brightish room. Suitable for watching video taken with a video camera in a moderately dark room. Suitable for projecting images taken with a digital camera that supports sRGB in a moderately dark room. Compatible with the sRGB color space. Up to 5 user-selected combinations of image quality settings can be stored in the memory. (P96) Stored settings can be selected as an image mode. Press the OK button to accept your setting and then press the MENU button or EXIT button. 95
-
 1
1 -
2
-
3
-
4
-
5
-
6
-
7
-
8
-
9
-
10
-
11
-
12
-
13
-
14
-
15
-
16
-
17
-
18
-
19
-
20
-
21
-
22
-
23
-
24
-
25
-
26
-
27
-
28
-
29
-
30
-
31
-
32
-
33
-
34
-
35
-
36
-
37
-
38
-
39
-
40
-
41
-
42
-
43
-
44
-
45
-
46
-
47
-
48
-
49
-
50
-
51
-
52
-
53
-
54
-
55
-
56
-
57
-
58
-
59
-
60
-
61
-
62
-
63
-
64
-
65
-
66
-
67
-
68
-
69
-
70
-
71
-
72
-
73
-
74
-
75
-
76
-
77
-
78
-
79
-
80
-
81
-
82
-
83
-
84
-
85
-
86
-
87
-
88
-
89
-
 90
90 -
 91
91 -
 92
92 -
 93
93 -
 94
94 -
 95
95 -
 96
96 -
 97
97 -
 98
98 -
 99
99 -
 100
100 -
101
-
102
-
103
-
104
-
105
-
106
-
107
-
108
-
109
-
110
-
111
-
112
-
113
-
114
-
115
-
116
-
117
-
118
-
119
-
120
-
121
-
122
-
123
-
124
-
125
-
126
-
127
-
128
-
129
-
130
-
131
-
132
-
133
-
134
-
135
-
136
-
137
-
138
-
139
-
140
-
141
-
142
-
143
-
144
-
145
-
146
-
147
-
148
-
149
-
150
-
151
-
152
-
153
-
154
-
155
-
156
-
157
-
158
-
159
-
160
-
161
-
162
-
163
-
164
-
165
-
166
-
167
-
168
-
169
-
170
-
171
-
172
-
173
-
174
-
175
-
176
-
177
-
178
-
179
-
180
-
181
-
182
-
183
-
184
-
185
-
186
-
187
-
188
-
189
-
190
-
191
-
192
-
193
-
194
-
195
-
196
-
197
-
198
-
199
-
200
-
201
-
202
-
203
-
204
-
205
-
206
-
207
-
208
-
209
-
210
-
211
-
212
-
213
-
214
-
215
-
216
-
217
-
218
-
219
-
220
-
221
-
222
-
223
-
224
-
225
-
226
-
227
-
228
-
229
-
230
-
231
-
232
-
233
-
234
-
235
-
236
-
237
-
238
-
239
-
240
-
241
-
242
-
243
-
244
-
245
-
246
-
247
-
248
-
249
-
250
-
251
-
252
-
253
-
254
-
255
-
256
-
257
-
258
-
259
-
260
-
261
-
262
-
263
-
264
-
265
-
266
-
267
-
268
-
269
-
270
-
271
-
272
-
273
-
274
-
275
-
276
-
277
-
278
-
279
-
280
-
281
-
282
-
283
-
284
-
285
-
286
-
287
-
288
-
289
-
290
-
291
-
292
-
293
-
294
-
295
-
296
-
297
-
298
-
299
-
300
-
301
-
302
-
303
-
304
-
305
-
306
-
307
-
308
 |
 |
