Canon MAXIFY MB5120 MB5100 series PDF User Manual Windows - Page 591
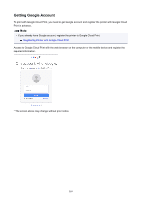
Setup, Web service setup, Web service connection setup, Google Cloud Print setup, Register with,
 |
View all Canon MAXIFY MB5120 manuals
Add to My Manuals
Save this manual to your list of manuals |
Page 591 highlights
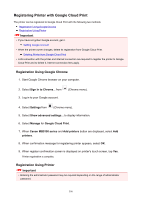
1. Make sure printer is turned on. 2. Flick HOME screen and tap Using the Operation Panel Setup. 3. Tap Web service setup. 4. Tap Web service connection setup -> Google Cloud Print setup -> Register with Google Cloud Print. Note • If you have already registered the printer with Google Cloud Print, the confirmation message to re-register the printer is displayed. 5. When confirmation screen to register printer is displayed, tap Yes. 6. When message to select language on print setting screen of Google Cloud Print is displayed, tap Next. 7. Tap a display language on print setting screen of Google Cloud Print. The confirmation message to print the authentication URL is displayed. 8. Load A4 or Letter-sized plain paper and tap OK. The authentication URL is printed. 9. Make sure authentication URL is printed, tap Yes. 10. Perform authentication process using web browser on computer or mobile device. Access to the URL using the web browser on the computer or the mobile device and perform the authentication process following the on-screen instructions. Important • Accessing to printed URL and performing the authentication process have to be carried out quickly. • If you exceed time limit of the authentication process, an error message is displayed on the touch screen. Tap OK. When the confirmation message to print the authentication URL is displayed, try again from step 8. 591
-
 1
1 -
2
-
3
-
4
-
5
-
6
-
7
-
8
-
9
-
10
-
11
-
12
-
13
-
14
-
15
-
16
-
17
-
18
-
19
-
20
-
21
-
22
-
23
-
24
-
25
-
26
-
27
-
28
-
29
-
30
-
31
-
32
-
33
-
34
-
35
-
36
-
37
-
38
-
39
-
40
-
41
-
42
-
43
-
44
-
45
-
46
-
47
-
48
-
49
-
50
-
51
-
52
-
53
-
54
-
55
-
56
-
57
-
58
-
59
-
60
-
61
-
62
-
63
-
64
-
65
-
66
-
67
-
68
-
69
-
70
-
71
-
72
-
73
-
74
-
75
-
76
-
77
-
78
-
79
-
80
-
81
-
82
-
83
-
84
-
85
-
86
-
87
-
88
-
89
-
90
-
91
-
92
-
93
-
94
-
95
-
96
-
97
-
98
-
99
-
100
-
101
-
102
-
103
-
104
-
105
-
106
-
107
-
108
-
109
-
110
-
111
-
112
-
113
-
114
-
115
-
116
-
117
-
118
-
119
-
120
-
121
-
122
-
123
-
124
-
125
-
126
-
127
-
128
-
129
-
130
-
131
-
132
-
133
-
134
-
135
-
136
-
137
-
138
-
139
-
140
-
141
-
142
-
143
-
144
-
145
-
146
-
147
-
148
-
149
-
150
-
151
-
152
-
153
-
154
-
155
-
156
-
157
-
158
-
159
-
160
-
161
-
162
-
163
-
164
-
165
-
166
-
167
-
168
-
169
-
170
-
171
-
172
-
173
-
174
-
175
-
176
-
177
-
178
-
179
-
180
-
181
-
182
-
183
-
184
-
185
-
186
-
187
-
188
-
189
-
190
-
191
-
192
-
193
-
194
-
195
-
196
-
197
-
198
-
199
-
200
-
201
-
202
-
203
-
204
-
205
-
206
-
207
-
208
-
209
-
210
-
211
-
212
-
213
-
214
-
215
-
216
-
217
-
218
-
219
-
220
-
221
-
222
-
223
-
224
-
225
-
226
-
227
-
228
-
229
-
230
-
231
-
232
-
233
-
234
-
235
-
236
-
237
-
238
-
239
-
240
-
241
-
242
-
243
-
244
-
245
-
246
-
247
-
248
-
249
-
250
-
251
-
252
-
253
-
254
-
255
-
256
-
257
-
258
-
259
-
260
-
261
-
262
-
263
-
264
-
265
-
266
-
267
-
268
-
269
-
270
-
271
-
272
-
273
-
274
-
275
-
276
-
277
-
278
-
279
-
280
-
281
-
282
-
283
-
284
-
285
-
286
-
287
-
288
-
289
-
290
-
291
-
292
-
293
-
294
-
295
-
296
-
297
-
298
-
299
-
300
-
301
-
302
-
303
-
304
-
305
-
306
-
307
-
308
-
309
-
310
-
311
-
312
-
313
-
314
-
315
-
316
-
317
-
318
-
319
-
320
-
321
-
322
-
323
-
324
-
325
-
326
-
327
-
328
-
329
-
330
-
331
-
332
-
333
-
334
-
335
-
336
-
337
-
338
-
339
-
340
-
341
-
342
-
343
-
344
-
345
-
346
-
347
-
348
-
349
-
350
-
351
-
352
-
353
-
354
-
355
-
356
-
357
-
358
-
359
-
360
-
361
-
362
-
363
-
364
-
365
-
366
-
367
-
368
-
369
-
370
-
371
-
372
-
373
-
374
-
375
-
376
-
377
-
378
-
379
-
380
-
381
-
382
-
383
-
384
-
385
-
386
-
387
-
388
-
389
-
390
-
391
-
392
-
393
-
394
-
395
-
396
-
397
-
398
-
399
-
400
-
401
-
402
-
403
-
404
-
405
-
406
-
407
-
408
-
409
-
410
-
411
-
412
-
413
-
414
-
415
-
416
-
417
-
418
-
419
-
420
-
421
-
422
-
423
-
424
-
425
-
426
-
427
-
428
-
429
-
430
-
431
-
432
-
433
-
434
-
435
-
436
-
437
-
438
-
439
-
440
-
441
-
442
-
443
-
444
-
445
-
446
-
447
-
448
-
449
-
450
-
451
-
452
-
453
-
454
-
455
-
456
-
457
-
458
-
459
-
460
-
461
-
462
-
463
-
464
-
465
-
466
-
467
-
468
-
469
-
470
-
471
-
472
-
473
-
474
-
475
-
476
-
477
-
478
-
479
-
480
-
481
-
482
-
483
-
484
-
485
-
486
-
487
-
488
-
489
-
490
-
491
-
492
-
493
-
494
-
495
-
496
-
497
-
498
-
499
-
500
-
501
-
502
-
503
-
504
-
505
-
506
-
507
-
508
-
509
-
510
-
511
-
512
-
513
-
514
-
515
-
516
-
517
-
518
-
519
-
520
-
521
-
522
-
523
-
524
-
525
-
526
-
527
-
528
-
529
-
530
-
531
-
532
-
533
-
534
-
535
-
536
-
537
-
538
-
539
-
540
-
541
-
542
-
543
-
544
-
545
-
546
-
547
-
548
-
549
-
550
-
551
-
552
-
553
-
554
-
555
-
556
-
557
-
558
-
559
-
560
-
561
-
562
-
563
-
564
-
565
-
566
-
567
-
568
-
569
-
570
-
571
-
572
-
573
-
574
-
575
-
576
-
577
-
578
-
579
-
580
-
581
-
582
-
583
-
584
-
585
-
 586
586 -
 587
587 -
 588
588 -
 589
589 -
 590
590 -
 591
591 -
 592
592 -
 593
593 -
 594
594 -
 595
595 -
 596
596 -
597
-
598
-
599
-
600
-
601
-
602
-
603
-
604
-
605
-
606
-
607
-
608
-
609
-
610
-
611
-
612
-
613
-
614
-
615
-
616
-
617
-
618
-
619
-
620
-
621
-
622
-
623
-
624
-
625
-
626
-
627
-
628
-
629
-
630
-
631
-
632
-
633
-
634
-
635
-
636
-
637
-
638
-
639
-
640
-
641
-
642
-
643
-
644
-
645
-
646
-
647
-
648
-
649
-
650
-
651
-
652
-
653
-
654
-
655
-
656
-
657
-
658
-
659
-
660
-
661
-
662
-
663
-
664
-
665
-
666
-
667
-
668
-
669
-
670
-
671
-
672
-
673
-
674
-
675
-
676
-
677
-
678
-
679
-
680
-
681
-
682
-
683
-
684
-
685
-
686
-
687
-
688
-
689
-
690
-
691
-
692
-
693
-
694
-
695
-
696
-
697
-
698
-
699
-
700
-
701
-
702
-
703
-
704
-
705
-
706
-
707
-
708
-
709
-
710
-
711
-
712
-
713
-
714
-
715
-
716
-
717
-
718
-
719
-
720
-
721
-
722
-
723
-
724
-
725
-
726
-
727
-
728
-
729
-
730
-
731
-
732
-
733
-
734
-
735
-
736
-
737
-
738
-
739
-
740
-
741
-
742
-
743
-
744
-
745
-
746
-
747
-
748
-
749
-
750
-
751
-
752
-
753
-
754
-
755
-
756
-
757
-
758
-
759
-
760
-
761
-
762
-
763
-
764
-
765
-
766
-
767
-
768
-
769
-
770
-
771
-
772
-
773
-
774
-
775
-
776
-
777
-
778
-
779
-
780
-
781
-
782
-
783
-
784
-
785
-
786
-
787
-
788
-
789
-
790
-
791
-
792
-
793
-
794
-
795
-
796
-
797
-
798
-
799
-
800
-
801
-
802
-
803
-
804
-
805
-
806
-
807
-
808
-
809
-
810
-
811
-
812
-
813
-
814
-
815
-
816
-
817
-
818
-
819
-
820
-
821
-
822
-
823
-
824
-
825
-
826
-
827
-
828
-
829
-
830
-
831
-
832
-
833
-
834
-
835
-
836
-
837
-
838
-
839
-
840
-
841
-
842
-
843
-
844
-
845
-
846
-
847
-
848
-
849
-
850
-
851
-
852
-
853
-
854
-
855
-
856
-
857
-
858
-
859
-
860
-
861
-
862
-
863
-
864
-
865
-
866
-
867
-
868
-
869
-
870
-
871
-
872
-
873
-
874
-
875
-
876
-
877
-
878
-
879
-
880
-
881
-
882
-
883
-
884
-
885
-
886
-
887
-
888
-
889
-
890
-
891
-
892
-
893
-
894
-
895
-
896
-
897
-
898
-
899
-
900
-
901
-
902
-
903
-
904
-
905
-
906
-
907
-
908
-
909
-
910
-
911
-
912
-
913
-
914
-
915
-
916
-
917
-
918
-
919
-
920
-
921
-
922
-
923
-
924
-
925
-
926
-
927
-
928
-
929
-
930
-
931
-
932
-
933
-
934
-
935
-
936
-
937
-
938
-
939
-
940
-
941
-
942
-
943
-
944
-
945
-
946
-
947
-
948
-
949
-
950
-
951
-
952
-
953
-
954
-
955
-
956
-
957
-
958
-
959
-
960
-
961
-
962
-
963
-
964
-
965
-
966
-
967
-
968
-
969
-
970
-
971
-
972
-
973
-
974
-
975
-
976
-
977
-
978
-
979
-
980
-
981
-
982
-
983
-
984
-
985
-
986
-
987
-
988
-
989
-
990
-
991
-
992
-
993
-
994
-
995
-
996
-
997
-
998
-
999
-
1,000
-
1,001
-
1,002
-
1,003
-
1,004
-
1,005
-
1,006
-
1,007
-
1,008
-
1,009
-
1,010
-
1,011
-
1,012
-
1,013
-
1,014
-
1,015
-
1,016
-
1,017
-
1,018
-
1,019
-
1,020
-
1,021
-
1,022
-
1,023
-
1,024
-
1,025
-
1,026
-
1,027
-
1,028
-
1,029
-
1,030
-
1,031
-
1,032
-
1,033
-
1,034
-
1,035
-
1,036
-
1,037
-
1,038
-
1,039
-
1,040
-
1,041
-
1,042
-
1,043
-
1,044
-
1,045
-
1,046
-
1,047
-
1,048
-
1,049
-
1,050
-
1,051
-
1,052
-
1,053
-
1,054
-
1,055
-
1,056
-
1,057
-
1,058
-
1,059
-
1,060
-
1,061
-
1,062
-
1,063
-
1,064
-
1,065
-
1,066
-
1,067
-
1,068
-
1,069
-
1,070
-
1,071
-
1,072
-
1,073
-
1,074
-
1,075
-
1,076
-
1,077
-
1,078
-
1,079
-
1,080
-
1,081
-
1,082
-
1,083
-
1,084
-
1,085
-
1,086
-
1,087
-
1,088
-
1,089
-
1,090
-
1,091
-
1,092
-
1,093
-
1,094
-
1,095
-
1,096
-
1,097
-
1,098
-
1,099
-
1,100
-
1,101
-
1,102
-
1,103
-
1,104
-
1,105
-
1,106
-
1,107
-
1,108
-
1,109
-
1,110
-
1,111
-
1,112
-
1,113
-
1,114
-
1,115
-
1,116
-
1,117
-
1,118
-
1,119
-
1,120
-
1,121
-
1,122
-
1,123
-
1,124
-
1,125
-
1,126
-
1,127
-
1,128
-
1,129
-
1,130
-
1,131
-
1,132
-
1,133
-
1,134
-
1,135
-
1,136
-
1,137
-
1,138
-
1,139
-
1,140
-
1,141
-
1,142
-
1,143
-
1,144
-
1,145
-
1,146
-
1,147
-
1,148
-
1,149
-
1,150
-
1,151
-
1,152
-
1,153
-
1,154
-
1,155
-
1,156
-
1,157
-
1,158
-
1,159
-
1,160
-
1,161
-
1,162
-
1,163
-
1,164
-
1,165
-
1,166
-
1,167
-
1,168
-
1,169
-
1,170
-
1,171
-
1,172
-
1,173
-
1,174
-
1,175
-
1,176
-
1,177
-
1,178
-
1,179
-
1,180
-
1,181
-
1,182
-
1,183
-
1,184
-
1,185
-
1,186
-
1,187
-
1,188
-
1,189
-
1,190
-
1,191
-
1,192
-
1,193
-
1,194
-
1,195
-
1,196
-
1,197
-
1,198
-
1,199
-
1,200
-
1,201
-
1,202
-
1,203
-
1,204
-
1,205
-
1,206
-
1,207
-
1,208
-
1,209
-
1,210
-
1,211
-
1,212
-
1,213
-
1,214
-
1,215
-
1,216
-
1,217
-
1,218
-
1,219
-
1,220
-
1,221
-
1,222
-
1,223
-
1,224
-
1,225
-
1,226
-
1,227
-
1,228
-
1,229
-
1,230
-
1,231
-
1,232
-
1,233
-
1,234
-
1,235
-
1,236
-
1,237
-
1,238
-
1,239
-
1,240
-
1,241
-
1,242
-
1,243
-
1,244
-
1,245
-
1,246
-
1,247
-
1,248
-
1,249
-
1,250
-
1,251
-
1,252
-
1,253
-
1,254
-
1,255
-
1,256
-
1,257
-
1,258
-
1,259
-
1,260
-
1,261
-
1,262
-
1,263
-
1,264
-
1,265
-
1,266
-
1,267
-
1,268
-
1,269
-
1,270
-
1,271
-
1,272
-
1,273
-
1,274
-
1,275
-
1,276
-
1,277
-
1,278
-
1,279
-
1,280
-
1,281
-
1,282
-
1,283
-
1,284
-
1,285
-
1,286
-
1,287
-
1,288
-
1,289
-
1,290
-
1,291
-
1,292
-
1,293
-
1,294
-
1,295
-
1,296
-
1,297
-
1,298
-
1,299
-
1,300
-
1,301
-
1,302
-
1,303
-
1,304
-
1,305
-
1,306
-
1,307
-
1,308
-
1,309
-
1,310
-
1,311
-
1,312
-
1,313
-
1,314
-
1,315
-
1,316
-
1,317
-
1,318
-
1,319
-
1,320
-
1,321
-
1,322
-
1,323
-
1,324
-
1,325
-
1,326
-
1,327
-
1,328
-
1,329
-
1,330
-
1,331
-
1,332
-
1,333
-
1,334
-
1,335
-
1,336
-
1,337
-
1,338
-
1,339
-
1,340
-
1,341
-
1,342
-
1,343
-
1,344
-
1,345
-
1,346
-
1,347
-
1,348
-
1,349
-
1,350
-
1,351
-
1,352
-
1,353
-
1,354
-
1,355
-
1,356
 |
 |
