Bosch SHXM4AY55N Installation Instruction - Page 9
MPORTANT, Before you begin, you must read the safety instructions., PRE-INSTALL CHECKLIST - 24
 |
View all Bosch SHXM4AY55N manuals
Add to My Manuals
Save this manual to your list of manuals |
Page 9 highlights
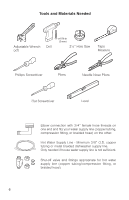
IMPORTANT! Before you begin, you must read the safety instructions. PRE-INSTALL CHECKLIST 1. Unpack unit. Retain packing material until successful installation is complete. 2. Remove all packing material from inside the dishwasher. 3. Inspect parts to ensure you have all the necessary materials. 4. Flush household hot water supply for at least two minutes. 5. Measure the enclosure area. Is the opening at least 34" (863.6 mm) high and 24" (609.6 mm) wide? 6. Is the opening near enough to the sink for the water line and drain hoses to access plumbing? 7. Will the unit be installed close enough to the sink so that drain hose length does not exceed 92" (2336.8 mm) and so that a portion of the drain hose is raised at least 33" (840 mm) above the floor? 8. Do the openings for electric cable, water line, and drain hose routing through cabinet fit within the shaded area in Figure 3? 9. Are the openings sanded smooth if wood or covered by a protective gasket if metal? 10. Is your water heater set at 120°F (49°C) and does water pressure measure 15-145 psi (1-10 bar)? 11. If installing in a corner, will the dishwasher door clear cabinet hardware? 12. Determine mounting method based on dishwasher model and countertop type (see Figures 11-14). 13. Only use included hardware for install. If replacing dishwasher, dispose of old hose and other equipment properly. 9
-
 1
1 -
2
-
3
-
 4
4 -
 5
5 -
 6
6 -
 7
7 -
 8
8 -
 9
9 -
 10
10 -
 11
11 -
 12
12 -
 13
13 -
 14
14 -
15
-
16
-
17
-
18
-
19
-
20
-
21
-
22
-
23
-
24
-
25
-
26
-
27
-
28
-
29
-
30
-
31
-
32
-
33
-
34
-
35
-
36
-
37
-
38
-
39
-
40
-
41
-
42
-
43
-
44
-
45
-
46
-
47
-
48
-
49
-
50
-
51
-
52
-
53
-
54
-
55
-
56
-
57
-
58
-
59
-
60
-
61
-
62
-
63
-
64
-
65
-
66
-
67
-
68
-
69
-
70
-
71
-
72
-
73
-
74
-
75
-
76
-
77
-
78
-
79
-
80
 |
 |
