Belkin F1DD104L User Manual - Page 9
Connecting the KVM Switch
 |
UPC - 722868120019
View all Belkin F1DD104L manuals
Add to My Manuals
Save this manual to your list of manuals |
Page 9 highlights
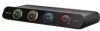
section Installing the KVM Switch Connecting the KVM Switch 1 The KVM Switch is a plug-and-play device for installation. For a quick start on installation and operation, please follow the instructions below for the setup sequence: 2 Step 1. 3 Connect the shared keyboard, monitor, and mouse (also speaker 4 set and microphone) to the console port of the KVM Switch. 5 Step 2. Connect each of your 6 computers to the KVM Switch, using the USB KVM 7 cable, and audio and mic cables. 8 Step 3. Power your KVM Switch by connecting the external power adapter to it. 4 3 2 1 Note: Since the USB interface is hot-pluggable, you don't have to turn off the computer before making connections to the KVM Switch. 7
-
 1
1 -
2
-
3
-
 4
4 -
 5
5 -
 6
6 -
 7
7 -
 8
8 -
 9
9 -
 10
10 -
 11
11 -
 12
12 -
 13
13 -
 14
14 -
15
-
16
-
17
-
18
-
19
-
20
-
21
-
22
-
23
-
24
-
25
-
26
-
27
-
28
-
29
-
30
-
31
-
32
-
33
-
34
-
35
-
36
-
37
-
38
-
39
 |
 |

7
1
2
3
4
5
6
7
8
section
Installing the KVM Switch
Connecting the KVM Switch
The
KVM Switch is a plug-and-play device for installation. For a quick start
on installation and operation, please follow the instructions below for the
setup sequence:
Step 1.
Connect the shared keyboard,
monitor, and mouse (also speaker
set and microphone) to the console
port of the KVM Switch.
Step 2.
Connect each of your
computers to the KVM
Switch, using the USB KVM
cable, and audio and
mic cables.
Step 3.
Power your KVM Switch by
connecting the external power
adapter to it.
Note:
Since the USB interface is hot-pluggable, you don’t have to turn off the
computer before making connections to the KVM Switch.
1
2
3
4