Acer Chromebook Tab 10 User Manual
Acer Chromebook Tab 10 Manual
 |
View all Acer Chromebook Tab 10 manuals
Add to My Manuals
Save this manual to your list of manuals |
Acer Chromebook Tab 10 manual content summary:
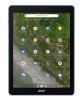
- Acer Chromebook Tab 10 | User Manual - Page 1
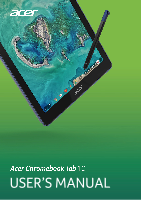
USER'S MANUAL - Acer Chromebook Tab 10 | User Manual - Page 2
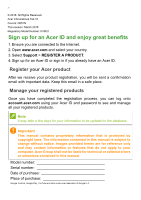
© 2018. All Rights Reserved. Acer Chromebook Tab 10 Covers: D651N This revision: March 2018 Regulatory Model Number: N18Q1 Sign up for an Acer ID and enjoy great benefits 1. Ensure you are connected to the Internet. 2. Open www.acer.com and select your country. 3. Select Support > REGISTER A PRODUCT - Acer Chromebook Tab 10 | User Manual - Page 3
Accept the Terms of Service 4 First-time sign-in 4 Create a new Google™ Account 4 Browse as a guest 4 Sign in to your Google Account 5 Your Acer Chromebook Tab tour 6 Front view 6 Rear view 7 Top view 8 Left view 9 Base view 10 USB Type-C information 10 The Chrome OS Desktop - Acer Chromebook Tab 10 | User Manual - Page 4
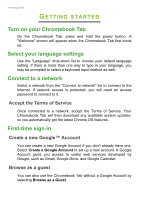
on your Chromebook Tab On the Chromebook Tab, press and hold the power button. A "Welcome" screen will appear when the Chromebook Tab first boots up it. Accept the Terms of Service Once connected to a network, accept the Terms of Service. Your Chromebook Tab will then download any available system - Acer Chromebook Tab 10 | User Manual - Page 5
have a Google Account, enter your username and password in the sign-in box that appears and select the Sign in button. Sign in to your Chromebook Enter your email Forgot email? More options NEXT Back Important Sign in with your primary Google Account. This account will be set as the owner - Acer Chromebook Tab 10 | User Manual - Page 6
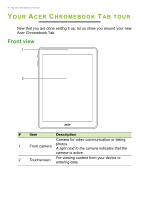
TOUR Now that you are done setting it up, let us show you around your new Acer Chromebook Tab. Front view 1 2 # Item Description Camera for video communication or taking 1 Front camera photos. A light next to the camera indicates that the camera is active. 2 Touchscreen - Acer Chromebook Tab 10 | User Manual - Page 7
Rear view Your Acer Chromebook Tab tour - 7 1 2 # Item Description 1 Rear camera Camera for video communication or taking photos. Remove the pen from the slot and perform 2 Stylus pen touch actions on the screen. To disengage the stylus from the tablet refer to Stylus on page 13. - Acer Chromebook Tab 10 | User Manual - Page 8
8 - Your Acer Chromebook Tab tour Top view 1 2 3 # Item 1 Speakers 2 Microphone 3 Headset/speaker jack Description Deliver stereo audio output. Receives audio for video chats and internet calls. Connects to audio devices (e.g., speakers, headphones), or a headset with microphone. - Acer Chromebook Tab 10 | User Manual - Page 9
Left view Your Acer Chromebook Tab tour - 9 1 2 3 45 # Item Description 1 Stylus slot Holds the stylus pen. 2 microSD card slot Insert a microSD card into the slot. 3 Volume control key Adjusts the volume - Acer Chromebook Tab 10 | User Manual - Page 10
10 - Your Acer Chromebook Tab tour Base view 1 2 # Item 1 Speakers 2 USB Type-C port with DC-in Description Deliver stereo audio output. Connects to the provided USB Type-C power adapter and to USB devices with a USB Type-C connector. Supports DisplayPort™ over USB-C™. USB Type-C information - Acer Chromebook Tab 10 | User Manual - Page 11
Window controls Window controls 1 2 3 Shelf 4 56 7 8 9 10 11 Number Description Goes Backward and Forward in the current web 1 browsing session). Select Reload to refresh the current webpage. 2 Closes a tab. 3 Opens a new tab. 4 Type a web address or perform an internet search in - Acer Chromebook Tab 10 | User Manual - Page 12
the screen or the right side, respectively. 7 Closes the entire window (tabs and all). 8 Bookmark (save) webpage links to this quick-access area called the "bookmarks bar". 9 Select to bookmark (save) a link to the currrent webpage. 10 applicable to your Chromebook Tab. Launcher Select - Acer Chromebook Tab 10 | User Manual - Page 13
to open the stylus tools. The dedicated stylus tools have a specific function. Icon Function Description Capture region Takes a partial screenshot. Capture screen Create note Laser pointer Magnifying glass Takes a full page screenshot. Opens Google Keep and creates a new note. Use the pen as - Acer Chromebook Tab 10 | User Manual - Page 14
signal strength, and battery life. Tap the Status area to display a box with more options. Icon Description Icon Description Chrome OS help Shut down Lock screen Volume control Bluetooth status Brightness Settings Wireless network connection Battery status Auto rotate - Acer Chromebook Tab 10 | User Manual - Page 15
EXTENSIONS Apps & extensions - 15 You can enhance your Chromebook Tab with extra web applications (Chrome apps, for short), features the Chrome browser. Android apps, designed for Android mobile devices are supported on Chromebooks. You can find Chrome apps and extensions through the Web Store, - Acer Chromebook Tab 10 | User Manual - Page 16
16 - Apps & extensions Installing apps from Google Play Store 1. Select the Launcher icon. 2. In the All Apps list, select Play Store (or type "Play Store" in the search bar). 3. You can browse apps by category or search for an app by keyword. 4. Select an app to view more information. 5. Select - Acer Chromebook Tab 10 | User Manual - Page 17
by using the Files app on your Chromebook Tab. To use the Files app, select the Files icon in the apps list, or use the keyboard shortcut + + . This user manual uses Google Drive and Files interchangeably when giving instructions regarding accessing files. Creating a new document - Acer Chromebook Tab 10 | User Manual - Page 18
18 - Apps & extensions Sync files from Downloads to Google Drive 1. Select the Launcher icon. 2. In the All Apps list, select Files (or type "Files" in the search bar). 3. Select the files that you want to upload. 4. Drag-and-drop the files to My Drive. Enable offline access to Google Drive files - Acer Chromebook Tab 10 | User Manual - Page 19
"YouTube" in the search bar). Playing video or audio files Your Chromebook Tab has a built-in media player to play audio and video files. To play a file, double-click on an audio or video file in your Files app. Media type Supported formats Audio / Video .3gp, .avi, .mov, .mp4, .m4v, .m4a, .mp3 - Acer Chromebook Tab 10 | User Manual - Page 20
20 - Apps & extensions Other Supported File Types Your Chromebook Tab supports a number of other file formats. File type Supported formats Microsoft Office files .doc, .docx, .xls, .xlsx, .ppt (read-only), .pptx (readonly) Images .bmp, .gif, .jpg, .jpeg, .png, .webp Compressed .zip, .rar - Acer Chromebook Tab 10 | User Manual - Page 21
Chrome OS tips and tricks - 21 CHROME OS TIPS AND TRICKS Your Chromebook Tab is a new type of computer that works somewhat differently than what you may be used to, so you might like to know how easy and - Acer Chromebook Tab 10 | User Manual - Page 22
22 - Chrome OS tips and tricks 3. Select My Drive (or whatever sub-folder you've created to put your files in). Since your files are saved in Google Drive, they are saved online and available anywhere you have internet access. To access your files from any internet-connected computer do the - Acer Chromebook Tab 10 | User Manual - Page 23
may not be available in all countries and regions. Google Play's current list of country availability for apps and digital content, visit https:// support.google.com/googleplay/answer/2843119?hl=en To listen to streaming music, you can download streaming apps like Pandora, Spotify, Rdio, Deezer and - Acer Chromebook Tab 10 | User Manual - Page 24
or type "Files" in the search 3. Double-click on any Microsoft Office file stored in Google Drive or on an external hard drive or USB flash drive connected to your Chromebook Tab. 4. Select File > Save as Google Docs, Slides, or Sheets (format depends on the type of document). Export Google Drive - Acer Chromebook Tab 10 | User Manual - Page 25
from within whichever Office Online product you are using (you can install the OneDrive app from the Web Store as well). How to use your Chromebook Tab when there's no internet The Chrome Web Store contains useful offline apps (see Installing apps from Chrome Web Store on page 15). You're able - Acer Chromebook Tab 10 | User Manual - Page 26
26 - Chrome OS tips and tricks Gmail Offline Note The first time you use Gmail Offline you MUST be connected to the internet to enable offline viewing. 1. Select the Launcher icon. 2. In the All Apps list, select Gmail Offline in the search bar). (or type "Gmail Offline" 3. Use the app like you - Acer Chromebook Tab 10 | User Manual - Page 27
Chrome OS tips and tricks - 27 4. Make your desired changes. The next time you are online and have Google Drive open, your local changes will upload to Google Drive. Note If you make changes to a Google document while offline and someone else makes changes to the document as well (for example, if - Acer Chromebook Tab 10 | User Manual - Page 28
SETTINGS Use the Settings menu to adjust the various options for your Chromebook Tab. To access the Settings menu do the following: 1. Select the Status area of the shelf in the lower-right corner of the screen (where your account picture appears). 2. Select Settings icon. 3. To show the advanced - Acer Chromebook Tab 10 | User Manual - Page 29
the time format and time zone on your Chromebook Tab. If the date or time is incorrect on your Chromebook Tab, try adjusting the time zone. To change the time zone: 1. Select the Status area of the shelf in the lower-right corner of the screen (where your account picture appears). 2. Select Settings - Acer Chromebook Tab 10 | User Manual - Page 30
area of the shelf in the lower-right corner of the screen (where your account picture appears). 2. Select Restart to update. 3. Your Chromebook Tab will shutdown and automatically restart, with the update applied. Manual update To manually check for an update or check what version of Chrome OS - Acer Chromebook Tab 10 | User Manual - Page 31
service center. Visit www.acer.com to find an authorized service site. Resetting your Chromebook Tab There may be times when you want to reset your Chromebook Tab (for example, removing your personal information and settings). Completely resetting your Chromebook Tab is known as "Powerwashing - Acer Chromebook Tab 10 | User Manual - Page 32
available both online and offline. Chromebook Help is installed on your Chromebook Tab and doesn't require internet access. It covers basic troubleshooting as well as more detailed information about Chrome OS and using your Chromebook Tab. Note Some sections in Chromebook Help have web links, which
-
 1
1 -
 2
2 -
 3
3 -
 4
4 -
 5
5 -
 6
6 -
 7
7 -
8
-
9
-
10
-
11
-
12
-
13
-
14
-
15
-
16
-
17
-
18
-
19
-
20
-
21
-
22
-
23
-
24
-
25
-
26
-
27
-
28
-
29
-
30
-
31
-
32
 |
 |
USER’S MANUAL