Acer AR360 F1 User Manual - Page 45
Removal and replacement procedures, Extend the server from the rack
 |
View all Acer AR360 F1 manuals
Add to My Manuals
Save this manual to your list of manuals |
Page 45 highlights
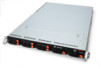
29 Removal and replacement procedures Required tools You need the following items for some procedures: • T-10/T-15 Torx screwdriver (included with the server) Preparation procedures To access some components and perform certain service procedures, you must perform one or more of the following procedures: • Extend the server from the rack If you are performing service procedures in an Acer branded, telco, or third-party rack cabinet, you can use the locking feature of the rack rails to support the server and gain access to internal components. For more information about telco rack solutions, refer to the RackSolutions.com website • Power down the server If you must remove a server from a rack or a non-hot-plug component from a server, power downthe server. • Remove the server from the rack If the rack environment, cabling configuration, or the server location in the rack creates awkward conditions, remove the server from the rack. • Access the product rear panel If you are performing certain service procedures, access the product rear panel Extend the server from the rack 1 If the server is screwed into the rack, remove the screws and set them aside. 2 Grasp the handles and extend the server from the rack.
-
 1
1 -
2
-
3
-
4
-
5
-
6
-
7
-
8
-
9
-
10
-
11
-
12
-
13
-
14
-
15
-
16
-
17
-
18
-
19
-
20
-
21
-
22
-
23
-
24
-
25
-
26
-
27
-
28
-
29
-
30
-
31
-
32
-
33
-
34
-
35
-
36
-
37
-
38
-
39
-
 40
40 -
 41
41 -
 42
42 -
 43
43 -
 44
44 -
 45
45 -
 46
46 -
 47
47 -
 48
48 -
 49
49 -
 50
50 -
51
-
52
-
53
-
54
-
55
-
56
-
57
-
58
-
59
-
60
-
61
-
62
-
63
-
64
-
65
-
66
-
67
-
68
-
69
-
70
-
71
-
72
-
73
-
74
-
75
-
76
-
77
-
78
-
79
-
80
-
81
-
82
-
83
-
84
-
85
-
86
-
87
-
88
-
89
-
90
-
91
-
92
-
93
-
94
-
95
-
96
-
97
-
98
-
99
-
100
-
101
-
102
-
103
-
104
-
105
-
106
-
107
-
108
-
109
-
110
-
111
-
112
-
113
-
114
-
115
-
116
-
117
-
118
-
119
-
120
-
121
-
122
-
123
-
124
-
125
-
126
-
127
-
128
-
129
-
130
-
131
-
132
-
133
-
134
-
135
-
136
-
137
-
138
-
139
-
140
-
141
-
142
-
143
-
144
-
145
-
146
-
147
-
148
-
149
-
150
-
151
-
152
-
153
-
154
-
155
-
156
-
157
-
158
-
159
-
160
-
161
-
162
-
163
-
164
-
165
-
166
-
167
-
168
-
169
-
170
-
171
-
172
-
173
-
174
-
175
-
176
-
177
-
178
-
179
-
180
-
181
-
182
-
183
-
184
-
185
-
186
-
187
-
188
 |
 |
