2009 Yamaha Motorsports Midnight Warrior Owners Manual - Page 51
2009 Yamaha Motorsports Midnight Warrior Manual

Page 51 highlights
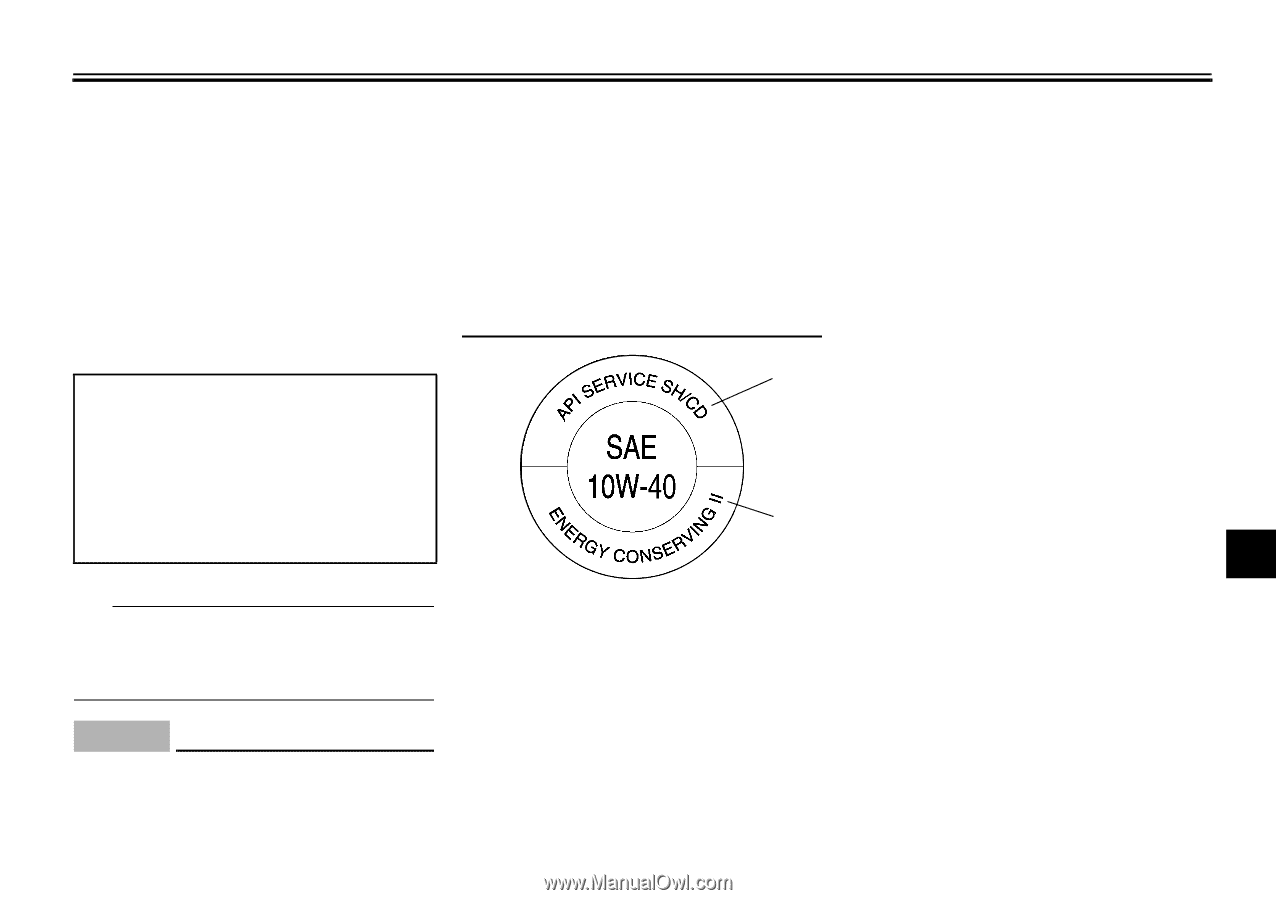
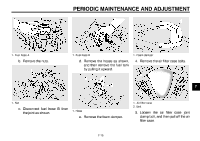
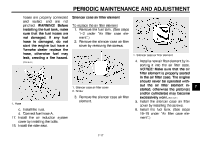
PERIODIC MAINTENANCE AND ADJUSTMENT through the filler hole, insert the dipstick, and then tighten the oil filler cap. 12. Start the engine, rev it several times, and then turn it off. 13. Remove the engine oil filler cap, and then gradually fill the oil tank with the remaining oil quantity while regularly checking the oil level on the dipstick. Recommended engine oil: See page 9-1. Oil quantity: Without oil filter cartridge replacement: 3.70 L (3.91 US qt, 3.26 Imp.qt) With oil filter cartridge replacement: 4.10 L (4.33 US qt, 3.61 Imp.qt) G mix any chemical additives. Do not use oils with a diesel specification of "CD" or oils of a higher quality than specified. In addition, do not use oils labeled "ENERGY CONSERVING II" or higher. Make sure that no foreign material enters the crankcase. 16. Turn the engine off, and then check the oil level and correct it if necessary. 17. Install the rider seat. 1 2 7 1. "CD" specification 2. "ENERGY CONSERVING II" TIP Be sure to wipe off spilled oil on any parts after the engine and exhaust system have cooled down. ECA11620 NOTICE G In order to prevent clutch slippage (since the engine oil also lubricates the clutch), do not 14. Install the engine oil filler cap. 15. Start the engine, and then let it idle for several minutes while checking it for oil leakage. If oil is leaking, immediately turn the engine off and check for the cause. 7-13
-
 1
1 -
2
-
3
-
4
-
5
-
6
-
7
-
8
-
9
-
10
-
11
-
12
-
13
-
14
-
15
-
16
-
17
-
18
-
19
-
20
-
21
-
22
-
23
-
24
-
25
-
26
-
27
-
28
-
29
-
30
-
31
-
32
-
33
-
34
-
35
-
36
-
37
-
38
-
39
-
40
-
41
-
42
-
43
-
44
-
45
-
 46
46 -
 47
47 -
 48
48 -
 49
49 -
 50
50 -
 51
51 -
 52
52 -
 53
53 -
 54
54 -
 55
55 -
 56
56 -
57
-
58
-
59
-
60
-
61
-
62
-
63
-
64
-
65
-
66
-
67
-
68
-
69
-
70
-
71
-
72
-
73
-
74
-
75
-
76
-
77
-
78
-
79
-
80
-
81
-
82
-
83
-
84
-
85
-
86
-
87
-
88
-
89
-
90
-
91
-
92
-
93
-
94
-
95
-
96
-
97
-
98
 |
 |