2007 Yamaha Motorsports Attak GT Owners Manual
2007 Yamaha Motorsports Attak GT Manual

2007 Yamaha Motorsports Attak GT manual content summary:
- 2007 Yamaha Motorsports Attak GT | Owners Manual - Page 1
SNOWMOBILE OWNER'S MANUAL RX10GTW RXW10GTW LIT-12628-02-54 8GD-28199-11 - 2007 Yamaha Motorsports Attak GT | Owners Manual - Page 2
- 2007 Yamaha Motorsports Attak GT | Owners Manual - Page 3
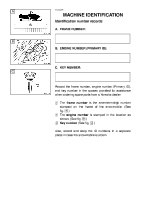
A ESU00286 1- MACHINE IDENTIFICATION Identification number records A. FRAME NUMBER: CZ-01E B B. ENGINE NUMBER (PRIMARY ID): CZ-01E C. KEY NUMBER: C CZ-01E Record the frame number, engine number (Primary ID), and key number in the spaces provided for assistance when ordering spare parts from a - 2007 Yamaha Motorsports Attak GT | Owners Manual - Page 4
that you and your Yamaha dealer pay close attention to the recommended maintenance schedules and operating instructions contained within this manual. RX10GTW RXW10GTW OWNER'S MANUAL ©2006 by Yamaha Motor Corporation, U.S.A. 1st Edition, March 2006 All rights reserved. Any reprinting or unauthorized - 2007 Yamaha Motorsports Attak GT | Owners Manual - Page 5
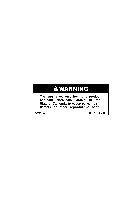
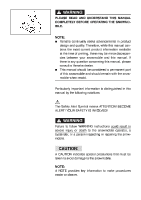
when resold. @ Particularly important information is distinguished in this manual by the following notations. The Safety Alert Symbol means ATTENTION! BECOME ALERT! YOUR SAFETY IS INVOLVED! WARNING @ Failure to follow WARNING instructions could result in severe injury or death to the snowmobile - 2007 Yamaha Motorsports Attak GT | Owners Manual - Page 6
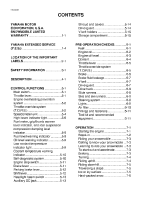
ESU00003 CONTENTS YAMAHA MOTOR CORPORATION, U.S.A. SNOWMOBILE LIMITED WARRANTY ...1-1 YAMAHA EXTENDED SERVICE (Y.E.S.) ...1-4 LOCATION OF THE IMPORTANT LABELS...2-1 SAFETY INFORMATION ...3-1 DESCRIPTION ...4-1 CONTROL FUNCTIONS ...5-1 Main switch...5-1 Throttle lever...5-1 Engine overheating - 2007 Yamaha Motorsports Attak GT | Owners Manual - Page 7
the skis...8-30 Lubrication ...8-31 Replacing a headlight bulb ...8-32 Adjusting the headlight beams ...8-33 Battery ...8-33 Replacing a fuse...8-34 TROUBLESHOOTING ...9-1 STORAGE ...10-1 SPECIFICATIONS ...11-1 Dimensions...11-1 Engine ...11-1 Chassis...11-2 Electric...11-3 WIRING DIAGRAM ...12-1 - 2007 Yamaha Motorsports Attak GT | Owners Manual - Page 8
and maintain the snowmobile as specified in the appropriate Owner's Manual. WARRANTY TRANSFER: To transfer any remaining warranty from the original . An inspection and registration fee will be charged for this service. EMISSION CONTROL SYSTEM WARRANTY Yamaha Motor Corporation, USA also warrants - 2007 Yamaha Motorsports Attak GT | Owners Manual - Page 9
of having the dealer do them? A. Yes, if you are a qualified snowmobile mechanic and follow the procedures specified in the Owner's and Service Manual. We do recommend, however, that items requiring special tools or equipment be done by a Yamaha snowmobile dealer. Q. Under what conditions is the - 2007 Yamaha Motorsports Attak GT | Owners Manual - Page 10
machine requires warranty service, you must take it to any authorized Yamaha snowmobile dealer within the continental United States. Be sure to bring your warranty identification card or other valid proof of the original date of purchase. If a question or problem arises regarding warranty, first - 2007 Yamaha Motorsports Attak GT | Owners Manual - Page 11
ESU04280 YAMAHA EXTENDED SERVICE (Y.E.S.) CW-06E 1-4 - 2007 Yamaha Motorsports Attak GT | Owners Manual - Page 12
ESU04050 2- LOCATION OF THE IMPORTANT LABELS Please read the following labels carefully before operating this snowmobile. NOTE: @ Maintain or replace safety and instruction labels, as necessary. @ 1 8FB-77761-E0 2 3 4 4AA-22259-70 4AA-22259-60 2-1 - 2007 Yamaha Motorsports Attak GT | Owners Manual - Page 13
5 RXW10GT NOTE: @ The following suspension adjustment charts are included with the Owner's Manual. @ 2-2 - 2007 Yamaha Motorsports Attak GT | Owners Manual - Page 14
the following for your safety. Severe injury or death may result if you ignore any of the following. Before operating 1. Read the Owner's Manual and all labels before operating this snowmobile. Become familiar with all of the operating controls and their function. Consult a Yamaha dealer about any - 2007 Yamaha Motorsports Attak GT | Owners Manual - Page 15
7. Do not allow anyone to stand behind the snowmobile when starting, inspecting, or adjusting the snowmobile. A broken track, track fittings, or debris thrown by the track could be dangerous to the operator or bystanders. 8. Handle fuel with care; it is HIGHLY FLAMMABLE. G Never add fuel when the - 2007 Yamaha Motorsports Attak GT | Owners Manual - Page 16
an enclosed space. 4. Always refer to the "STORAGE" section if the snowmobile is to be stored for an extended period. 5. Maintain or replace safety and instruction labels, as necessary. 3-3 - 2007 Yamaha Motorsports Attak GT | Owners Manual - Page 17
ESU00012 4- DESCRIPTION RX10GT RXW10GT 4-1 - 2007 Yamaha Motorsports Attak GT | Owners Manual - Page 18
1 2 3 4 5 6 7 8 9 0 A B C D E F G H I J K L Windshield Steering handlebar Seat Frame Storage compartment Slide rail suspension Drive track Skis Headlights Shroud Tail/brake lights Snow flap Brake lever Parking brake lever Grip warmer/rear suspension adjustment switch Headlight beam switch Engine - 2007 Yamaha Motorsports Attak GT | Owners Manual - Page 19
ESU00013 5- CONTROL FUNCTIONS ESU00362 Main switch The main switch controls the following items. 1 "OFF" The ignition circuit is switched off. The key can be removed only in this position. 2 "ON" The ignition circuit is switched on. 3 "START" The starting circuit is switched on. The starter - 2007 Yamaha Motorsports Attak GT | Owners Manual - Page 20
G G If the T.O.R.S. is activated, make sure that the cause of the malfunction has been corrected and that the engine can be operated without a problem before restarting the engine. Be sure to use the specified spark plug and spark plug cap. Otherwise, the T.O.R.S. will not work properly. @ 5-2 - 2007 Yamaha Motorsports Attak GT | Owners Manual - Page 21
switch Throttle position sensor Engine B È É Ê 1 2 3 a b c d Idling/ starting Off Closed Run B Running On Open Run C Trouble Off Open T.O.R.S. will operate C Idling/starting Running Trouble Throttle position sensor (throttle valve position) Throttle switch Throttle cable On Off Open Closed - 2007 Yamaha Motorsports Attak GT | Owners Manual - Page 22
ESU05110 Speedometer unit The speedometer unit is equipped with the following: G a digital speedometer (which shows the riding speed) G an odometer (which shows the total distance traveled) G two tripmeters (which show the distance traveled since they were last set to zero) G a barometer (which - 2007 Yamaha Motorsports Attak GT | Owners Manual - Page 23
Odometer, tripmeter, and barometer modes Pushing the "SELECT" button 1 switches the display between the odometer mode "ODO", tripmeter modes "TRIP A" and "TRIP B", and barometer mode "BARO". To reset a tripmeter, push the "RESET" button for at least 1 second while the tripmeter is displayed. NOTE: - 2007 Yamaha Motorsports Attak GT | Owners Manual - Page 24
To adjust the display brightness 1. Turn the main switch to "OFF". 2. Push and hold down the "SELECT" button 1. 3. Turn the main switch to "ON", and then, after 5 seconds, release the "SELECT" button. 4. Push the "RESET" button 2 to select the desired display brightness level 3, and then push the " - 2007 Yamaha Motorsports Attak GT | Owners Manual - Page 25
Fuel meter As the fuel level decreases in the fuel tank, the segments disappear until the level goes down to the last segment "E" (Empty). When this occurs, the fuel level warning indicator 2 and the warning light 3 come on. If the fuel level warning indicator and the warning light come on, fill the - 2007 Yamaha Motorsports Attak GT | Owners Manual - Page 26
To adjust the thumb warmer temperature To raise the temperature, press the right adjustment switch to "HI", and to lower it, press the switch to "LO". To adjust the rear suspension compression damping level 1. Push the "MODE" button and make sure that the rear suspension indicator 6 is displayed. If - 2007 Yamaha Motorsports Attak GT | Owners Manual - Page 27
of the snowmobile. The fuel level warning indicator 1, warning light 2, and all segments of the fuel meter 3 warn the rider of the above problems by flashing continuously. When this occurs, have a Yamaha dealer inspect the snowmobile as soon as possible. ESU03770 Oil level warning indicator The oil - 2007 Yamaha Motorsports Attak GT | Owners Manual - Page 28
G G G If the self-diagnosis warning indicator and warning light flash continuously, and an error code is displayed during operation, there may be some problem with the electrical circuit, lead couplers, etc. Stop the engine and allow it to cool off. Then, check that the wire harness couplers in - 2007 Yamaha Motorsports Attak GT | Owners Manual - Page 29
does not project out over the handlebar end. This will help prevent brake lever damage when the snowmobile is placed on its side for service. @ The brake lever is equipped with a position adjuster. To adjust the brake lever position: 1. Loosen the locknut 1. 2. While lightly pushing the brake lever - 2007 Yamaha Motorsports Attak GT | Owners Manual - Page 30
A ESU00035 Parking brake lever When parking the snowmobile or starting the engine, apply the parking brake by moving the brake lever 1 to the left. To release the parking brake, move the parking brake lever 1 to the right. B È To apply the parking brake É To release the parking brake WARNING @ G - 2007 Yamaha Motorsports Attak GT | Owners Manual - Page 31
ESU00039 Headlight beam switch Push the headlight beam switch to change the headlight beam to high or low. 1 2 3 4 Headlight beam switch Push High beam Low beam ESU04301 Auxiliary DC jack The auxiliary DC jack is located in the front panel and can be used for accessories. NOTE: @ The auxiliary - 2007 Yamaha Motorsports Attak GT | Owners Manual - Page 32
G G @ Do not drive the snowmobile with the shroud or covers unfastened or removed. Keep your body and clothing away from rotating parts when servicing the snowmobile with the shroud or covers removed. Do not touch the hot muffler and engine during or immediately after operation. CAUTION: @ Make - 2007 Yamaha Motorsports Attak GT | Owners Manual - Page 33
V-belt holders provided. CAUTION: @ Make sure that the V-belt is installed securely in the holders. @ ESU00680 Storage compartment Open the storage compartment to store the service tools, spare parts, or other small items. 5-15 - 2007 Yamaha Motorsports Attak GT | Owners Manual - Page 34
ESU00072 6- PRE-OPERATION CHECKS NOTE: @ Pre-operation checks should be made each time the snowmobile is used. @ WARNING @ The engine and muffler will be very hot after the engine has been run. Avoid touching the engine and muffler while they are still hot with any part of your body or - 2007 Yamaha Motorsports Attak GT | Owners Manual - Page 35
CAUTION: @ G G G G @ Oxygenated fuels (gasohol) containing a maximum 5% of ethanol can be used, although richer jetting may be required to prevent engine damage. Consult a Yamaha dealer. Gasohol containing methanol is not recommended. Make sure that snow or ice does not enter the fuel tank when - 2007 Yamaha Motorsports Attak GT | Owners Manual - Page 36
ESU04581 Engine oil level The engine oil level should be checked before each use. CAUTION: @ Do not run the engine with too much or not enough oil in the oil tank. Oil could flow into the air filter case and the engine could be damaged. @ Checking the engine oil level 1. Place the snowmobile on - 2007 Yamaha Motorsports Attak GT | Owners Manual - Page 37
CAUTION: @ G G @ When adding the engine oil, be careful not to fill above the "H" level mark on the oil level gauge/dipstick. Make sure that no foreign material enters the engine oil tank. 7. Insert the oil level gauge/dipstick into the oil filler hole, and then tighten it securely. 8. Connect - 2007 Yamaha Motorsports Attak GT | Owners Manual - Page 38
ESU00087 Throttle lever Check the throttle lever operation before starting the engine. The throttle lever must open smoothly and spring back to its home position when released. ESU00090 Throttle override system (T.O.R.S.) Check the T.O.R.S. for proper operation. WARNING @ When checking T.O.R.S.: - 2007 Yamaha Motorsports Attak GT | Owners Manual - Page 39
WARNING @ G G A soft, spongy feeling in the brake lever indicates a failure in the brake system. Do not operate the snowmobile if you find any problems in the brake system. You could lose braking ability, which could lead to an accident. Ask a Yamaha dealer to inspect and repair the brake system - 2007 Yamaha Motorsports Attak GT | Owners Manual - Page 40
ESU00093 Brake fluid leakage Apply the brake for a few minutes. Check to see if any brake fluid leaks out from the brake hose joints or the master cylinder. WARNING @ If brake fluid leakage is found, ask a Yamaha dealer for immediate repairs. @ CAUTION: @ Brake fluid may deteriorate painted - 2007 Yamaha Motorsports Attak GT | Owners Manual - Page 41
ESU00097 Drive track Check the drive track for deflection, wear, or damage. Adjust or replace if necessary. (See pages 8-28-8-30 for more details.) WARNING @ Do not operate the snowmobile if you find damage to the drive track, or if it has been maladjusted. Drive track damage or failure could - 2007 Yamaha Motorsports Attak GT | Owners Manual - Page 42
ESU01020 Skis and ski runners Check the skis and ski runners for wear and damage. Replace if necessary. Ski runner wear limit a: 8 mm (0.31 in) Ski wear limit b: 12 mm (0.47 in) CAUTION: @ Avoid scratching the skis when loading and unloading the snowmobile, when riding in areas with little or no - 2007 Yamaha Motorsports Attak GT | Owners Manual - Page 43
ESU04601 Air filter Always check that there is no snow under the air filter element frame. 1. Remove the shroud. (See pages 8-5-8-7 for removal procedures.) 2. Unhook the air filter case cover fasteners. 3. Remove the headlight unit bolts and the two top cover bolts near the headlight unit. 4. - 2007 Yamaha Motorsports Attak GT | Owners Manual - Page 44
ESU00110 Fittings and fasteners Check the tightness of the fittings and fasteners. Tighten in proper sequence and torque if necessary. ESU00345 Tool kit and recommended equipment It is good practice to carry the tool kit, spare parts, and other necessary equipment with you while riding the - 2007 Yamaha Motorsports Attak GT | Owners Manual - Page 45
ESU00112 7- OPERATION ESU04640 Starting the engine WARNING @ G G @ Be sure to check the "SAFETY INFORMATION" section carefully before starting the engine. Make sure that the parking brake is applied. NOTE: @ Make sure that the engine stop switch is in the on position. The starter motor - 2007 Yamaha Motorsports Attak GT | Owners Manual - Page 46
operated normally. CAUTION: @ G G After 800 km (500 mi) of operation, the engine oil must be changed and the oil filter cartridge replaced. If any engine trouble should occur during the engine break-in period, immediately have a Yamaha dealer check the snowmobile. @ 7-2 - 2007 Yamaha Motorsports Attak GT | Owners Manual - Page 47
riding safely. Before operating the snowmobile, read this Owner's Manual completely and understand the operation of the controls. Pay particular 's handling and performance characteristics. Set the parking brake and follow the instructions on page 7-1 to start the engine. Once the engine has warmed - 2007 Yamaha Motorsports Attak GT | Owners Manual - Page 48
Turning Riding uphill For most snow surfaces, "body English" is the key to turning. As you approach a curve, slow down and begin to turn the handlebar in the desired direction. As you do so, put your weight on the running board to the inside of the turn and lean your upper body into the turn. This - 2007 Yamaha Motorsports Attak GT | Owners Manual - Page 49
Riding downhill When riding downhill, keep speed to a minimum. It is important to apply just enough throttle to keep the clutch engaged while descending the hill. This will allow you to use engine compression to help slow the snowmobile, and to keep the snowmobile from rolling freely down the hill. - 2007 Yamaha Motorsports Attak GT | Owners Manual - Page 50
Hard-packed snow It can be more difficult to negotiate on hard-packed snow as both the skis and drive track do not have as much traction as when the snowmobile is operated on fresh snow. Avoid rapid acceleration, turning, and braking. @ WARNING Drive track damage or failure could result in loss of - 2007 Yamaha Motorsports Attak GT | Owners Manual - Page 51
ESU00251 Maximizing drive track life Recommendations Track tension During initial break-in, the new drive track will tend to stretch quickly as the track settles. Be sure to correct the track tension and alignment frequently. (See pages 8-28-8-30 for adjustment procedures.) A loose track can slip ( - 2007 Yamaha Motorsports Attak GT | Owners Manual - Page 52
ESU04360 Driving WARNING @ Be sure to read the "SAFETY INFORMATION" and "Riding your snowmobile" sections carefully before operating the snowmobile. @ NOTE: @ Make sure that the engine is warmed up enough before riding. @ 1. To select the desired operating position, pull the shift lever out, - 2007 Yamaha Motorsports Attak GT | Owners Manual - Page 53
2. Release the parking brake by moving the parking brake lever to the right. 3. Press the throttle lever slowly to move the snowmobile. 4. Turn the handlebar in the desired direction. 5. Squeeze the brake lever to stop the snowmobile. 6. Apply the parking brake by moving the parking brake lever to - 2007 Yamaha Motorsports Attak GT | Owners Manual - Page 54
for you. @ PROPER PERIODIC MAINTENANCE OF YOUR SNOWMOBILE IS IMPORTANT IN ORDER TO ENJOY LONG, PLEASURABLE SERVICE. ESPECIALLY IMPORTANT ARE THE MAINTENANCE SERVICES RELATED TO EMISSIONS CONTROL. THESE SERVICES NOT ONLY ENSURE CLEANER AIR, BUT ARE ALSO VITAL TO PROPER ENGINE OPERATION AND MAXIMUM - 2007 Yamaha Motorsports Attak GT | Owners Manual - Page 55
speed. Adjust synchronization. Check for leakage. Tighten or replace gasket if necessary. G G G G G 8-9 ∗ It is recommended that these items be serviced by a Yamaha dealer. ESU04980 General maintenance and lubrication chart CD-32E Item Remarks Preoperation check (Daily) G Initial 1 month or - 2007 Yamaha Motorsports Attak GT | Owners Manual - Page 56
primary. ary clutches Inspect ramp shoes/bushings for wear-for secondary. Replace if necessary. Lubricate with specified grease. ∗ It is recommended that these items be serviced by a Yamaha dealer. G G 8-3 - 2007 Yamaha Motorsports Attak GT | Owners Manual - Page 57
. Check tightness. ∗ Repair if necessary. Check for proper placement. G G G 5-14, 8-5-8-7 6-11 6-11 ∗ It is recommended that these items be serviced by a Yamaha dealer. NOTE: @ Brake system: G After disassembling the master cylinder or caliper cylinder, always change the brake fluid. Regularly - 2007 Yamaha Motorsports Attak GT | Owners Manual - Page 58
that the tool kit is properly seated in its holder and is securely fastened. @ NOTE: @ If you do not have a torque wrench available during a service operation requiring one, take your snowmobile to a Yamaha dealer to check the torque settings and adjust them if necessary. @ ESU04502 Removing and - 2007 Yamaha Motorsports Attak GT | Owners Manual - Page 59
Remove the bolts, disconnect the main switch coupler and auxiliary DC jack coupler, and then remove the top cover. 1 2 3 4 Screws Cable guide Bolts Top cover To install the top cover 1. Connect the main switch coupler and auxiliary DC jack coupler, place the top cover in its original - 2007 Yamaha Motorsports Attak GT | Owners Manual - Page 60
unfastened or removed. Keep your body and clothing away from rotating parts when servicing the snowmobile with the shroud or covers removed. Do not touch the hot track air leak or carburetion problem for that cylinder. Do not attempt to diagnose such problems yourself. Instead, take the snowmobile - 2007 Yamaha Motorsports Attak GT | Owners Manual - Page 61
Spark plugs are produced in several different thread lengths. The thread length or reach is the distance from the spark plug gasket seat to the end of the threaded portion. If the reach is too long, overheating and engine damage may result. If the reach is too short, spark plug fouling and poor - 2007 Yamaha Motorsports Attak GT | Owners Manual - Page 62
ESU04830 Adjusting the engine idling speed CAUTION: @ G G @ Be sure to have a Yamaha dealer make this adjustment. Make sure that the throttle lever moves smoothly. 1. Remove the shroud, the left and right side covers, and the top cover. (See pages 8-5-8-7 for removal procedures.) 2. Start the - 2007 Yamaha Motorsports Attak GT | Owners Manual - Page 63
ESU04530 Adjusting the throttle cable 1. Remove the shroud. (See pages 8-5-8-7 for removal procedures.) 2. Remove the headlight unit bolts and the two top cover bolts near the headlight unit. 3. Disconnect the speedometer coupler and headlight couplers, and then remove the headlight unit. 4. Loosen - 2007 Yamaha Motorsports Attak GT | Owners Manual - Page 64
ESU04540 Adjusting the high-altitude settings Operating at high altitude reduces the performance of a gasoline engine about 3% for every 305 m (1,000 ft) of elevation. This is because there is less air as altitude increases. Less air means less oxygen available for combustion. Your snowmobile - 2007 Yamaha Motorsports Attak GT | Owners Manual - Page 65
ESU04593 Changing the engine oil It is recommended to have a Yamaha dealer change the engine oil. WARNING @ Engine oil is extremely hot immediately after the engine is turned off. Coming into contact with or getting any engine oil on your clothes could result in burns. @ CAUTION: @ G G G Do - 2007 Yamaha Motorsports Attak GT | Owners Manual - Page 66
8. Install the engine oil drain bolts, and then tighten them to the specified torques. Tightening torques: Crankcase engine oil drain bolt: 30 Nm (3.0 m·kgf, 22 ft·lb) Oil tank engine oil drain bolt: 16 Nm (1.6 m·kgf, 11 ft·lb) 9. Add 2.0 L (1.8 Imp qt, 2.1 US qt) of the recommended engine oil to - 2007 Yamaha Motorsports Attak GT | Owners Manual - Page 67
14. Install the bottom panel and the lower right side cover, and then install the right side cover and the shroud. CAUTION: @ If oil is leaking or the oil level warning indicator comes on when the engine is running, immediately turn the engine off and have a Yamaha dealer check the snowmobile. - 2007 Yamaha Motorsports Attak GT | Owners Manual - Page 68
Replenishing the coolant WARNING @ G G Do not remove the coolant reservoir cap when the engine is hot. Scalding hot fluid and steam may be blown out under pressure, which could cause serious injury. When the engine has cooled, place a thick rag or towel over the coolant reservoir cap, and slowly - 2007 Yamaha Motorsports Attak GT | Owners Manual - Page 69
4. Start the engine, allow it to idle for several minutes, and then turn it off. 5. Check the coolant reservoir. If it is not full, remove the coolant reservoir cap, fill the reservoir with the recommended coolant, and then install the cap. 6. Check for any coolant leakage. NOTE: @ If you find any - 2007 Yamaha Motorsports Attak GT | Owners Manual - Page 70
1. Remove the shroud and the left side cover. (See pages 8-5-8-7 for removal procedures.) 2. Remove the drive guard. 3. Rotate the secondary sliding sheave clockwise 1 and push 2 it so that it separates from the secondary fixed sheave. 4. Pull 3 the V-belt up over the secondary fixed sheave. 5. - 2007 Yamaha Motorsports Attak GT | Owners Manual - Page 71
7. If the position is incorrect, adjust the V-belt position by removing or adding a spacer 4 on each adjusting bolt 5. CD-06E V-belt position More than 1.5 mm (0.06 in) above the edge From 1.5 mm (0.06 in) above the edge to 0.5 mm (0.02 in) below the edge More than 0.5 mm (0.02 in) below the edge - 2007 Yamaha Motorsports Attak GT | Owners Manual - Page 72
ESU04611 Checking the drive chain housing oil level and the drive chain tension Checking the oil level WARNING @ The engine, oil tank, brake disc, and coolant hoses will be very hot after the engine has been run. Avoid contact while they are still hot with any part of your body or clothing during - 2007 Yamaha Motorsports Attak GT | Owners Manual - Page 73
Adjusting the chain tension 1. Remove the shroud and the right side cover. (See pages 8-5-8-7 for removal procedures.) 2. Loosen the locknut. 3. Turn the adjusting bolt clockwise until it is finger tight, and then loosen it 1/4 turn. 4. Hold the adjusting bolt in place while tightening the locknut. - 2007 Yamaha Motorsports Attak GT | Owners Manual - Page 74
1. Loosen the locknut 1 and the adjusting bolt 2. 2. Loosen the cable locknut 3. 3. Turn the cable adjuster 4 in or out to adjust the cable length. Cable length a: 43.5-46.5 mm (1.713-1.831 in) 4. Tighten the cable locknut. 5. Turn the adjusting bolt in or out to adjust the clearance between the - 2007 Yamaha Motorsports Attak GT | Owners Manual - Page 75
ESU01811 Changing the brake fluid Brake fluid replacement is necessary when the following components are replaced during the periodic maintenance or if they are damaged or leaking. a. All oil seals of the master cylinder and caliper cylinder b. The brake hose WARNING @ Make sure that the brake - 2007 Yamaha Motorsports Attak GT | Owners Manual - Page 76
WARNING @ This shock absorber contains highly pressurized nitrogen gas. It could explode by improper handling, causing injury, or property damage. G Do not tamper with or attempt to open the shock absorber. G Do not subject the shock absorber to an open flame or other high heat source, which could - 2007 Yamaha Motorsports Attak GT | Owners Manual - Page 77
Rebound damping force The rebound damping force of each ski shock absorber can be adjusted by turning the rebound damping force adjusting knob 2. CD-34E Adjusting knob position 20 clicks out Minimum 12 clicks out Standard ∗ 3 clicks out Maximum Turns out b Damping Soft Turns in a Hard ∗ With - 2007 Yamaha Motorsports Attak GT | Owners Manual - Page 78
ESU04670 Adjusting the rear suspension spring preload The rear suspension spring preload can be adjusted by turning the spring preload adjuster 1 on the shock absorber. A For RX10GT CD-17E Spring seat length* Preload È a Length (front) Standard Increased Harder Decreased → Softer Maximum - 2007 Yamaha Motorsports Attak GT | Owners Manual - Page 79
G G Do not deform or damage the shock absorber in any way. Do not dispose of a worn or damaged shock absorber by yourself. Take the unit to a Yamaha dealer. @ ESU05040 Adjusting the rear suspension damping forces Adjusting the compression damping force The compression damping force can be - 2007 Yamaha Motorsports Attak GT | Owners Manual - Page 80
ESU04680 Adjusting the control rod The weight transfer can be adjusted by turning the control rod adjuster or adjusting nut. 1. Loosen the locknut 1. 2. Turn the control rod adjuster 2 in direction a to increase weight transfer or direction b to decrease weight transfer. CD-27E Adjuster turning - 2007 Yamaha Motorsports Attak GT | Owners Manual - Page 81
to allow the drive track to spin, a suitable stand must be used to support the rear of the snowmobile. Never allow anyone to hold the rear of the is damaged to the depth where fabric reinforcement material is visible or support rods are broken. Otherwise, track damage or failure could result in - 2007 Yamaha Motorsports Attak GT | Owners Manual - Page 82
Adjusting the drive track WARNING @ G G G @ Be sure to have a Yamaha dealer make this adjustment. Support the snowmobile securely on a suitable stand before working underneath the snowmobile. Operate the engine in a well-ventilated area. 1. Lift the rear of the snowmobile onto a - 2007 Yamaha Motorsports Attak GT | Owners Manual - Page 83
CAUTION: @ The right and left adjusters should be turned to an equal amount. @ 6. Recheck alignment and deflection. If necessary, repeat steps 3 to 5 until the proper adjustment is achieved. 7. Tighten the rear axle nut. Rear axle tightening torque: 75 Nm (7.5 m·kgf, 54.2 ft·lb) ESU02001 - 2007 Yamaha Motorsports Attak GT | Owners Manual - Page 84
ESU00371 Lubrication Lubricate the following points. Lubricant: Low-temperature grease 1 Throttle cable end 2 @ WARNING Apply a dab of grease onto the cable end only. Do not grease the throttle cable because it could become frozen, which could cause loss of control. @ 2 Front suspension 3 Rear - 2007 Yamaha Motorsports Attak GT | Owners Manual - Page 85
ESU04560 Replacing a headlight bulb 1. Remove the top cover. (See pages 8-5-8-7 for removal procedures.) 2. Remove the screws, and then remove the headlight access panel. 3. Disconnect the headlight coupler. 4. Remove the bulb holder cover. 5. Unhook the bulb holder by pushing it in, then clockwise - 2007 Yamaha Motorsports Attak GT | Owners Manual - Page 86
ESU04661 Adjusting the headlight beams 1. Remove the top cover. (See pages 8-5-8-7 for removal procedures.) 2. Use a Phillips screwdriver to turn the headlight beam adjuster 1 and adjust the headlight beams. Headlight beam movement: a Down b Up 3. Install the top cover. ESU00355 Battery This - 2007 Yamaha Motorsports Attak GT | Owners Manual - Page 87
ESU05050 Replacing a fuse WARNING @ Be sure to use the specified fuse. A wrong fuse could cause electrical system damage or A FIRE HAZARD. @ CAUTION: @ Be sure to turn the main switch to "OFF" and disconnect the negative battery lead to prevent accidental short-circuiting. @ 1. Remove the - 2007 Yamaha Motorsports Attak GT | Owners Manual - Page 88
9. Replace the blown fuse with one of the proper amperage. Specified fuses: 0Main fuse: AFuel injection system fuse: B"HEAD" (Headlight) fuse: C"SIG" (Signal) fuse: D"DC TERM" (Auxiliary DC jack) fuse: E"IGN" (Ignition) fuse: F"BACK UP" (Backup) fuse: G"FAN" (Radiator fan) fuse: H"ECS" ( - 2007 Yamaha Motorsports Attak GT | Owners Manual - Page 89
ESU04720 9- TROUBLESHOOTING A. Engine turns over but does not start 1. Fuel system No fuel supplied to combustion chamber G No fuel in tank ...Supply fuel. G Clogged fuel line ...Clean - 2007 Yamaha Motorsports Attak GT | Owners Manual - Page 90
2. Remove the shroud and the right side cover. (See pages 8-5-8-7 for removal procedures.) 3. Remove the red (+) connecting lead from the lead holder and move it away from the black (-) connecting lead. 5. Connect the other end of the red (+) jumper cable to the positive (+) terminal of the booster - 2007 Yamaha Motorsports Attak GT | Owners Manual - Page 91
8. Start the engine. 9. Disconnect the black (-) jumper cable from the black (-) connecting lead, and then pull the cover completely over the lead terminal. 10. Disconnect the black (-) jumper cable from the negative (-) terminal of the booster battery. 11. Disconnect the red (+) jumper cable from - 2007 Yamaha Motorsports Attak GT | Owners Manual - Page 92
...Ask a Yamaha dealer to inspect. I. V-belt slips or burns 1. Oily or dirty V-belt or primary and secondary sheave assembly surfaces ...Clean. 2. Problem with the driveline ...See H above. J. Engine does not upshift or downshift properly or engages harshly 1. Worn or damaged V-belt ...Replace the - 2007 Yamaha Motorsports Attak GT | Owners Manual - Page 93
ESU04742 10- STORAGE Long-term storage requires some preventive procedures to guard against deterioration. 1. Cleaning Thoroughly clean the snowmobile, inside and out, to remove the corrosive salts and acids that can accumulate. Use Yamaha Mud, Grease, and Engine Cleaner, or an equivalent product - 2007 Yamaha Motorsports Attak GT | Owners Manual - Page 94
use a plastic or vinyl cover-condensation could be trapped underneath which could increase the chances of rusting. Returning to service after storage When returning your snowmobile to service, install the V-belt and battery and adjust the drive track. Remove the spark plugs and clean or replace them - 2007 Yamaha Motorsports Attak GT | Owners Manual - Page 95
ESU00228 1- SPECIFICATIONS RX10GT/RXW10GT 2,805 mm (110.4 in): RX10GT 3,000 mm (118.1 in): RXW10GT 1,225 mm ( 48.2 in) 1,160 mm ( 45.7 in) 262 kg ( 578 lb): RX10GT 269 kg ( 593 lb): RXW10GT 1,086 mm ( 42.7 in) ESU00229 Dimensions CS-01E Overall length Overall width Overall height Dry weight Ski - 2007 Yamaha Motorsports Attak GT | Owners Manual - Page 96
ESU00231 Chassis CS-03E RX10GT/RXW10GT Drive track and suspension: Track Width Track deflection Molded rubber, fiber glass rod reinforced 381 mm (15.0 in) 30-35 mm (1.18-1.38 in)/ 100 N (10 kg, 22 lb): RX10GT 25-30 mm (0.98-1.18 in)/ 100 N (10 kg, 22 lb): RXW10GT 768 mm (30.2 in): RX10GT 960 mm ( - 2007 Yamaha Motorsports Attak GT | Owners Manual - Page 97
ESU00232 Electric CS-04E Ignition system Spark plug Battery Headlight Tail/brake light Meter light Indicator light Type Gap Capacity Maximum charge rate Bulb × Quantity Bulb × Quantity Bulb × Quantity Bulb × Quantity RX10GT/RXW10GT TCI R CR9EB (NGK) 0.7-0.8 mm (0.028-0.031 in) YTX14-BS 12 V 12 - 2007 Yamaha Motorsports Attak GT | Owners Manual - Page 98
ESU00233 1- WIRING DIAGRAM R/ W R/W B W (BLACK) (BLACK) Br B O (10A) Gy B/ L K L O R/ W (BLACK) B/L Gy Y/ L Y/L G W W R/ W Gy/R Gy/R O R/ W G O/G R/ W O Gy/R O/G G Gy B 1 H I B B G Br/Y Br/Y R/Y L/ W WWW WWW WWW Br/Y Y/ R G/ Y L/R Br/L Lg B R/B O L/B O/G B G/B Gy/R O/B G Y Br/ W B/Y W O/ - 2007 Yamaha Motorsports Attak GT | Owners Manual - Page 99
1 2 3 4 5 6 7 8 9 0 A B C D E F G H \ ] _ a b c d e f g h i j k l m n o p q r s Brake light switch Tail/brake light Fuel sender Oil level switch Meter assembly Meter light High beam indicator light Low coolant temperature indicator light Warning light Headlight relay Headlight Headlight beam switch - 2007 Yamaha Motorsports Attak GT | Owners Manual - Page 100
-MEMO- - 2007 Yamaha Motorsports Attak GT | Owners Manual - Page 101
- 2007 Yamaha Motorsports Attak GT | Owners Manual - Page 102
YAMAHA MOTOR CO., LTD. PRINTED ON RECYCLED PAPER PRINTED IN JAPAN 2006.05-1.2×1 CR (E)
-
 1
1 -
 2
2 -
 3
3 -
 4
4 -
 5
5 -
 6
6 -
 7
7 -
8
-
9
-
10
-
11
-
12
-
13
-
14
-
15
-
16
-
17
-
18
-
19
-
20
-
21
-
22
-
23
-
24
-
25
-
26
-
27
-
28
-
29
-
30
-
31
-
32
-
33
-
34
-
35
-
36
-
37
-
38
-
39
-
40
-
41
-
42
-
43
-
44
-
45
-
46
-
47
-
48
-
49
-
50
-
51
-
52
-
53
-
54
-
55
-
56
-
57
-
58
-
59
-
60
-
61
-
62
-
63
-
64
-
65
-
66
-
67
-
68
-
69
-
70
-
71
-
72
-
73
-
74
-
75
-
76
-
77
-
78
-
79
-
80
-
81
-
82
-
83
-
84
-
85
-
86
-
87
-
88
-
89
-
90
-
91
-
92
-
93
-
94
-
95
-
96
-
97
-
98
-
99
-
100
-
101
-
102
 |
 |

OWNER’S MANUAL
SNOWMOBILE
RX10GTW
RXW10GTW
8GD-28199-11
LIT-12628-02-54