2006 Yamaha Motorsports SXVenom Owners Manual - Page 62
2006 Yamaha Motorsports SXVenom Manual

Page 62 highlights
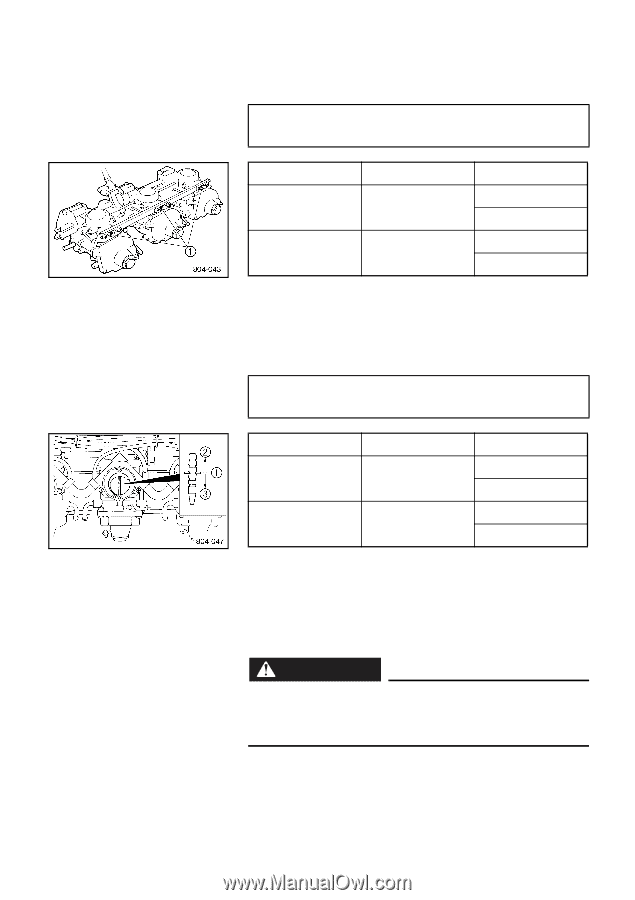
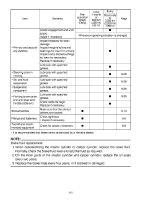
Adjusting a pilot screw Turn the pilot screw in or out to adjust the low speed tuning. Standard pilot screw position: 2.0 turns out from the seated position. CD-02E Pilot screw 1 Mixture Lean Rich Condition Warm weather High altitude Cold weather Low altitude Turn in Turn out Adjusting a jet needle Adjust the jet needle by changing its clip position according to the setting chart which is available at a Yamaha dealer. Standard jet needle clip 1 position: 3rd groove from upper end CD-03E Clip position Mixture Lean Rich Condition Warm weather High altitude Cold weather Low altitude 2 Upper end 3 Lower end 1. Remove the top cover from the carburetor. 2. Change the jet needle clip to the proper position. Make sure that the plastic washer is in place below the clip. 3. Assemble by reversing the removal steps. WARNING @ Make sure that the throttle outer cable is firmly seated in the holder and the throttle operates smoothly after assembling the carburetors. @ 8-8
-
 1
1 -
2
-
3
-
4
-
5
-
6
-
7
-
8
-
9
-
10
-
11
-
12
-
13
-
14
-
15
-
16
-
17
-
18
-
19
-
20
-
21
-
22
-
23
-
24
-
25
-
26
-
27
-
28
-
29
-
30
-
31
-
32
-
33
-
34
-
35
-
36
-
37
-
38
-
39
-
40
-
41
-
42
-
43
-
44
-
45
-
46
-
47
-
48
-
49
-
50
-
51
-
52
-
53
-
54
-
55
-
56
-
 57
57 -
 58
58 -
 59
59 -
 60
60 -
 61
61 -
 62
62 -
 63
63 -
 64
64 -
 65
65 -
 66
66 -
 67
67 -
68
-
69
-
70
-
71
-
72
-
73
-
74
-
75
-
76
-
77
-
78
-
79
-
80
-
81
-
82
-
83
-
84
-
85
-
86
-
87
-
88
-
89
-
90
-
91
-
92
-
93
-
94
 |
 |