WestBend 41091R Instruction Manual - Page 19
Extend, Guidelines, Decorative, Crust, Treatment
 |
View all WestBend 41091R manuals
Add to My Manuals
Save this manual to your list of manuals |
Page 19 highlights
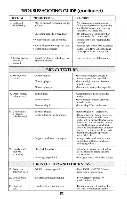
AV13G 31A111 CAUTION: To prevent personal injury, do not touch cover, vent or side walls of bread maker during the bake cycle as these surfaces are hot. Do not put hands inside oven chamber or touch the heating unit after completion of the bake cycle as these surfaces are also hot. EXTEND RISE GUIDELINES Use the following as a guide as to whether or not you should extend the rise period when the alert sounds near the end of the final rise period, before the bake cycle begins. For 1'/2 pound loaves, the dough should be about 14/ -inch below to just below the top edge of pan in the center when the alert sounds. (The dough in the ends of the pan will be lower.) For 2 pound loaves, the dough should be about 12/ -inch below to just above the top edge of pan in the center when alert sounds. (The dough in the ends of the pan will be lower.) If the dough is below these guidelines for the respective loaf size, extend the rise by 10 or 20 minutes depending on the relationship in height. Pressing the extend rise button once will extend the rise 10 minutes. Pressing the button again will extend the rise 20 minutes. The selected time will appear in display. Typically, the dough will rise about '/4-inch in 10 minutes. If you wish to cancel out any remaining extend rise time to initiate baking faster, simply hold the extend rise button down until the word EXTEND disappears from display. The bake cycle will then begin. SPECIAL NOTE: DO NOT extend the rise if the dough is within the ranges given above, as the dough will continue to rise during the initial part of the bake cycle and can actually rise an additional 1 to 112/ inches. This will prevent the bread from baking into the top of the bread maker. If the dough does bake into the top of bread maker, open door and poke with a toothpick in several places. The top of the crust will not be perfect as a result of this, but it will ensure that the crust browns on top. At the end of the final (3rd) rise, five (5) minutes before the bake cycle begins, an audible alert will sound to remind you to both check the height of the dough and to extend the rise if needed, and also to perform any crust treatment if desired. If you wish to treat the crust, simply open the door, unlock pan and carefully remove bread pan from bread maker using oven mitts. Handle pan gently to prevent dough from collapsing. DO NOT TURN BREAD MAKER OFF TO PERFORM CRUST TREATMENT. Slash top of dough with a sharp knife, about '/4 to '/2 inch deep for desired design. See Diagram 18 below for ideas. Gently brush surface of dough with oil or melted butter and sprinkle with seeds, herbs, coarse salt or grated Parmesan or Romano cheese or other desired topping that will not melt during the bake cycle. Carefully return pan to bread maker using oven mitts, making sure it is locked securely in place. Close door. Bread will begin to bake shortly. Crusts can also be decorated after baking. For a dusted top, simply sprinkle flour or powdered sugar over top of crust after loaf is removed from bread pan. No buttering or oiling is necessary. Or, brush top crust with melted butter and sprinkle with desired seed, herbs, coarse salt or grated cheese. Bread can also be iced if desired such as raisin bread. Allow bread to cool 30 minutes on rack before drizzling with icing or frosting with thick icing. These are just a few suggestions you may wish to try. Let your imagination create some more ideas. ( Slashed Top Butter Split Top DECORATIVE CRUST TREATMENT For a special touch, you can create breads with decorative crusts, whether slashed or slit or just oiled and sprinkled with some seeds or herbs. Follow these guidelines for adding a decorative touch to the crust before baking begins: Tic-Tac-Toe Top Diagram 18 XSlashed Top 18
-
 1
1 -
2
-
3
-
4
-
5
-
6
-
7
-
8
-
9
-
10
-
11
-
12
-
13
-
 14
14 -
 15
15 -
 16
16 -
 17
17 -
 18
18 -
 19
19 -
 20
20 -
 21
21 -
 22
22 -
 23
23 -
 24
24 -
25
-
26
-
27
-
28
-
29
-
30
-
31
-
32
-
33
-
34
-
35
-
36
-
37
-
38
-
39
-
40
-
41
-
42
-
43
-
44
-
45
-
46
-
47
-
48
 |
 |
