Weed Eater LB 20V Owner Manual - Page 10
Assembly, Awarning
 |
View all Weed Eater LB 20V manuals
Add to My Manuals
Save this manual to your list of manuals |
Page 10 highlights
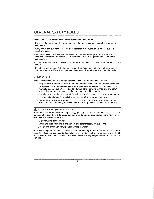
ASSEMBLY AWARNING To avoid injury and to reduce the risk of electrical shock or fire: • Replace the battery pack or charger immediately If the battery case or charger cord is damaged. • Always make sure the sweeper switch is OFF before inserting or removing the battery pack. • Always make sure the battery pack is removed and the switch turned OFF, before inspecting, adjusting, or maintaining any other part of the sweeper. • Read, understand, and follow the Battery Charger instructions. NOZZLES (See Figure 3.) The two nozzles extend the reach of the sweeper. FOR SWEEPING (See Figure 3.) 1. Align the widest end of the large nozzle (1) over the front opening on the sweeper (2). 2. Slide the nozzle over the sweeper outlet opening until latch on sweeper inserts engages into the opening on the sweeper nozzle. 3. Insert the smaller tapered nozzle (3) onto the large nozzle until latch on sweeper inserts into end nozzle opening and locks into place. 0 2 1 O 3 Fig. 3 10
-
 1
1 -
2
-
3
-
4
-
 5
5 -
 6
6 -
 7
7 -
 8
8 -
 9
9 -
 10
10 -
 11
11 -
 12
12 -
 13
13 -
 14
14 -
 15
15
 |
 |
