Vtech Star Wars First Order Stormtrooper Smartwatch White User Manual - Page 16
A Volume, B Brightness, C Date, D Time
 |
View all Vtech Star Wars First Order Stormtrooper Smartwatch White manuals
Add to My Manuals
Save this manual to your list of manuals |
Page 16 highlights
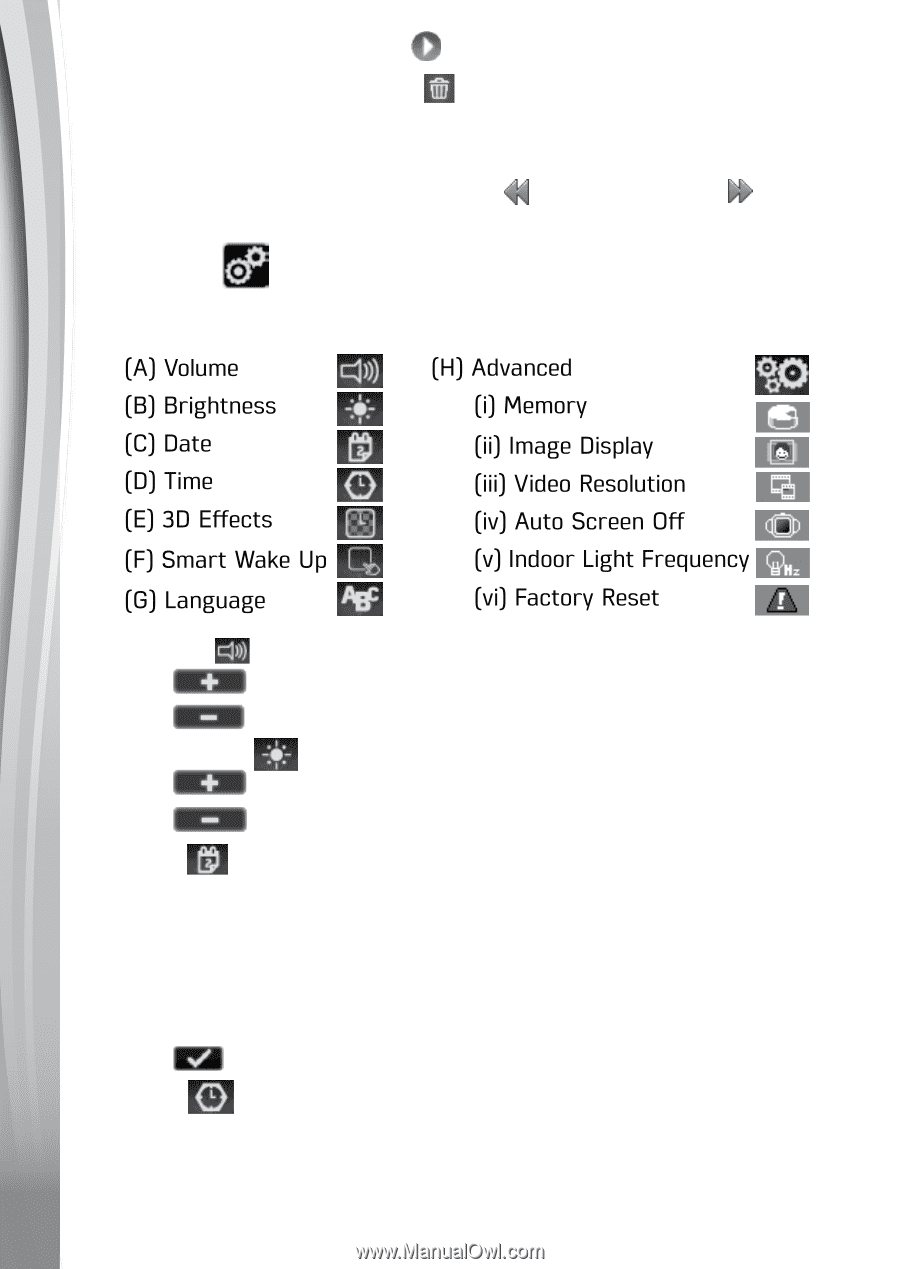
• Tap the on-screen Play icon to play the video. • Tap the on-screen Trash icon to display the delete menu. Note: To delete all photos and videos, press the down arrow while in the Delete menu. Then tap the checkmark to delete or the X to cancel. While playing a video, tap the Rewind or Fast Forward icons to toggle the rewind/fast forward speed. 12. Settings In Settings, swipe left or right on the screen to scroll through the different setting options. The following have options for adjustment: (A) Volume • Tap to increase the volume. • Tap to decrease the volume. (B) Brightness • Tap to increase the LCD brightness. • Tap to decrease the LCD brightness. (C) Date • Tap the Set icon to enter the Date Setup screen. • On the Date Setup screen, swipe up or down on the day, month and year to scroll through the options. • Tap the Date Format icon to change the date format (DD/MM/YYYY or MM/DD/YYYY). • Tap to save. (D) Time • Tap the Set icon to enter the Time Setup screen. • On the Time Setup screen, swipe up or down on the minutes, hours or AM/PM (if using the 12-hour clock) to scroll through the options. 16
-
 1
1 -
2
-
3
-
4
-
5
-
6
-
7
-
8
-
9
-
10
-
 11
11 -
 12
12 -
 13
13 -
 14
14 -
 15
15 -
 16
16 -
 17
17 -
 18
18 -
 19
19 -
 20
20 -
 21
21 -
22
-
23
-
24
-
25
-
26
 |
 |