Viking VQGFS5361 Installation / Use and Care Instructions - Page 25
Using Your Grill, Pre-grill Checklist
 |
View all Viking VQGFS5361 manuals
Add to My Manuals
Save this manual to your list of manuals |
Page 25 highlights
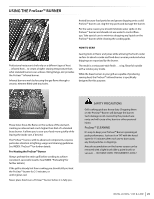
USING YOUR GRILL Grilling requires high heat for searing and low, controlled heat for slow cooking. Thinner cuts of food are often cooked at a "HI" heat setting with the lid open. On the other hand, large, thick pieces of meat or poultry are often first seared at the high setting and then grilled at a lower setting ... sometimes with the lid closed ... achieving the best results in the middle of the food without burning the outside. Some foods are cooked using direct heat and some using indirect heat. Your grill features a variety of professional-level burners and tools for meeting the wide variety of cooking challenges. We will reveal how these features work for you. So please read and enjoy! Depending on the model you chose, your grill may be equipped with up to three different burner types. The operation of each type varies, so it is important to understand all three. Main Brass Burner ProSear™ Burner This heavy-duty, durable brass burner is the standard main burner found under the briquette trays. This advanced infrared burner provides high-intensity infrared heat for searing foods and sealing in flavor. ProSear is a trademark of Viking Range LLC PRE-GRILL CHECKLIST Rotisserie Burner This infrared burner spans the back of the cooking surface and provides consistent heat for slow rotisserie cooking. BEFORE YOUR FIRST USE There are a few must-check safety precautions to consider before you use your grill. Please be sure that: • All packing materials and tie-downs have been removed from the burners. (See INDEX: "Unpacking & Assembly" for further details.) • You have fuel connected. (See INDEX: "Gas ments" for further details.) Require- • You have electric connected. (See INDEX: "Electric Requirements" for further details.) • A qualified plumber has performed a leak test on all the fittings that supply fuel to your grill. • IF YOUR GRILL DOES NOT LIGHT IN 4 TO 5 SECONDS you may need to purge the line. (See INDEX: "Purging the Gas Line" AT EACH NEW SEASON At the start of each new grilling season you should remove the grilling racks and check the burners, venturis, orifices and valves for obstructions. Spiders and insects often nest in these areas of the grill and can disrupt air flow, causing damage to the grill and personal injury. Also, check all hoses and fittings for damage, abrasion, wear and tear. | INSTALLATION / USE & CARE 25
-
 1
1 -
2
-
3
-
4
-
5
-
6
-
7
-
8
-
9
-
10
-
11
-
12
-
13
-
14
-
15
-
16
-
17
-
18
-
19
-
 20
20 -
 21
21 -
 22
22 -
 23
23 -
 24
24 -
 25
25 -
 26
26 -
 27
27 -
 28
28 -
 29
29 -
 30
30 -
31
-
32
-
33
-
34
-
35
-
36
-
37
-
38
-
39
-
40
-
41
-
42
-
43
-
44
 |
 |
