Vantec NST-D428S3-BK Datasheet
Vantec NST-D428S3-BK - NexStar® TX 3.5” USB 3.0 Hard Drive Dock Manual
 |
View all Vantec NST-D428S3-BK manuals
Add to My Manuals
Save this manual to your list of manuals |
Vantec NST-D428S3-BK manual content summary:
- Vantec NST-D428S3-BK | Datasheet - Page 1
. 2. Once safe removal has been complated, turn OFF the power on the NexStar TX Hard Drive Dock. 3. The Hard Drive may now be ejected and removed. v1.01 NST-D428S3-BK www.vantecusa.com Copyright © 2016 Vantec Thermal Technologies. All Right Reserved. | All Registered Trademarks Belong To Their
-
 1
1
 |
 |
Copyright © 2016 Vantec Thermal Technologies. All Right Reserved.
|
All Registered Trademarks Belong To Their Respective Companies.
Information in this document is subject to change without notice.
Reproduction of these materials in any manner whatsoever without written permission is strictly forbidden.
Printed in China
Printed on Recycled Paper.
v1.01
NST-D428S3-BK
www.vantecusa.com
Hard Drive Dock for Two 2.5”/3.5” SATA 6Gbps SSD/HDD
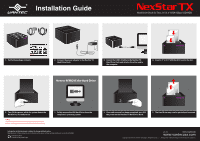
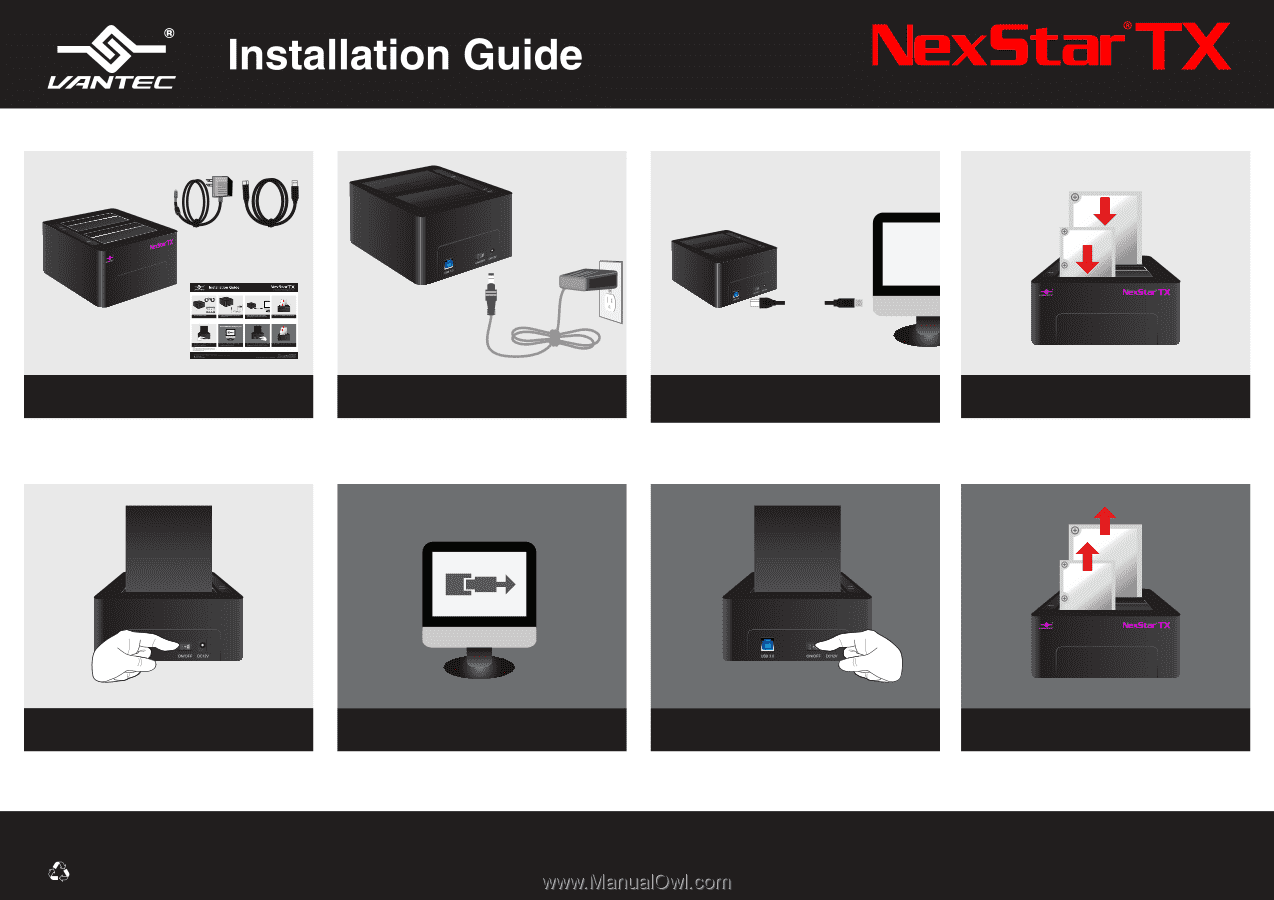
1.
Verify the package contents.
2.
Connect the power adapter to the NexStar TX
Hard Drive Dock.
3.
Connct the USB 3.0 Cable to the NexStar TX
Hard Drive Dock and attache the other end to
the computer.
USB Cable
1.
Safely remove the USB Hard Drive from the
computer’s operating system.
2.
Once safe removal has been complated, turn OFF
the power on the NexStar TX Hard Drive Dock.
4.
Insert 2.5” or 3.5” SATA Hard Drive into the slot.
3.
The Hard Drive may now be ejected and removed.
5.
Turn ON the power, while the system detect the
Hard Drive, it’s ready to use.
How to REMOVE the Hard Drive
NOTE:
New hard drives needs to be initialized and partitioned
before it will appear in Windows Explorer or Mac desktop.