Sony SDM-X202 Operating Instructions - Page 13
Sony SDM-X202 Manual
 |
View all Sony SDM-X202 manuals
Add to My Manuals
Save this manual to your list of manuals |
Page 13 highlights
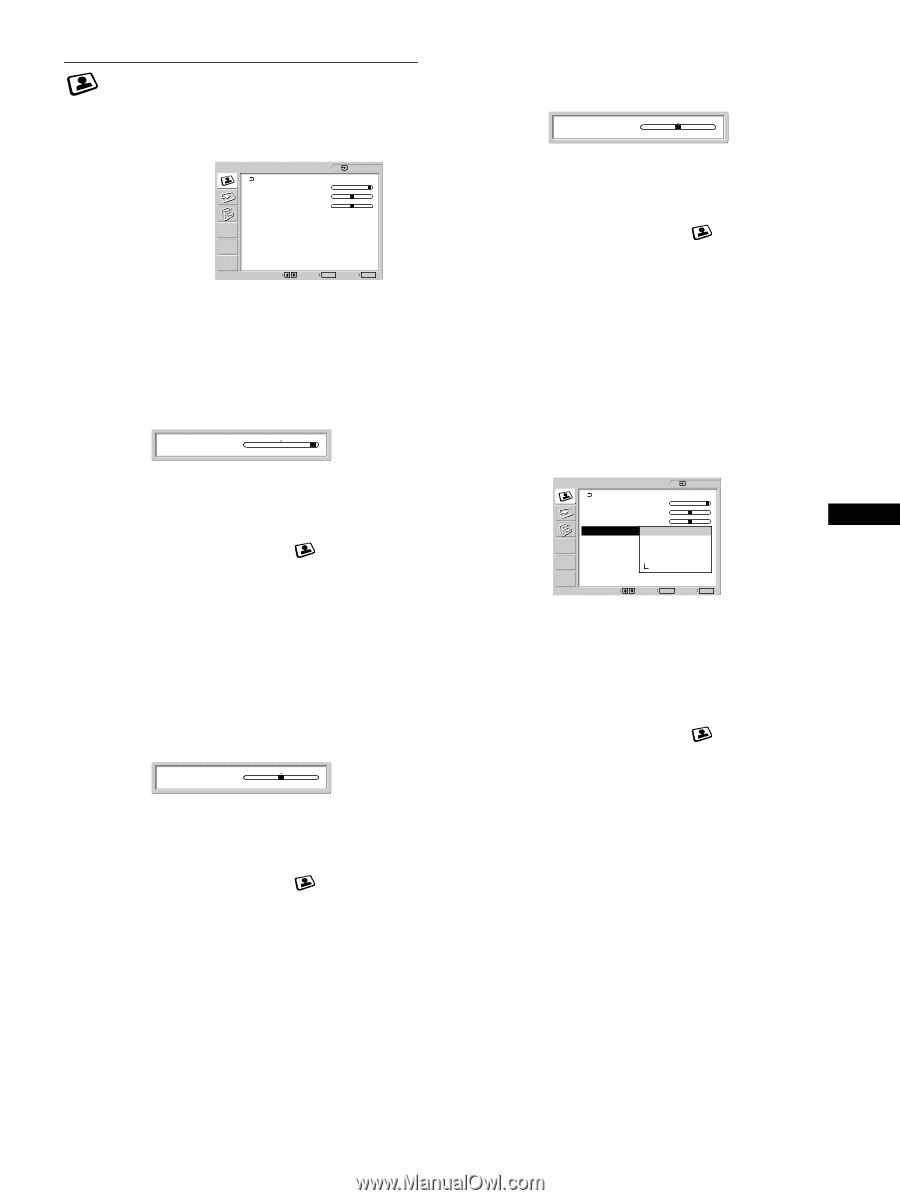
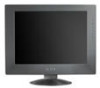
x Adjusting the Brightness PICTURE ADJUSTMENT menu You can adjust the following items using the PICTURE ADJUSTMENT menu Backlight Contrast Brightness Color Gamma Smoothing PICTURE ADJUSTMENT Backlight : Contrast : Brightness : Color : Gamma : Smoothing : 100 50 50 9300K Gamma2 Standard 1: HD15 Adjust the picture brightness (black level). Brightness : 50 1 Press the MENU button. The main menu appears on the screen. Press the M/m buttons to select (PICTURE ADJUSTMENT) and press the OK button. The PICTURE ADJUSTMENT menu appears on the screen. Press the M/m buttons to select "Brightness" and press the OK button. The "Brightness" adjustment menu appears on the screen. Press the M/m buttons to adjust the brightness. 2 1600 × 1200/60 Hz Select Set OK Exit MENU x Adjusting the Backlight If the screen is too bright, adjust the backlight to make the screen easier to see. Note The backlight cannot be adjusted when the ECO mode is set to "On" (page 19). Backlight : 100 3 4 x Adjusting the Color You can select the picture's color level for the white color field from the default color temperature settings. Also, if necessary, you can fine tune the color temperature. PICTURE ADJUSTMENT 1: HD15 100 50 50 9300K 6500K 5000K User Adjust 1600 × 1200/60 Hz Select Set OK 1 Press the MENU button. The main menu appears on the screen. Press the M/m buttons to select (PICTURE ADJUSTMENT) and press the OK button. The PICTURE ADJUSTMENT menu appears on the screen. Press the M/m buttons to select "Backlight" and press the OK button. The "Backlight" adjustment menu appears on the screen. Press the M/m buttons to adjust the light level. 2 Backlight : Contrast : Brightness : Color : Gamma : Smoothing : GB Exit MENU 3 Selecting the picture's color level for the white color field from the default color temperature settings 1 Press the MENU button. The main menu appears on the screen. Press the M/m buttons to select (PICTURE ADJUSTMENT) and press the OK button. The PICTURE ADJUSTMENT menu appears on the screen. Press the M/m buttons to select "Color" and press the OK button. The options are displayed on the popup menu. Press the M/m buttons to select the desired color temperature. Since the default setting is 9300K, the whites will change from a bluish hue to a reddish hue as the temperature is lowered to 6500K and 5000K. 4 x Adjusting the Contrast Adjust the picture contrast. Contrast : 50 2 3 1 Press the MENU button. The main menu appears on the screen. 4 2 Press the M/m buttons to select (PICTURE ADJUSTMENT) and press the OK button. The PICTURE ADJUSTMENT menu appears on the screen. Press the M/m buttons to select "Contrast" and press the OK button. The "Contrast" adjustment menu appears on the screen. Press the M/m buttons to adjust the contrast. 3 4 13
-
 1
1 -
2
-
3
-
4
-
5
-
6
-
7
-
 8
8 -
 9
9 -
 10
10 -
 11
11 -
 12
12 -
 13
13 -
 14
14 -
 15
15 -
 16
16 -
 17
17 -
 18
18 -
19
-
20
-
21
-
22
-
23
-
24
 |
 |