Sony LBT-XGR6 Operating Instructions - Page 14
Recording to a tape –– CD Synchro Recording/High Speed Dubbing/Recording Manually/Program Edit
 |
View all Sony LBT-XGR6 manuals
Add to My Manuals
Save this manual to your list of manuals |
Page 14 highlights
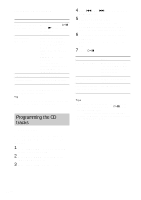
Recording to a tape -- CD Synchro Recording/High Speed Dubbing/Recording Manually/ Program Edit You can record from a CD, tape (or connected components) or radio. You can use TYPE I (normal) tape. The recording level is adjusted automatically. Steps Recording from a CD (CD Synchro Recording) Recording from a tape (High-Speed Dubbing) Recording Manually 1 Insert a recordable tape into deck B. 2 Insert the CD you want to record. Insert the tape you want to record into deck A. Press FUNCTION or TUNER/BAND repeatedly until the source or band you want to record appears, and then load the CD/ tape (or other music source), or tune to the station you want to record. 3 Press CD SYNC. Press H SPEED DUB. Press z REC. DECK B stands by for recording. When you want to record on the reverse side, press h. 4 Press DIRECTION repeatedly to select g to record on one side. Select j (or RELAY) to record on both sides. 5 Press X. Recording starts. Press X, then start playing the source to be recorded. To stop recording Press x. Tips • When you record on both sides, be sure to start from the front side. If you start from the reverse side, recording stops at the end of the reverse side. • For recording from the tape: If you set the direction to j when the tapes you use have different lengths, the tapes in each deck reverses independently. If you select RELAY, the tapes in both decks reverse together. • To record with the surround effect, press SURROUND so that "SUR " appears. The equalizer settings will not be recorded. • For recording from the radio: If noise is heard while recording from the radio, move the respective antenna to reduce the noise. 14GB
-
 1
1 -
2
-
3
-
4
-
5
-
6
-
7
-
8
-
 9
9 -
 10
10 -
 11
11 -
 12
12 -
 13
13 -
 14
14 -
 15
15 -
 16
16 -
 17
17 -
 18
18 -
 19
19 -
20
-
21
-
22
-
23
-
24
-
25
-
26
-
27
-
28
-
29
-
30
-
31
-
32
-
33
-
34
-
35
-
36
 |
 |
