Sharp XG-E3500U XG-E3500U Operation Manual - Page 13
Inverted Labeling for Ceiling Mount, Terminal Cover - projector lamp
 |
View all Sharp XG-E3500U manuals
Add to My Manuals
Save this manual to your list of manuals |
Page 13 highlights
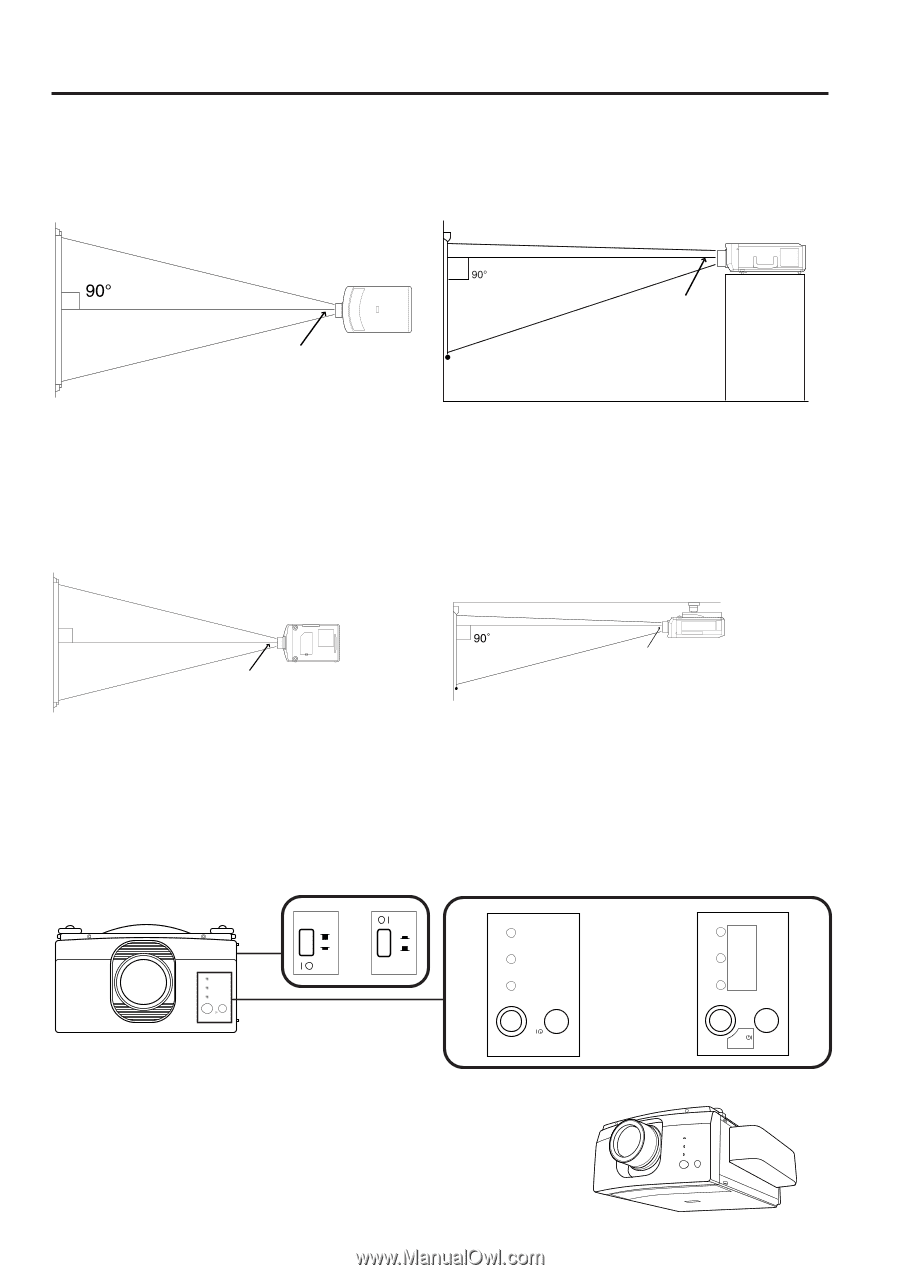
Example of a high-mount setup • A high-mount setup makes projection from an elevated location possible, without ceiling modifications. TOP VIEW SIDE VIEW Lens center Lens center Example of a ceiling-mount setup Before mounting the projector, be sure to contact your nearest Authorized Sharp Industrial LCD Products Dealer to obtain the manufacturer recommended ceiling mount bracket (sold separately). (AN-XGCM20 Ceiling Mount Bracket, AN-EP101AP Extension Tube). TOP VIEW SIDE VIEW 90˚ Lens center Lens center • If the relative positions of the projector and the screen are not properly adjusted, the picture will be distorted. Note: • A polarizing screen cannot be used with this projector. Inverted Labeling for Ceiling Mount • When ceiling mounting the projector, attach the supplied inverted label as shown. Front ON/OFF POWER LAMP TEMP. ON OFF ¬ ON OFF ¬ TEMP. LAMP POWER ON/OFF POWER LAMP TEMP. ON/OFF Terminal Cover • When the projector is ceiling mounted, attach the terminal cover (supplied) to hide the connecting cables. • Use the terminal cover to hide the connecting cables when the projector is used on a desktop or high mounted. E-13
-
 1
1 -
2
-
3
-
4
-
5
-
6
-
7
-
 8
8 -
 9
9 -
 10
10 -
 11
11 -
 12
12 -
 13
13 -
 14
14 -
 15
15 -
 16
16 -
 17
17 -
 18
18 -
19
-
20
-
21
-
22
-
23
-
24
-
25
-
26
-
27
-
28
-
29
-
30
-
31
-
32
-
33
-
34
-
35
-
36
-
37
-
38
 |
 |