Sharp PG-M10SL PG-M10SU , PG-M10XU Operation Manual - Page 37
Troubleshooting
 |
View all Sharp PG-M10SL manuals
Add to My Manuals
Save this manual to your list of manuals |
Page 37 highlights
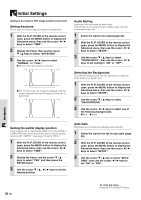
Troubleshooting Please check the following before requesting repairs. Problem Check Reference page The power will not turn on. • Is the power plug connected to the power outlet? • Is the lamp cover correctly installed? • Is the internal temperature too high? A protective feature prevents the power turning on when the internal temperature is too high. • Has the lamp usage time exceeded 1100 hours? The power will not turn on when 1100 hours have elapsed. 18 37 36 29, 36, 37 No image • Has the connected input been selected? • Are the cables correctly connected to the input terminals? • Are the brightness and contrast set to minimum? • Is the sliding lens cap closed? • Is the lamp blown? • Has the lamp usage time exceeded 1100 hours? • If a notebook type computer is being used, was the computer power turned on after the projector was connected? Is the computer set to disable output to the external COMPUTER input terminal? In many cases, when a notebook type computer is connected to the projector, a signal will not be output to the COMPUTER input terminal unless the computer power is turned on. • Does the STATUS indicator blink? 18, 20 15, 16 26 18 37 29, 36, 37 16, 17 36 Distorted images • Is installation correct? • Was the Keystone adjustment performed correctly? 18 22, 32 Blurred images • Is the lens properly focused? 19 • Are the screen and projector positioned at the correct angle? 18 • Does the projection distance place the screen outside the focus range? 13 • Is there condensation, dirt, etc., on the lens? - Condensation on the internal optical system is possible when the projector has been stored in a cool place and then is used in a warm place. In such cases, wait several minutes for the condensation to evaporate. • Is the unit's input terminal set for RGB data while projecting PC data? 31 Images are offset vertically or • Correctly adjust the horizontal and vertical position of the screen. 28 horizontally and are not correctly • Is the clock frequency correctly adjusted? 28 displayed • Are the resolution and frequency correct for the input signal? Check the 27 resolution of the personal computer. The remote control does not work • Does the send indicator (LED) light? If it does not light, the batteries are exhausted. In such cases, replace with fresh batteries. • Is there any obstacle between the remote control and the remote sensors of the main unit? • Is the remote control being used outside its effective range? • Is there a fluorescent light or other strong light source close to the remote sensors? 9, 12 9 9 - The wireless mouse control does • Is the MOUSE terminal of the main unit and the personal computer 21 not work correctly connected? • Was the personal computer started after being connected to the MOUSE 21 terminal of the main unit? The STATUS indicator blinks • Check the STATUS indicator list. 36 Flickering text or offset colors with • Manually adjust the clock frequency and phase. 28 COMPUTER input terminal • Press the AUTO SYNC button. Others 35
-
 1
1 -
2
-
3
-
4
-
5
-
6
-
7
-
8
-
9
-
10
-
11
-
12
-
13
-
14
-
15
-
16
-
17
-
18
-
19
-
20
-
21
-
22
-
23
-
24
-
25
-
26
-
27
-
28
-
29
-
30
-
31
-
 32
32 -
 33
33 -
 34
34 -
 35
35 -
 36
36 -
 37
37 -
 38
38 -
 39
39 -
 40
40 -
 41
41 -
 42
42 -
43
-
44
-
45
-
46
-
47
-
48
-
49
 |
 |