Samsung VS20R9045T3/AA User Manual - Page 17
OPERATION, Using the vacuum cleaner, Using the charging stand, Installation guide
 |
View all Samsung VS20R9045T3/AA manuals
Add to My Manuals
Save this manual to your list of manuals |
Page 17 highlights
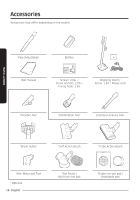
Installing the charging stand INSTALLATION Installation guide 2 'Click' 1 4 3 2 1 4 3 24 26 inches inches Assembling the charging stand 1 Place the stand pipe on the bottom support, and screw the pieces together using the included small screw. -- Make sure the pieces are aligned correctly and push it in firmly so that the screw hole is aligned. 2 Insert the vacuum charging part at the top of the stand pipe. -- Do not disassemble it after attaching it. 3 Connect the power cord to the rear of the charging stand. -- Hold the connection part of the cord and push it onto the connection pins firmly until the gray lines on the tip of the cord are not visible. -- To make it easier to place the stand directly against a wall, insert the cord into one of the grooves on the bottom of the bottom support. 4 Plug in the charging stand. Fixing by the hook 1 Using the fixing hook as a template, mark where the top and bottom screw holes will be placed on the wall. -- Top: 26 inches from the floor -- Bottom: 24 inches from the floor 2 Drill the holes using a 1/4 inch. drill bit, and put the provided screw anchors into the hole. 3 Fix the fixing hook to the wall with the provided screws (large). 4 Hook the groove of the charging stand into the fixing hook. ❇❇Please refer to the QR code for detailed information on the installation and charging method of the charging stand. English 17
-
 1
1 -
2
-
3
-
4
-
5
-
6
-
7
-
8
-
9
-
10
-
11
-
 12
12 -
 13
13 -
 14
14 -
 15
15 -
 16
16 -
 17
17 -
 18
18 -
 19
19 -
 20
20 -
 21
21 -
 22
22 -
23
-
24
-
25
-
26
-
27
-
28
-
29
-
30
-
31
-
32
-
33
-
34
-
35
-
36
-
37
-
38
-
39
-
40
-
41
-
42
-
43
-
44
-
45
-
46
-
47
-
48
-
49
-
50
-
51
-
52
-
53
-
54
-
55
-
56
-
57
-
58
-
59
-
60
-
61
-
62
-
63
-
64
-
65
-
66
-
67
-
68
 |
 |
