Roku 2050X Setup Guide - Page 1
Roku 2050X Manual
 |
View all Roku 2050X manuals
Add to My Manuals
Save this manual to your list of manuals |
Page 1 highlights
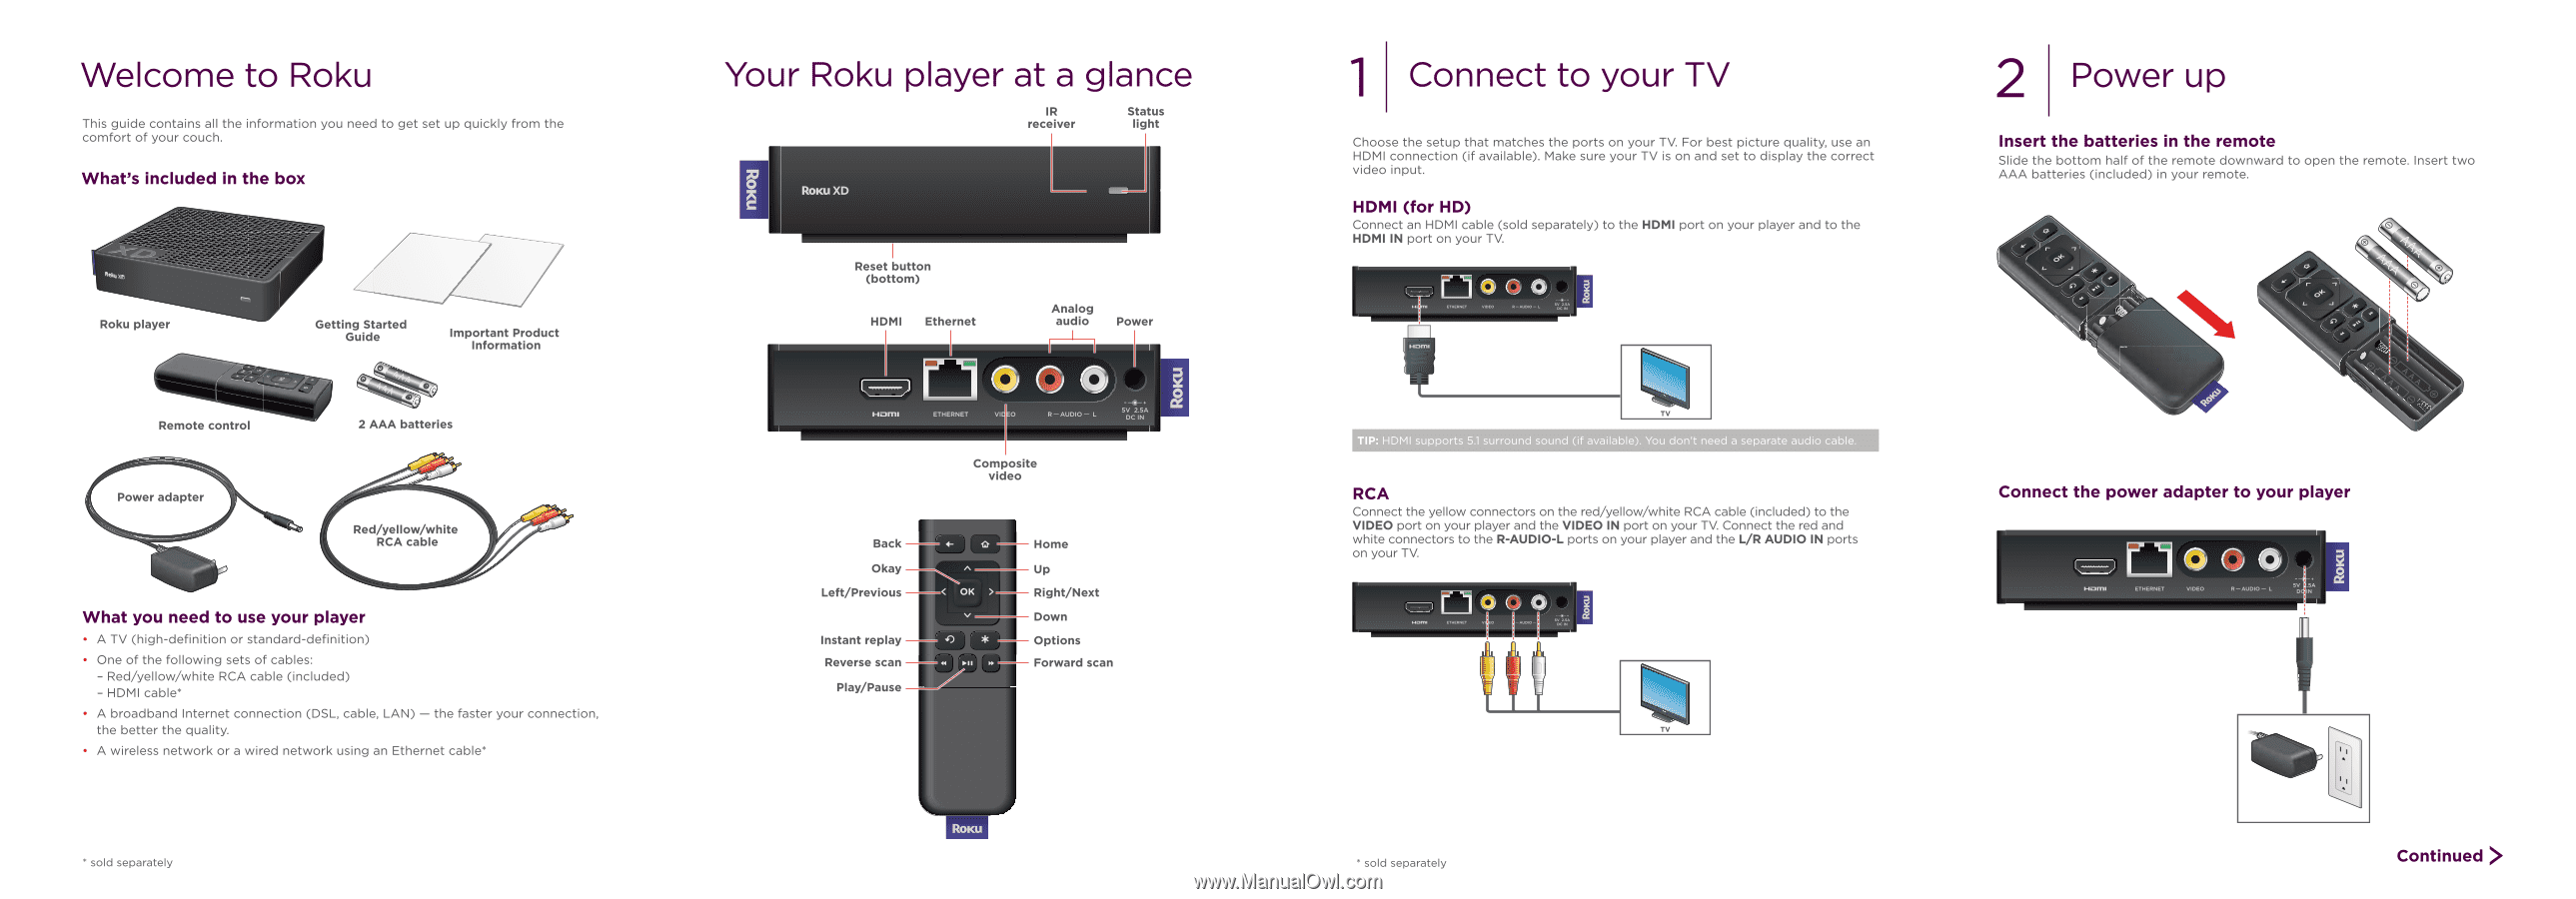
Welcome to Roku This guide contains all the information you need to get set up quickly from the comfort of your couch. What's included in the box R.ku Xc, Roku player Getting Started Guide Important Product Information Remote control 2 AAA batteries Power adapter Red/yellow/white RCA cable What you need to use your player • A TV (high-definition or standard-definition) • One of the following sets of cables: - Red/yellow/white RCA cable (included) - HDMI cable* • A broadband Internet connection (DSL, cable, LAN) - the faster your connection, the better the quality. • A wireless network or a wired network using an Ethernet cable* * sold separately Your Roku player at a glance IR receiver Status light Roku XD Reset button (bottom) HDMI Ethernet Analog audio Power HOITII ago ETHERNET VI' E0 R -AUDIO - L -ft-• cc 5V 2.5A DC IN Composite video Back Okay A Left/Previous I < OK > V Instant replay - Reverse scan cmi Play/Pause Home Up Right/Next Down Options Forward scan I 1 Connect to your TV Choose the setup that matches the ports on your TV. For best picture quality, use an HDMI connection (if available). Make sure your TV is on and set to display the correct video input. HDMI (for HD) Connect an HDMI cable (sold separately) to the HDMI port on your player and to the HDMI IN port on your TV. 04 0 nETHERNET VIDEO R-ADDIO- L sN TIP: HDMI supports 5.1 surround sound (if available). You don't need a separate audio cable. RCA Connect the yellow connectors on the red/yellow/white RCA cable (included) to the VIDEO port on your player and the VIDEO IN port on your TV. Connect the red and white connectors to the R-AUDIO-L ports on your player and the L/R AUDIO IN ports on your TV. MO.. ETHERNET VI 0 DC IN 2 Power up Insert the batteries in the remote Slide the bottom half of the remote downward to open the remote. Insert two AAA batteries (included) in your remote. a, r 04- 0 4a * S MN, Connect the power adapter to your player MORA ETHERNET 0 0 0 VIDEO R-AUDIO - L 5V .5A D' IN * sold separately Continued
-
 1
1 -
 2
2
 |
 |