Pyle PSPL41 PSPL41 Manual 1 - Page 4
Operating Instruction
 |
View all Pyle PSPL41 manuals
Add to My Manuals
Save this manual to your list of manuals |
Page 4 highlights
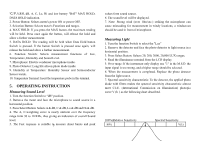
℃,℉,%RH, dB, A, C, Lo, Hi and low battery "BAT" MAX HOLD, DATA HOLD indication. 2. Power Button: Selects meter's power ON or power OFF. 3. Selection Button: Selects meter's Functions and ranges. 4. MAX HOLD: If you press the MAX button, the maximum reading will be held. Press once again the button, will release the hold and allow a further measurement. 5. DATA HOLD: The reading will be held when Data Hold button Switch is pressed. If the button Switch is pressed once again, will release the hold and allow a further measurement. 6. Function Switch: Selects measurement functions of Lux, Temperature, Humidity and Sound Level. 7. Microphone: Electric condenser microphone inside. 8. Photo Detector: Long life silicon photo diode inside. 9. Humidity at Temperature: Humidity Sensor and Semiconductor Sensor inside. 10. Temperature Terminal: Insert the temperature probe in this terminal. 5. OPERATING INSTRUCTION Measuring Sound Level 1. Turn the function Switch to "dB" position. 2. Remove the meter and face the microphone to sound source in a horizontal position. 3. Press Select Button: Selects A & dB, C & dB, Lo & dB and Hi & dB. 4. The A, C-weighting curve is nearly uniform over the frequency range form 30 to 10 KHz, thus giving an indication of overall Sound level. 5. The Fast response is suitable to5 measure shout bursts and peak values form sound source. 6. The sound level will be displayed. 7. Note: Strong wind (over 10m/sec.) striking the microphone can cause misreading for measurement in windy locations, a windscreen should be used in front of microphone. Measuring Light 1. Turn the function Switch to select the "Lux" 2. Remove the detector and face the photo detector to light source in a horizontal position. 3. Press Select Button: Selects 20, 200, 2000, 20,000 LUX ranges. 4. Read the illuminance nominal from the LCD display. 5. Over-range: If the instrument only display one "1" in the M.S.D. the input signal is too strong, and a higher range should be selected. 6. When the measurement is completed. Replace the photo detector from the light source. 7. Spectral sensitivity characteristic: To the detector, the applied photo diode with filters makes the spectral sensitivity characteristic almost meet C.I.E. (International Commission on Illumination) photopia curve V (λ ) as the following chart described. 100%(Relative Sensitivity 80% 6 Spectral Sensitivity V(λ)
-
 1
1 -
 2
2 -
 3
3 -
 4
4 -
 5
5 -
 6
6
 |
 |
