Panasonic WVCF354 WVCF344 User Guide - Page 10
Camera title setting [CAMERA ID
 |
View all Panasonic WVCF354 manuals
Add to My Manuals
Save this manual to your list of manuals |
Page 10 highlights
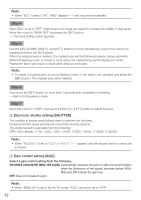
**CAMERA SETUP** SCENE2 ALC/ELC ALC SHUTTER OFF AGC ON(HIGH) Camera operation SENS UP WHITE BAL DNR OFF ATW1 HIGH setting [CAMERA SETUP] D&N(ELE) OFF VMD The followinCgOPsYe(tStCinENgEs1)related to camera actions can be configured on the "CAMERA SETUP" screen displaRyEeTdTfOrPomENDthe top screen. Refer to page 5-6 for how to call up the screen. The settings configured on the "CAMERA SETUP" screen will be saved as a scene file. 1 Register a scene file [SCENE1/SCENE2] It is possible to register 2 patterns of scene file. When different settings are to be applied between day and night, SCENE1 can be applied in the daytime and SCENE2 at night. Change between the scene files can be made by shortcut operation. ( page 27) "SCENE1" is set as the default setting. Screen when "SCENE1" is selected Screen when "SCENE2" is selected **CAMERA SETUP** SCENE1 ALC/ELC ALC SHUTTER OFF AGC ON(HIGH) SENS UP OFF WHITE BAL ATW1 DNR HIGH D&N(ELE) OFF VMD OFF RET TOP END **CAMERA SETUP** SCENE2 ALC/ELC ALC SHUTTER OFF AGC ON(HIGH) SENS UP OFF WHITE BAL ATW1 DNR HIGH D&N(ELE) OFF VMD COPY(SCENE1) RET TOP END Step 1 After confirming that "SCENE1" is selected, configure the settings of "ALC/ELC" through "VMD". ( page 11-18) To change the scene files, go to step 2. Step 2 Move the cursor to "SCENE1" and use the [right] or [left] button to select "SCENE2". → The screen changes and displays "SCENE2". Step 3 To configure the settings of "SCENE2" using the settings of "SCENE1", press the [SET] button after moving the cursor to "COPY(SCENE1)". → The settings of "SCENE1" will be copied to "SCENE2". Step 4 Edit the settings to be changed. The number displayed at the right side of the title on each setting screen indicates a scene file number. Step 5 Move the cursor to "SCENE2" and press the [right] or [left ] button to select "SCENE1" to resume normal operation. **ALC CONT**(1) BACK LIGHT COMP BLC OFF ABS ON Scene file number MASK SET LEVEL .I..... 0 - + RET TOP END 10
-
 1
1 -
2
-
3
-
4
-
 5
5 -
 6
6 -
 7
7 -
 8
8 -
 9
9 -
 10
10 -
 11
11 -
 12
12 -
 13
13 -
 14
14 -
 15
15 -
16
-
17
-
18
-
19
-
20
-
21
-
22
-
23
-
24
-
25
-
26
-
27
-
28
 |
 |
