Panasonic PTF100NTU PTF100NTU User Guide - Page 39
Security Menu, Input Password, Password Change, Text Display, Text Change
 |
View all Panasonic PTF100NTU manuals
Add to My Manuals
Save this manual to your list of manuals |
Page 39 highlights
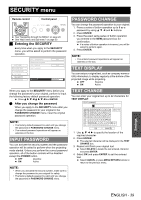
SECURITY menu Remote control Control panel See "Navigating through the MENU" on page 29. See "Main menu and Sub-menu" on page 30. J Entering the SECURITY Every time when you apply to the SECURITY menu, you will be asked to perform the password operation. INPUT PASSWORD OFF PASSWORD CHANGE PICTURE TEXT DISPLAY OFF POSITION TEXT CHANGE LANGUAGE OPTION SECURITY NETWORK PASSWORD PASSWORD CHANGE You can change the password operation to your original. 1. Press a series of button operation up to 8 as a password by using F G I and H buttons. 2. Press ENTER. 3. Press the exact same series of button operation you entered in the NEW password box for confirmation. If a series of button operation is incorrect, you will be asked to perform again. 4. Press ENTER. NOTE: • The entered password operations will appear as asterisks in the box. TEXT DISPLAY You can set your original text, such as company name or URL information, to display regularly at the bottom of the projected image while projecting. OFF Deactive ON Active When you apply to the SECURITY menu before you change the password to your original, perform to input the following factory default password operation. Press F H G I F H G I and ENTER. Q After you change the password When you apply to the SECURITY menu after you change the password to your original in the PASSWORD CHANGE menu, input the original password operation. TEXT CHANGE You can enter your original text up to 22 characters for TEXT DISPLAY. TEXT CHANGE DELETE NOTE: • The factory default password is valid until you change the password in PASSWORD CHANGE menu. • The entered password operations will appear as asterisks in the box. INPUT PASSWORD You can activate the security system and the password operation will be asked to perform when the projecting mode started. Unless you perform the correct password operation, all of the button controls will be disabled except the POWER button. OFF Deactive ON Active NOTE: • When you activated the security system, make sure to change the password to your original for safety. • The factory default password is valid until you change the password in PASSWORD CHANGE menu. OK CANCEL 1. Use F G I H to specify the location of the required character. 2. Press ENTER. The selected character will be displayed in the TEXT CHANGE box. 3. Repeat until finish your original text. Select DELETE to delete the last entered character and press ENTER. 4. Select OK and press ENTER to set the entered text. Select CANCEL or press MENU/RETURN buttons to return to the previous menu. Settings ENGLISH - 39
-
 1
1 -
2
-
3
-
4
-
5
-
6
-
7
-
8
-
9
-
10
-
11
-
12
-
13
-
14
-
15
-
16
-
17
-
18
-
19
-
20
-
21
-
22
-
23
-
24
-
25
-
26
-
27
-
28
-
29
-
30
-
31
-
32
-
33
-
 34
34 -
 35
35 -
 36
36 -
 37
37 -
 38
38 -
 39
39 -
 40
40 -
 41
41 -
 42
42 -
 43
43 -
 44
44 -
45
-
46
-
47
-
48
-
49
-
50
-
51
-
52
-
53
-
54
-
55
-
56
-
57
-
58
-
59
-
60
-
61
-
62
-
63
-
64
-
65
-
66
 |
 |
