Panasonic AJSDC915P AJSDC915 User Guide - Page 54
Operations on SUB menus, Selecting the desired item, Changing the settings
 |
View all Panasonic AJSDC915P manuals
Add to My Manuals
Save this manual to your list of manuals |
Page 54 highlights
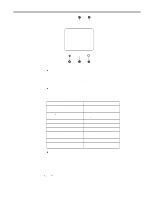
Displaying Menus on the Viewfinder Screen Operations on SUB menus Selecting the desired item 1 Press the SHIFT/ITEM button. Each time this button is pressed, the cursor (arrow) which indicates the selected item moves to the next item. Cursor Movement order ¢| RO P { †MA S T E R P E D : MAS TER DT L : MA S T E R GAMMA : R GA I N : B GA I N : R PEDESTAL : G PEDESTAL : B PEDESTAL : µ0 0 0 µ0 0 0 . 45 µ0 0 0 µ0 0 0 µ0 0 0 µ0 0 0 µ0 0 0 The item can also be selected using the UP and DOWN buttons as follows. Changing the settings Press the UP button to increase the setting. ÁThe setting is incremented by 1 level each time the UP button is pressed. Press the DOWN button to decrease the setting. ÁThe setting is decremented by 1 level each time the DOWN button is pressed. SHIFT/ ITEM UP PAGE TCG F-RUN SET R-RUN FRONT REAR AUDIO IN MIC MIC LINE DOWN MENU SET OFF CUE CH 1 MIX CH 2 CH 1 CH 2 REAR MIC POWER ON OFF Changing the ON/OFF selection The setting switches to ON or OFF each time the UP (or DOWN) button is pressed. Returning to the default settings Align the arrow with READ FACTORY DATA on the "INITIALIZE" SUB menu page of the MAIN menu screen 4 of 4. When the UP (or DOWN) button is now pressed, the initial (factory) settings will be restored. However, care should be taken as the camera ID cannot be returned to the default settings. Quitting the menu Set the MENU SET/OFF switch to OFF. ÁThe setting menu disappears from the viewfinder screen and the displays indicating the unit's current status appear at the top and bottom of the viewfinder screen. - 54 -
-
 1
1 -
2
-
3
-
4
-
5
-
6
-
7
-
8
-
9
-
10
-
11
-
12
-
13
-
14
-
15
-
16
-
17
-
18
-
19
-
20
-
21
-
22
-
23
-
24
-
25
-
26
-
27
-
28
-
29
-
30
-
31
-
32
-
33
-
34
-
35
-
36
-
37
-
38
-
39
-
40
-
41
-
42
-
43
-
44
-
45
-
46
-
47
-
48
-
 49
49 -
 50
50 -
 51
51 -
 52
52 -
 53
53 -
 54
54 -
 55
55 -
 56
56 -
 57
57 -
 58
58 -
 59
59 -
60
-
61
-
62
-
63
-
64
-
65
-
66
-
67
-
68
-
69
-
70
-
71
-
72
-
73
-
74
-
75
-
76
-
77
-
78
-
79
-
80
-
81
-
82
-
83
-
84
-
85
-
86
-
87
-
88
-
89
-
90
-
91
-
92
-
93
-
94
-
95
-
96
-
97
-
98
-
99
-
100
-
101
-
102
-
103
-
104
-
105
-
106
-
107
-
108
-
109
-
110
-
111
-
112
-
113
-
114
-
115
-
116
-
117
-
118
-
119
-
120
-
121
-
122
-
123
-
124
-
125
-
126
-
127
-
128
-
129
-
130
-
131
-
132
-
133
-
134
-
135
-
136
-
137
-
138
-
139
-
140
-
141
-
142
-
143
-
144
-
145
-
146
-
147
-
148
-
149
-
150
-
151
-
152
-
153
-
154
-
155
-
156
-
157
-
158
-
159
-
160
 |
 |
