Onkyo TX SR806 Owner Manual - Page 93
Hardware Setup, Remote Control, Zone2, Tuner TX-SR806 only - receiver code
 |
UPC - 751398008238
View all Onkyo TX SR806 manuals
Add to My Manuals
Save this manual to your list of manuals |
Page 93 highlights
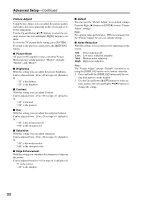
Advanced Setup-Continued . Hardware Setup This section explains items on the "Hardware Setup" menu. 1 Remote controller Press the [RECEIVER] button followed by the [SETUP] button. The main menu appears onscreen. If the main menu doesn't appear, make sure the appropriate external input is selected on your TV. 2 Use the Up and Down [R]/[X] but- tons to select "7. Hardware Setup", and then press [ENTER]. The "Hardware Setup" menu appears. 7. Hardware Setup 1. Remote Control 2. Zone2 3. Tuner 4. Analog Multich 5. HDMI Note: The "3. Tuner" (*) setting is not available on the TX-SA806. 3 Use the Up and Down [R]/[X] but- tons to select an item, and then press [ENTER]. The screen for that item appears. 4 Use the Up and Down [R]/[X] but- tons to select an item, and use the Left and Right [F]/[S] but- tons to change it. The items are explained below. 5 When you've finished, press the [SETUP] button. The setup menu closes. Note: This procedure can also be performed on the AV receiver/AV amplifier by using its [SETUP] button, arrow buttons, and [ENTER] button. Remote Control ■ Remote ID When several Onkyo components are used in the same room, their remote ID codes may overlap. To differentiate the AV receiver/AV amplifier from the other components, you can change its remote ID from 1, the default, to 2 or 3. Note: If you do change the AV receiver/AV amplifier's remote ID, be sure to change the remote controller to the same ID (see below), otherwise, you won't be able to control it with the remote controller. Changing the Remote Controller's ID 1 While holding down the [RECEIVER] button, press and hold down the [SETUP] button until the [RECEIVER] button lights up (about 3 seconds). (3 seconds) 2 Use the number buttons to enter ID 1, 2, or 3. The [RECEIVER] button flashes twice. Zone2 See "Zone 2" on page 99. Tuner (TX-SR806 only) ■ AM Frequency Step (on some models) See "AM Frequency Step Setup (on some models)" on page 49. ■ SAT Radio Mode (on North American model) If you connect an XM Satellite Radio antenna or SIRIUS Satellite Radio antenna to the AV receiver (both sold separately), set this setting to "XM" or "SIRIUS" respectively. If you connect both types of antenna, select "XM/SIRIUS". Otherwise, select "None". See the separate Satellite Radio Guide for more information. ■ Antenna Aiming (on North American model) The ID of the Sirius Connect Home Tuner is displayed here. You must sign up to obtain a SIRIUS ID. See the separate Satellite Radio Guide for more information. 93
-
 1
1 -
2
-
3
-
4
-
5
-
6
-
7
-
8
-
9
-
10
-
11
-
12
-
13
-
14
-
15
-
16
-
17
-
18
-
19
-
20
-
21
-
22
-
23
-
24
-
25
-
26
-
27
-
28
-
29
-
30
-
31
-
32
-
33
-
34
-
35
-
36
-
37
-
38
-
39
-
40
-
41
-
42
-
43
-
44
-
45
-
46
-
47
-
48
-
49
-
50
-
51
-
52
-
53
-
54
-
55
-
56
-
57
-
58
-
59
-
60
-
61
-
62
-
63
-
64
-
65
-
66
-
67
-
68
-
69
-
70
-
71
-
72
-
73
-
74
-
75
-
76
-
77
-
78
-
79
-
80
-
81
-
82
-
83
-
84
-
85
-
86
-
87
-
 88
88 -
 89
89 -
 90
90 -
 91
91 -
 92
92 -
 93
93 -
 94
94 -
 95
95 -
 96
96 -
 97
97 -
 98
98 -
99
-
100
-
101
-
102
-
103
-
104
-
105
-
106
-
107
-
108
-
109
-
110
-
111
-
112
-
113
-
114
-
115
-
116
-
117
-
118
-
119
-
120
-
121
-
122
-
123
-
124
 |
 |
