Nextar N7-110 N7-110 manual - Page 8
How to Set the Clock, Specifications, Accessories - manual
 |
UPC - 714129937153
View all Nextar N7-110 manuals
Add to My Manuals
Save this manual to your list of manuals |
Page 8 highlights
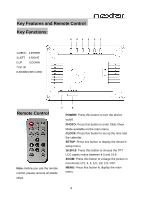
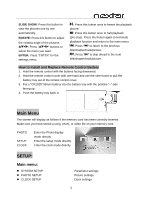
CLOCK SETUP Function: DATE SETUP: Press arrow keys and ENTER button to set the date. TIME SETUP:Press arrow keys and ENTER button to set the time. POWER ON: Press arrow keys and ENTER to set the time to power on the device. POWER OFF: Press arrow keys and ENTER to set the time to power off the device. How to Set the Clock Set the local time and calendar Press the Up and Down arrow keys to select functions. Press the Right and Left arrow keys to select desired settings. Press the ENTER key to confirm settings. Specifications Display: 7" TFT LCD 480 X 234 (RGB) Power: AC Adapter; Input 100-240V; Output 12V 1-1.5A Environmental Requirements Operation: 0~35℃, Humidity 0~85% Storage: -20~60℃, Humidity 10~90% Accessories: AV Adapter Remote Control Warranty Card Registration Card Return Card Manual 7
-
 1
1 -
2
-
 3
3 -
 4
4 -
 5
5 -
 6
6 -
 7
7 -
 8
8
 |
 |
