NEC NP-ME331X Users Manual - Page 45
(8) Projecting Your Computer’s Screen Image from the Projector via the USB Cable (USB Display)
 |
View all NEC NP-ME331X manuals
Add to My Manuals
Save this manual to your list of manuals |
Page 45 highlights
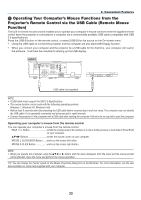
3. Convenient Features ❽ Projecting Your Computer's Screen Image from the Projector via the USB Cable (USB Display) Using a commercially available USB cable (compatible with USB 2.0 specifications) to connect the computer with the projector allows you to send your computer screen image to the projector for displaying. Power On/Off and source selection of the projector can be done from your computer without connecting a computer cable (VGA). The USB Display utilizes the function of Image Express Utility Lite which is pre-installed software on the projector. NOTE: • To make the USB-Display available on Windows XP, the Windows user account must have "Administrator" privilege. • USB Display will not work in [NORMAL] of [STANDBY MODE]. (→ page 75) 1. Start the computer. 2. Connect the projector's power cord to the wall outlet and put the projector into standby condition. 3. Use the USB cable to connect the computer with the projector. USB cable (not supplied) → To wall outlet Power cord (supplied) The message "The projector is in standby mode. Connect it?" will be displayed on the computer screen. • The control window of Image Express Utility Lite will be displayed on the top of the screen. NOTE: Depending on the computer setting, the "AutoPlay" window may be displayed when the computer detects the connection to the projector. If this happens, click the "Start USB Display" window. 4. Click "Yes". The projector will turn on and the message "The projector is getting ready. Please wait." will be displayed on the computer screen. This message will disappear in a few seconds. 34
-
 1
1 -
2
-
3
-
4
-
5
-
6
-
7
-
8
-
9
-
10
-
11
-
12
-
13
-
14
-
15
-
16
-
17
-
18
-
19
-
20
-
21
-
22
-
23
-
24
-
25
-
26
-
27
-
28
-
29
-
30
-
31
-
32
-
33
-
34
-
35
-
36
-
37
-
38
-
39
-
 40
40 -
 41
41 -
 42
42 -
 43
43 -
 44
44 -
 45
45 -
 46
46 -
 47
47 -
 48
48 -
 49
49 -
 50
50 -
51
-
52
-
53
-
54
-
55
-
56
-
57
-
58
-
59
-
60
-
61
-
62
-
63
-
64
-
65
-
66
-
67
-
68
-
69
-
70
-
71
-
72
-
73
-
74
-
75
-
76
-
77
-
78
-
79
-
80
-
81
-
82
-
83
-
84
-
85
-
86
-
87
-
88
-
89
-
90
-
91
-
92
-
93
-
94
-
95
-
96
-
97
-
98
-
99
-
100
-
101
-
102
-
103
-
104
-
105
-
106
-
107
-
108
-
109
-
110
-
111
-
112
-
113
-
114
-
115
-
116
-
117
-
118
-
119
-
120
-
121
-
122
-
123
-
124
-
125
-
126
-
127
-
128
-
129
-
130
-
131
-
132
-
133
 |
 |
