NEC FP955 MulitSync FP955 User's Manual - Page 7
Controls - dvi
 |
View all NEC FP955 manuals
Add to My Manuals
Save this manual to your list of manuals |
Page 7 highlights
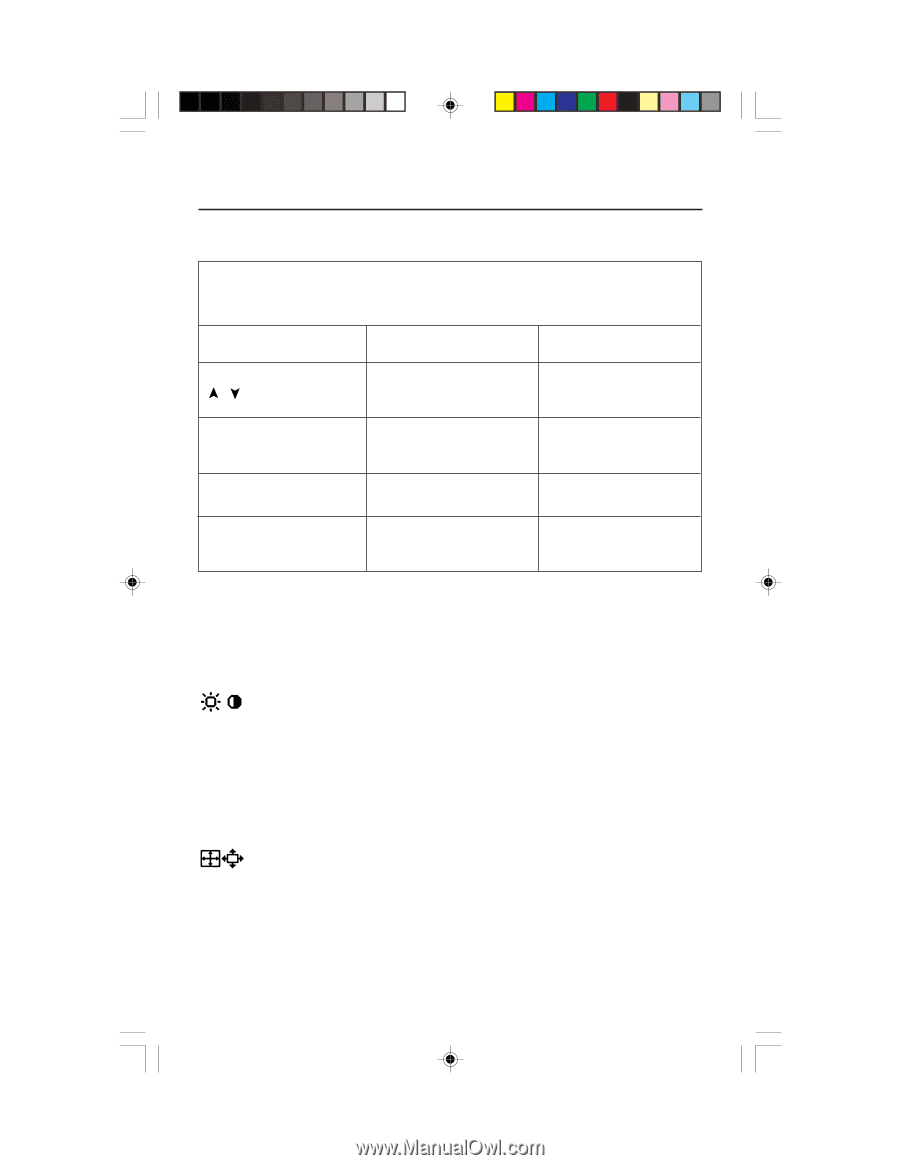
Controls OSM™ (On-Screen Manager) control buttons on the front of the monitor function as follows: To change DVI/D-SUB signal input, press the RESET button. NOTE: OSM must be closed in order to change the DVI/D-SUB signal input. EXIT Main Menu Exits the OSM menu. Sub-Menu Exits to the OSM controls main menu. CONTROL / Moves the highlighted area up/down to select one of the controls. Moves the highlighted area up/down to select one of the controls. CONTROL -/+ Moves the highlighted area left/right to select one of the controls. Moves the bar in the - or + direction to decrease or increase the adjustment. PROCEED Has no function. Only executes control or enters sub, sub-menu. RESET Resets all the controls within the highlighted menu to the factory setting. Resets the highlighted control to the factory setting. NOTE: When RESET is pressed in the main and sub-menu, a warning window will appear allowing you to cancel the reset function. When OSM controls are activated, icons are displayed at the top of the menu. If an arrow (➔) is displayed in a sub-menu, it indicates further choices are available. To enter a sub-menu, press PROCEED. Brightness/Contrast Controls Brightness: Adjusts the overall image and background screen brightness. Contrast: Adjusts the image brightness in relation to the background. Degauss: Eliminates the buildup of stray magnetic fields which alter the correct scan of the electron beams and affect the purity of the screen colors, focus and convergence. When activated, your screen image will jump and waver a bit as the screen is demagnetized. Caution: Please allow a minimum of 20 minutes to elapse between uses of the Degauss Control. Size and Position Controls Left/Right: Moves the image horizontally (left or right). Down/Up: Moves the image vertically (up or down). Narrow/Wide: Decreases or increases the horizontal size of the image. Short/Tall: Decreases or increases the vertical size of the image. 5 FP955.wpc 7 1/23/01, 12:13 PM
-
 1
1 -
 2
2 -
 3
3 -
 4
4 -
 5
5 -
 6
6 -
 7
7 -
 8
8 -
 9
9 -
 10
10 -
 11
11 -
 12
12 -
13
-
14
-
15
-
16
-
17
-
18
-
19
-
20
-
21
-
22
-
23
-
24
-
25
-
26
-
27
-
28
-
29
-
30
-
31
-
32
-
33
-
34
-
35
-
36
-
37
-
38
-
39
-
40
-
41
-
42
-
43
-
44
-
45
-
46
-
47
-
48
-
49
-
50
-
51
-
52
-
53
-
54
-
55
-
56
-
57
-
58
-
59
-
60
-
61
-
62
-
63
-
64
-
65
-
66
-
67
-
68
 |
 |