Motorola moto g6 play User Guide Verizon - Page 4
Charge up & power on, Sign in, Put in the cards - screen size
 |
View all Motorola moto g6 play manuals
Add to My Manuals
Save this manual to your list of manuals |
Page 4 highlights
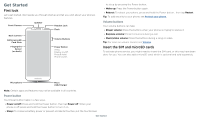
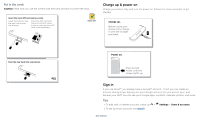
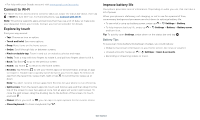
Put in the cards Caution: Make sure you use the correct size SIM card and don't cut the SIM card.. Insert the nano SIM and memory cards. Insert the SIM tool into the tray hole to pop out the tray. Insert the SIM card with the gold contacts down. Insert an optional microSD card (sold separately). SIM Nano SIM Charge up & power on Charge your phone fully and turn the power on. Follow the screen prompts to get started. Charge up. Before using your phone, fully charge it with the charger provided. Push the tray back into your phone. SIM card insert graphic. After the tray is removed, the SIM card is inserted in the second slot with the clipped corner to the bottom right. The SDcard is inserted in the first slot. Power on. Press & hold Power until the screen lights up. Battery in and power on graphic. Put the battery back in top down first and snap the cover on. After you charge the phone, press and hold the Power button until the screen lights up. Sign in If you use Gmail™, you already have a Google™ account-if not, you can create an account during setup. Signing into your Google account lets you access, sync, and backup your stuff. You can see your Google apps, contacts, calendar, photos, and more. Tips »»To add, edit, or delete accounts, swipe up > Settings > Users & accounts. »»To set up email accounts, see Gmail™. Get Started
-
 1
1 -
 2
2 -
 3
3 -
 4
4 -
 5
5 -
 6
6 -
 7
7 -
 8
8 -
 9
9 -
 10
10 -
11
-
12
-
13
-
14
-
15
-
16
-
17
-
18
-
19
-
20
-
21
-
22
-
23
-
24
-
25
-
26
-
27
-
28
-
29
-
30
-
31
-
32
 |
 |
