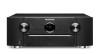
Marantz SR6012 Owner s Manual In English - SR6012
Marantz SR6012 Manual
 |
View all Marantz SR6012 manuals
Add to My Manuals
Save this manual to your list of manuals |
Marantz SR6012 manual content summary:
- Marantz SR6012 | Owner s Manual In English - SR6012 - Page 1
Contents . Connections Playback Settings Tips Appendix AV Surround Receiver SR6012 Front panel Display Rear panel 1 Remote Owner's Manual Index - Marantz SR6012 | Owner s Manual In English - SR6012 - Page 2
performance Easy operation Part names and functions Front panel Display Rear panel Remote control unit Playback Settings Tips Appendix 8 Connecting 7.1-channel speakers: Second pair of front speakers 60 Connecting multi-zone speakers 61 Connecting a TV 64 Connection 1 : TV equipped with - Marantz SR6012 | Owner s Manual In English - SR6012 - Page 3
Listening to music on a Bluetooth device 89 71 Playing music from Bluetooth device 90 72 Pairing with other Bluetooth devices 91 73 Reconnecting to this unit from a Bluetooth device 92 74 Listening to a PC or NAS 101 102 103 104 84 84 Front panel Display Rear panel 3 Remote Index - Marantz SR6012 | Owner s Manual In English - SR6012 - Page 4
music services 109 Direct playback 130 Listening to the same music in multiple rooms 112 Pure Direct playback 130 AirPlay function 116 all zones (All Zone Stereo) 127 Playback in ZONE2 (Separate room) 151 Connecting ZONE2 151 Playback in ZONE2 153 Front panel Display Rear panel 4 - Marantz SR6012 | Owner s Manual In English - SR6012 - Page 5
167 Bass 216 170 Front Speaker 217 172 Network 218 172 Information 218 174 Connection 218 179 Wi-Fi Setup 219 182 Settings 221 183 Network Control 222 185 Friendly Name 223 186 Diagnostics 223 186 188 189 189 190 Front panel Display Rear panel 5 Remote Index - Marantz SR6012 | Owner s Manual In English - SR6012 - Page 6
function does not work 258 Cannot connect to a wireless LAN network 259 When using HDMI ZONE2, the devices does not function properly 260 Update/upgrade error messages 261 Resetting factory settings 262 Resetting network settings 263 Front panel Display Rear panel 6 Remote Index - Marantz SR6012 | Owner s Manual In English - SR6012 - Page 7
264 Video conversion function 267 Playing back a USB memory devices 269 Playing back a Bluetooth device 270 Playing back a file saved on a PC or NAS 271 Playing back Specifications 291 Index 297 License 300 Settings Tips Appendix Front panel Display Rear panel 7 Remote Index - Marantz SR6012 | Owner s Manual In English - SR6012 - Page 8
Warranty (for USA/for CANADA) Cable labels Power cord FM indoor antenna AM loop antenna Sound calibration microphone Sound calibration microphone stand Remote control unit (RC035SR) R03/AAA batteries External antennas for Bluetooth/wireless connectivity Front panel Display Rear panel - Marantz SR6012 | Owner s Manual In English - SR6012 - Page 9
Contents Connections Playback Inserting the batteries 1 Remove the rear lid in the direction of the arrow and remove it. 2 Insert two batteries remote sensor when operating it. Approx. 23 ft/7 m 30° 30° . .. 3 Put the rear cover back on. Front panel Display Rear panel 9 Remote Index - Marantz SR6012 | Owner s Manual In English - SR6012 - Page 10
(v p. 282) This unit is equipped with a decoder that supports Dolby Atmos audio format. The placement or movement of sound is Containment) (v p. 169) Audyssey LFC™ solves the problem of low frequency sounds disturbing people in neighboring rooms or panel Display Rear panel 10 Remote Index - Marantz SR6012 | Owner s Manual In English - SR6012 - Page 11
realism only available from high-definition images, even when viewing fast-moving video. This unit also supports image processing for 4K 60p, 4:4:4 and 24-bit videos. By processing the video at the , with another program playing in the main room. Front panel Display Rear panel 11 Remote Index - Marantz SR6012 | Owner s Manual In English - SR6012 - Page 12
stored on your PC. This unit also supports Apple AirPlay which lets you stream your music library from supports the playback of high resolution audio formats such as DSD (5.6 MHz) and FLAC 192 kHz files. It provides high quality playback of high resolution files. Front panel Display Rear panel - Marantz SR6012 | Owner s Manual In English - SR6012 - Page 13
an auto-standby function that automatically turns off the power supply when the unit is not in use. This helps reduce unnecessary power use. Front panel Display Rear panel 13 Remote Index - Marantz SR6012 | Owner s Manual In English - SR6012 - Page 14
online streaming music services. When multiple HEOS devices are connected to the same network, HEOS devices can be grouped to play back the same music on all devices simultaneously, or different music can be played on each separate HEOS device. Front panel Display Rear panel 14 Remote Index - Marantz SR6012 | Owner s Manual In English - SR6012 - Page 15
. Then simply follow the instructions displayed on the TV screen to set up the speakers, network, etc. 0 Easy to use Graphical User Interface This unit is equipped with a Graphical User Interface for improved operability. Settings Tips Appendix Front panel Display Rear panel 15 Remote Index - Marantz SR6012 | Owner s Manual In English - SR6012 - Page 16
Contents Connections Playback Part names and functions Front panel qw e Settings Tips Appendix r t y . u For details, see the next page. Front panel Display Rear panel 16 Remote Index - Marantz SR6012 | Owner s Manual In English - SR6012 - Page 17
qw e Connections rt Playback y u A Power operation button (X) Used to turn the power of the MAIN ZONE (room where this unit is located) on/off (standby). (v p. 83) B Power indicator This is not to catch your fingers when closing the door. Front panel Display Rear panel 17 Remote Index - Marantz SR6012 | Owner s Manual In English - SR6012 - Page 18
) I STATUS button Each press of this switches the status information that is shown on the display. J SOUND MODE button Switching the sound mode. (v p. 128) Front panel Display Rear panel 18 Remote Index - Marantz SR6012 | Owner s Manual In English - SR6012 - Page 19
Contents Connections Q1 Q2 Q3 Q4 Playback Q5 Settings Tips Appendix L SETUP MIC jack This is used to connect the supplied Sound calibration microphone. (v p. 194) loss, do not raise the volume level excessively when using headphones. Front panel Display Rear panel 19 Remote Index - Marantz SR6012 | Owner s Manual In English - SR6012 - Page 20
change is displayed. (v p. 188) C Lights up when the broadcast is properly tuned in. D In the FM mode, this lights up when receiving stereo broadcasts. Front panel Display Rear panel 20 Remote Index - Marantz SR6012 | Owner s Manual In English - SR6012 - Page 21
on display y Appendix .. t E This lights when the sleep mode is selected. (v p. 143) F This lights up when ZONE2 (separate room) power is turned on. (v p. 153) Front panel Display Rear panel 21 Remote Index - Marantz SR6012 | Owner s Manual In English - SR6012 - Page 22
Contents Connections Playback Settings Tips Rear panel q w er t y ui o Q0 Appendix q Q1 Q2 Q3 Q4 Q5 Q6 Q7 . For details, see the next page. Front panel Display Rear panel 22 Remote Index - Marantz SR6012 | Owner s Manual In English - SR6012 - Page 23
Bluetooth. (v p. 78) A Place the external antennas for Bluetooth/wireless connectivity evenly over the screw terminal of rear fitted with RS-232C connectors. Consult the owner's manual of the home automation controller for more information about serial panel Display Rear panel 23 Remote Index - Marantz SR6012 | Owner s Manual In English - SR6012 - Page 24
tuner/cable TV)" (v p. 69) 0 "Connecting a DVD player or Blu-ray Disc player" (v p. 70) K AC inlet (AC IN) Used to connect the power cord. (v p. 81) Front panel Display Rear panel 24 Remote Index - Marantz SR6012 | Owner s Manual In English - SR6012 - Page 25
tuner/cable TV)" (v p. 69) 0 "Connecting a DVD player or Blu-ray Disc player" (v p. 70) NOTE 0 Do not touch the inner pins of the connectors on the rear panel. Electrostatic discharge may cause permanent damage to the unit. Front - Marantz SR6012 | Owner s Manual In English - SR6012 - Page 26
unit q w e r t y Playback Settings Tips Appendix A ZONE SELECT buttons These switch the zone (MAIN ZONE, ZONE2) that is operated through the remote control unit. 0 "Playback TV screen. (v p. 237) F Cursor buttons (uio p) These select items. Front panel Display Rear panel 26 Remote Index - Marantz SR6012 | Owner s Manual In English - SR6012 - Page 27
sound mode. (v p. 128) K Remote control signal transmitter This transmits signals from the remote control unit. (v p. 9) L SLEEP button This sets the sleep timer. (v p. 143) u i o Q0 Front panel Display Rear panel 27 Remote Index - Marantz SR6012 | Owner s Manual In English - SR6012 - Page 28
the volume" (v p. 84) 0 "Adjusting the volume (ZONE2)" (v p. 154) P OPTION button This displays the option menu on the TV screen. Q ENTER button This determines the selection. R SETUP button This displays the menu on the TV screen. (v p. 159) Front panel Display Rear panel 28 Remote Index - Marantz SR6012 | Owner s Manual In English - SR6012 - Page 29
when the "Setup Assistant" is running, follow the instructions in the "Setup Assistant" (page 9 in the separate "Quick Start Guide") screen for making connections. (During "Setup Assistant" cable Optical cable Audio cable LAN cable L L R R Front panel Display Rear panel 29 Remote Index - Marantz SR6012 | Owner s Manual In English - SR6012 - Page 30
): Place the SUBWOOFER at a convenient location near the front speakers. If you have two subwoofers, place them asymmetrically across the front of your room. Front panel Display Rear panel 30 Remote Index - Marantz SR6012 | Owner s Manual In English - SR6012 - Page 31
speakers. RHL/RHR (Rear height speaker left/right): Place the REAR HEIGHT left and right speakers directly behind the main listening position. Mount them as close to the ceiling as possible and aligned with the left and right front speakers. Front panel Display Rear panel 31 Remote Index - Marantz SR6012 | Owner s Manual In English - SR6012 - Page 32
(Back Dolby speaker Enabled speaker integrated with a surround back left/right): speaker, place the Dolby Atmos Enabled speaker instead of the surround back speaker. Front panel Display Rear panel 32 Remote Index - Marantz SR6012 | Owner s Manual In English - SR6012 - Page 33
wider and deeper surround sensation. 0 Dolby Atmos is not supported in a 5.1-channel or less speaker configuration. 0 DTS:X of the speaker configuration. 0 Use the illustration below as a guide for how high each speaker should be installed. The height panel Display Rear panel 33 Remote Index - Marantz SR6012 | Owner s Manual In English - SR6012 - Page 34
using a single surround back speaker, place it directly behind the listening position. FL FR SW C z1 z2 SL SR z1 22° - 30° z2 120° Front panel Display Rear panel 34 Remote Index - Marantz SR6012 | Owner s Manual In English - SR6012 - Page 35
and front height/rear height speakers. RHL FHL FL SL SW FHR FR C RHR SR Settings Tips Appendix n Ceiling speaker layout example Combination of 5.1-channel layout and top front/top rear speakers. TRL TFL TRR TFR FL FR SL SW C SR .. Front panel Display Rear panel 35 Remote - Marantz SR6012 | Owner s Manual In English - SR6012 - Page 36
Contents Connections Playback n Dolby Atmos Enabled speaker layout example Combination of 5.1-channel layout and front Dolby/surround Dolby speakers. Settings SDL SL FDL FL SW FDR C FR SDR SR Tips Appendix . Front panel Display Rear panel 36 Remote Index - Marantz SR6012 | Owner s Manual In English - SR6012 - Page 37
wires touch the rear panel or if the + and - sides touch each other. ("Protection circuit" (v p. 288)) 0 Never touch the speaker terminals while the power cord is connected. Doing so could result in electric shock. When the "Setup Assistant" (page 9 in the separate "Quick Start Guide") is running - Marantz SR6012 | Owner s Manual In English - SR6012 - Page 38
it. 3 Insert the speaker cable's core wire to the hilt into the speaker terminal. SW1 SW2 4 Turn the speaker terminal clockwise to tighten it. Front panel Display Rear panel 38 Remote Index - Marantz SR6012 | Owner s Manual In English - SR6012 - Page 39
to each speaker to each speaker cable. This makes it easy to connect the correct cable to the speaker terminals on the rear panel. Settings Tips Speaker terminals FRONT L FRONT R CENTER SURROUND L SURROUND R SURROUND BACK L SURROUND BACK R FRONT HEIGHT L FRONT HEIGHT R TOP FRONT L TOP FRONT R TOP - Marantz SR6012 | Owner s Manual In English - SR6012 - Page 40
the color of the speaker terminal matches that of the cable label. G How to attach the cable labels H Speaker This unit Settings Tips Appendix . Front panel Display Rear panel 40 Remote Index - Marantz SR6012 | Owner s Manual In English - SR6012 - Page 41
configuration to be installed. (v p. 202) Playback speaker in each zone MAIN ZONE ZONE2 "Amp Assign" settings Connection page 5.1-channel playback Can be set modes that are supported. The following pages provide basic connection examples. Front panel Display Rear panel 41 Remote Index - Marantz SR6012 | Owner s Manual In English - SR6012 - Page 42
Assign Assign Mode 11.1ch PRE OUT SPEAKERS FRONT FRONT SUBWOOFER 12 HEIGHT2 T.REAR CENTER SURROUND SURROUND SURR. BACK SURR.BACK HHEEIGIGHHTT11 HEIGHT1 FRONT CENTER Back SURROUND SURR.BACK T.FRONT Settings Tips Appendix . Front panel Display Rear panel 42 Remote Index - Marantz SR6012 | Owner s Manual In English - SR6012 - Page 43
Contents Connections Playback Connecting 5.1-channel speakers This serves as a basic 5.1-channel surround system. FL FR SW C SL SR Settings Tips SW FR FL C SR SL Appendix .. Front panel Display Rear panel 43 Remote Index - Marantz SR6012 | Owner s Manual In English - SR6012 - Page 44
in this configuration. (v p. 204) SW FR FL C SR SL SBR SBL 0 When using a single surround back speaker, connect it to the SURROUND BACK L terminal. Front panel Display Rear panel 44 Remote Index - Marantz SR6012 | Owner s Manual In English - SR6012 - Page 45
0 Set "Floor" - "Layout" to "5ch" and "Height Sp" to "2ch" in the menu when connecting in this configuration. (v p. 204) 0 The top front or top rear speakers can be connected instead of the top middle speakers. In this case, set the ceiling speakers to be connected under "Height" - "Layout" in the - Marantz SR6012 | Owner s Manual In English - SR6012 - Page 46
SR SL Appendix FHR FHL .. 0 Set "Floor" - "Layout" to "5ch" and "Height Sp" to "2ch" in the menu when connecting in this configuration. (v p. 204) 0 The rear height speakers can be connected instead of the front height speakers. In this case, set the height speakers to be connected under "Height - Marantz SR6012 | Owner s Manual In English - SR6012 - Page 47
of the front Dolby speakers. In this case, set the Dolby Atmos Enabled speakers to be connected under "Height" - "Layout" in the menu. (v p. 206) Front panel Display Rear panel 47 Remote Index - Marantz SR6012 | Owner s Manual In English - SR6012 - Page 48
same time. You can connect speakers for up to 11-channels for MAIN ZONE. When you connect speakers for 10 or more channels, the output speakers FL C SR SL SBR SBL TMR TML HEIGHT 1z z The top front or top rear speakers can be connected instead of the top middle speakers. In this case, set the - Marantz SR6012 | Owner s Manual In English - SR6012 - Page 49
SL TFR TFL TRR TRL HEIGHT 1z HEIGHT 2z z You can change the combination of the HEIGHT1 and HEIGHT2 channels in the settings. (v p. 54) Front panel Display Rear panel 49 Remote Index - Marantz SR6012 | Owner s Manual In English - SR6012 - Page 50
" - "Height Sp" to "2ch" in the menu when connecting in this configuration. (v p. 205) SW FR FL C SR SL SBR SBL FHR FHL HEIGHT 1z z The rear height speakers can be connected instead of the front height speakers. In this case, set the height speakers to be connected under "Height" - "Layout" in - Marantz SR6012 | Owner s Manual In English - SR6012 - Page 51
SL FHR FHL RHR RHL HEIGHT 1z HEIGHT 2z z You can change the combination of the HEIGHT1 and HEIGHT2 channels in the settings. (v p. 54) Front panel Display Rear panel 51 Remote Index - Marantz SR6012 | Owner s Manual In English - SR6012 - Page 52
of the front Dolby speakers. In this case, set the Dolby Atmos Enabled speakers to be connected under "Height" - "Layout" in the menu. (v p. 206) Front panel Display Rear panel 52 Remote Index - Marantz SR6012 | Owner s Manual In English - SR6012 - Page 53
SL FDR FDL SDR SDL HEIGHT 1z HEIGHT 2z z You can change the combination of the HEIGHT1 and HEIGHT2 channels in the settings. (v p. 54) Front panel Display Rear panel 53 Remote Index - Marantz SR6012 | Owner s Manual In English - SR6012 - Page 54
Front Height Front Height Top Front Top Front Top Middle Front Dolby Front Dolby Front Height Top Front Front Dolby Top Middle Top Rear Rear Height Top Rear Rear Height Rear Height Top Rear Rear Height Surround Dolby Surround Dolby Surround Dolby Front panel Display Rear panel 54 Remote Index - Marantz SR6012 | Owner s Manual In English - SR6012 - Page 55
up to 11.1-channels at the same time. You can connect speakers for 11-channels for MAIN ZONE by using an external power amplifier. o Example connection when using two sets of ceiling speakers TRL and HEIGHT2 channels in the settings. (v p. 58) Front panel Display Rear panel 55 Remote Index - Marantz SR6012 | Owner s Manual In English - SR6012 - Page 56
FL C SR SL SBR SBL FHR FHL HEIGHT 1z z You can change the combination of the HEIGHT1 and HEIGHT2 channels in the settings. (v p. 58) Front panel Display Rear panel 56 Remote Index - Marantz SR6012 | Owner s Manual In English - SR6012 - Page 57
FL C SR SL SBR SBL FDR FDL HEIGHT 1z z You can change the combination of the HEIGHT1 and HEIGHT2 channels in the settings. (v p. 58) Front panel Display Rear panel 57 Remote Index - Marantz SR6012 | Owner s Manual In English - SR6012 - Page 58
Front Dolby Front Height Front Height Top Front Top Front Front Dolby Front Dolby Top Middle Top Rear Rear Height Top Rear Rear Height Rear Height Top Rear Rear Height Surround Dolby Back Dolby Surround Dolby Back Dolby Surround Dolby Back Dolby Front panel Display Rear panel 58 Remote Index - Marantz SR6012 | Owner s Manual In English - SR6012 - Page 59
the tweeter terminal and woofer terminal of a speaker that supports bi-amplification. This connection enables back EMF (power You can connect speakers for up to 9-channels for MAIN ZONE. When you connect speakers for 8 or more channels, the 206) Front panel Display Rear panel 59 Remote Index - Marantz SR6012 | Owner s Manual In English - SR6012 - Page 60
A and B as desired. You can connect speakers for up to 9-channels for MAIN ZONE. When you connect speakers for 8 or more channels, the output speakers automatically switch according to connected from "Height" - "Layout" in the menu. (v p. 206) .. Front panel Display Rear panel 60 Remote Index - Marantz SR6012 | Owner s Manual In English - SR6012 - Page 61
or more channels, the output speakers automatically switch according to the input signal and sound mode. MAIN ZONE FHL FHR FL FR SW C SL SR SBL SBR ZONE2 ZONE2 L ZONE2 R SW FR FL C from "Height" - "Layout" in the menu. (v p. 206) .. Front panel Display Rear panel 61 Remote Index - Marantz SR6012 | Owner s Manual In English - SR6012 - Page 62
in MAIN ZONE and 2-channels in ZONE2. You can use the bi-amp connection for front speakers in MAIN ZONE. MAIN ZONE FL (Bi-Amp) FR (Bi-Amp) SW C SL SR ZONE2 ZONE2 L ZONE2 R C SR SL SW (R) ZONE2 ZONE2 R L (L) qw FR q w FL .. Front panel Display Rear panel 62 Remote Index - Marantz SR6012 | Owner s Manual In English - SR6012 - Page 63
2 LR LR LR LR LR LR LR LR LR LR . 0 When using just one surround back speaker, connect it to the left channel (L) terminal. Front panel Display Rear panel 63 Remote Index - Marantz SR6012 | Owner s Manual In English - SR6012 - Page 64
the ARC (Audio connector and incompatible with the ARC (Audio Return Channel)" (v p. 65) Return Channel)" (v p. 66) "Connection 3 : TV equipped without an HDMI connector" (v p. 67) Front panel Display Rear panel 64 Remote Index - Marantz SR6012 | Owner s Manual In English - SR6012 - Page 65
connect a TV that is compatible with the ARC function to this unit. Set "HDMI Control" to "On" when using a TV that supports the ARC function. (v p. 176) TV HDMI IN (ARC) . 0 When using the ARC function, connect to the HDMI MONITOR 1 connector. Front panel Display Rear panel 65 Remote Index - Marantz SR6012 | Owner s Manual In English - SR6012 - Page 66
audio from TV on this unit, use an optical cable to connect the TV to this unit. TV OUT OPTICAL OUT IN HDMI IN . Front panel Display Rear panel 66 Remote Index - Marantz SR6012 | Owner s Manual In English - SR6012 - Page 67
optical cable to connect the TV to this unit. OUT OPTICAL OUT TV VIDEO IN IN COMPONENT VIDEO IN Y PB PR Tips or Appendix . Front panel Display Rear panel 67 Remote Index - Marantz SR6012 | Owner s Manual In English - SR6012 - Page 68
"HDMI Audio Out" to "TV". (v p. 174) 0 To enjoy content that is copyright protected by HDCP 2.2, use a playback device and TV compatible with HDCP 2.2 only. Front panel Display Rear panel 68 Remote Index - Marantz SR6012 | Owner s Manual In English - SR6012 - Page 69
/ Cable TV AUDIO COAXIAL OUT VIDEO OUT VIDEO COMPONENT VIDEO OUT Y PB PR Satellite tuner/ Cable TV HDMI OUT RL or or RL Appendix . Front panel Display Rear panel 69 Remote Index - Marantz SR6012 | Owner s Manual In English - SR6012 - Page 70
OUT VIDEO OUT VIDEO COMPONENT VIDEO OUT Y PB PR DVD player HDMI OUT Blu-ray Disc player HDMI OUT RL or or RL Appendix . Front panel Display Rear panel 70 Remote Index - Marantz SR6012 | Owner s Manual In English - SR6012 - Page 71
camcorder or game console. (HDMI incompatible device) Video camcorder AUDIO AUDIO OUT LR VIDEO VIDEO OUT Video camcorder HDMI OUT LR LR Tips Appendix . Front panel Display Rear panel 71 Remote Index - Marantz SR6012 | Owner s Manual In English - SR6012 - Page 72
, connecting the ground line may have the reverse effect of increasing noise. In this case, it is not necessary to connect the ground line. Front panel Display Rear panel 72 Remote Index - Marantz SR6012 | Owner s Manual In English - SR6012 - Page 73
signal can be connected in the same way as a Blu-ray Disc player/DVD player. ("Connecting a DVD player or Blu-ray Disc player" (v p. 70)) Front panel Display Rear panel 73 Remote Index - Marantz SR6012 | Owner s Manual In English - SR6012 - Page 74
device to the USB port For operating instructions see "Playing a USB memory device" (v p. 85). USB memory device Appendix . 0 Marantz does not guarantee that all USB memory memory device. This may cause radio interference with other devices. Front panel Display Rear panel 74 Remote Index - Marantz SR6012 | Owner s Manual In English - SR6012 - Page 75
the retail store where you purchased the unit. NOTE 0 Make sure the AM loop antenna lead terminals do not touch metal parts of the panel. Settings Tips AM loop antenna (supplied) Black White q w e Appendix FM indoor antenna (supplied) . Front panel Display Rear panel 75 Remote Index - Marantz SR6012 | Owner s Manual In English - SR6012 - Page 76
o AM loop antenna assembly 1 Put the stand section through the bottom of the loop antenna from the rear and bend it forward. 2 Insert the projecting part into the square hole in the stand. Loop antenna Stand Square hole Projecting part . .. Front panel Display Rear panel 76 Remote Index - Marantz SR6012 | Owner s Manual In English - SR6012 - Page 77
streaming music services 0 Using the Apple AirPlay function 0 Operation on this unit via the network 0 Operation with the HEOS wireless multi-room sound system 0 Firmware Update For connections Ethernet connector LAN port/ Ethernet connector . Front panel Display Rear panel 77 Remote Index - Marantz SR6012 | Owner s Manual In English - SR6012 - Page 78
, connect the external antennas for Bluetooth/wireless connectivity connection to the rear panel and stand them upright. See "Wi-Fi Setup" on how to connect to on your computer. 0 Various online services may be discontinued without prior notice. . Front panel Display Rear panel 78 Remote Index - Marantz SR6012 | Owner s Manual In English - SR6012 - Page 79
When you are using a Marantz device other than this unit that supports remote connection, you can transmit remote control signals just by connecting the device to the REMOTE CONTROL IN/OUT connector with a monaural cable. Set the remote control switch located on the rear panel of the connected audio - Marantz SR6012 | Owner s Manual In English - SR6012 - Page 80
mA, or has shorted, the DC OUT jack cannot be used. In this case, turn off the power to the unit, and disconnect it. Front panel Display Rear panel 80 Remote Index - Marantz SR6012 | Owner s Manual In English - SR6012 - Page 81
Contents Connections Playback Settings Connecting the power cord After completing all the connections, insert the power plug into the power outlet. Tips Appendix To household power outlet (AC 120 V, 60 Hz) Power cord (supplied) . Front panel Display Rear panel 81 Remote Index - Marantz SR6012 | Owner s Manual In English - SR6012 - Page 82
to music on a Bluetooth device Listening to FM/AM broadcasts Playback Settings Tips Appendix Playback network audio/service Listening to Internet Radio Panel lock function 148 Remote lock function 150 Other functions Playback in ZONE2 (Separate room) 151 Front panel Display Rear panel - Marantz SR6012 | Owner s Manual In English - SR6012 - Page 83
back. The desired input source can be selected directly. 0 You can also select the input source by turning INPUT SELECTOR on the main unit. . Front panel Display Rear panel 83 Remote Index - Marantz SR6012 | Owner s Manual In English - SR6012 - Page 84
Blu-ray to switch an input source for a player used for playback. 4 Play the DVD player or Blu-ray Disc player. o Surround playback (v p. 128) Front panel Display Rear panel 84 Remote Index - Marantz SR6012 | Owner s Manual In English - SR6012 - Page 85
" or "FAT32" format. 0 The audio format types and specifications supported by this unit for playback are as follows. See "Playing back a USB memory devices" (v p. 269) for details. 0 WMA 0 MP3 0 WAV 0 MPEG-4 AAC 0 FLAC 0 Apple Lossless 0 DSD . Front panel Display Rear panel 85 Remote Index - Marantz SR6012 | Owner s Manual In English - SR6012 - Page 86
Queue Nature 02 Play Next Various Artists Nature 03 Add to End of QuVeuaerious Artists Cancel Nature 04 Various Artists Nature 05 Various Artists . Front panel Display Rear panel 86 Remote Index - Marantz SR6012 | Owner s Manual In English - SR6012 - Page 87
the album art can be displayed while playing the file. NOTE 0 Note that Marantz will accept no responsibility whatsoever for any problems arising with the data on a USB memory device when using this unit in conjunction with the USB memory device. Front panel Display Rear panel 87 Remote Index - Marantz SR6012 | Owner s Manual In English - SR6012 - Page 88
Level Adjust)" (v p. 123) 0 "Adjusting the tone (Tone)" (v p. 124) 0 "Displaying your desired video during audio playback (Video Select)" (v p. 125) 0 "Playing the same music in all zones (All Zone Stereo)" (v p. 127) Settings Tips Appendix Front panel Display Rear panel 88 Remote Index - Marantz SR6012 | Owner s Manual In English - SR6012 - Page 89
unit with the Bluetooth device. Communication is possible up to a range of about 98.4 ft/30 m. Bluetooth NOTE 0 To play back music from a Bluetooth device, the Bluetooth device needs to support the A2DP profile. uio p ENTER BACK OPTION 1/3 8 9 . Front panel Display Rear panel 89 Remote - Marantz SR6012 | Owner s Manual In English - SR6012 - Page 90
again. 1 Prepare for playback. A Connect the supplied external antennas for Bluetooth/wireless connectivity to the Bluetooth/wireless LAN antenna connectors on the rear panel. (v p. 23) B Press POWER X to turn on power to the unit. 2 Press Bluetooth. When using for the first time, the unit will go - Marantz SR6012 | Owner s Manual In English - SR6012 - Page 91
. NOTE 0 To operate the Bluetooth device with the remote control of this unit, the Bluetooth device needs to support the AVRCP profile. 0 The playback (Video Select)" (v p. 125) 0 "Playing the same music in all zones (All Zone Stereo)" (v p. 127) Front panel Display Rear panel 91 Remote Index - Marantz SR6012 | Owner s Manual In English - SR6012 - Page 92
unit is on. 0 When the "Network Control" setting of this unit is set to "Always On" and a Bluetooth device is connected with the unit in the standby state, the power of the unit will be turned on automatically. (v p. 222) Settings Tips Appendix Front panel Display Rear panel 92 Remote Index - Marantz SR6012 | Owner s Manual In English - SR6012 - Page 93
broadcasts. Make sure the FM antenna and AM loop antenna are connected to this unit first. CH/PAGE df uio p ENTER BACK OPTION TUNE +, - . Front panel Display Rear panel 93 Remote Index - Marantz SR6012 | Owner s Manual In English - SR6012 - Page 94
use the "Manual" mode or "Direct Tune" mode to tune in. Operation buttons TUNE +, - CH/PAGE d f u i o p Function Selects the radio station (up/down) Selects preset radio stations Selects the radio station (up/down) Selects preset radio stations Front panel Display Rear panel 94 Remote Index - Marantz SR6012 | Owner s Manual In English - SR6012 - Page 95
during audio playback (Video Select)" (v p. 125) 0 "Playing the same music in all zones (All Zone Stereo)" (v p. 127) Settings Tips Appendix Tuning in by entering the frequency (Direct Tune) , press ENTER. The preset frequency is tuned in. Front panel Display Rear panel 95 Remote Index - Marantz SR6012 | Owner s Manual In English - SR6012 - Page 96
broadcasts. If you cannot tune in automatically with "Auto" mode, change the mode to "Manual" and tune in manually. 1 Press OPTION when the input source is "Tuner". The option menu screen is displayed turns off. 0 The preset memory is overwritten. Front panel Display Rear panel 96 Remote Index - Marantz SR6012 | Owner s Manual In English - SR6012 - Page 97
the desired preset channel. 0 You can also select preset broadcast stations by pressing TUNER PRESET CH + or TUNER PRESET CH - on the main unit. Front panel Display Rear panel 97 Remote Index - Marantz SR6012 | Owner s Manual In English - SR6012 - Page 98
"Set Defaults", then the unit returns to displaying the frequency. 6 Enter the characters, then press "OK". 7 Press OPTION to return to the previous screen. Front panel Display Rear panel 98 Remote Index - Marantz SR6012 | Owner s Manual In English - SR6012 - Page 99
station you want to skip. C Use o p to select "Skip". The station you selected is not displayed. 4 Press OPTION to return to the previous screen. Front panel Display Rear panel 99 Remote Index - Marantz SR6012 | Owner s Manual In English - SR6012 - Page 100
to cancel the skip for. 3 Use o p to select "On". The skip is cancelled. NOTE 0 "Preset Skip" cannot be cancelled for groups. Settings Tips Appendix Front panel Display Rear panel 100 Remote Index - Marantz SR6012 | Owner s Manual In English - SR6012 - Page 101
this unit the database service provided by TuneIn Radio service. 0 The audio format types and specifications supported by this unit for playback are as follows. See "Playing back Internet Radio" (v p. 272) for details. 0 WMA 0 MP3 0 MPEG-4 AAC . Front panel Display Rear panel 101 Remote Index - Marantz SR6012 | Owner s Manual In English - SR6012 - Page 102
main unit's STATUS is pressed. NOTE 0 The radio station database service may be suspended or be otherwise unavailable without notice. o Operations accessible Select)" (v p. 125) 0 "Playing the same music in all zones (All Zone Stereo)" (v p. 127) Front panel Display Rear panel 102 Remote Index - Marantz SR6012 | Owner s Manual In English - SR6012 - Page 103
including PCs and NAS devices on your network. 0 Supported file formats: For details, see "Playing back a file saved on a PC or NAS" (v p. 271). 0 WMA 0 MP3 0 WAV 0 MPEG-4 AAC 0 FLAC 0 Apple Lossless 0 DSD uio p ENTER BACK OPTION 1/3 8 9 . Front panel Display Rear panel 103 Remote Index - Marantz SR6012 | Owner s Manual In English - SR6012 - Page 104
Queue Live 02 Play Next Various Artists Live 03 Add to End of QuVeuaerious Artists Cancel Live 04 Various Artists Live 05 Various Artists .. Front panel Display Rear panel 104 Remote Index - Marantz SR6012 | Owner s Manual In English - SR6012 - Page 105
art for WMA files can be displayed. 0 WMA Lossless files can be played when using a server supporting transcoding, such as Windows Media Player (Ver.11 or later). NOTE 0 When playing back music files by the first letter may not work properly. Front panel Display Rear panel 105 Remote Index - Marantz SR6012 | Owner s Manual In English - SR6012 - Page 106
Level Adjust)" (v p. 123) 0 "Adjusting the tone (Tone)" (v p. 124) 0 "Displaying your desired video during audio playback (Video Select)" (v p. 125) 0 "Playing the same music in all zones (All Zone Stereo)" (v p. 127) Settings Tips Appendix Front panel Display Rear panel 106 Remote Index - Marantz SR6012 | Owner s Manual In English - SR6012 - Page 107
online music streaming services from the HEOS App. Depending upon your geographical location, there are several options to choose from. Download the HEOS App for iOS or Android by searching App Store, Google Play store or Amazon Appstore for "HEOS". . Front panel Display Rear panel 107 Remote - Marantz SR6012 | Owner s Manual In English - SR6012 - Page 108
system. o Signing up for a HEOS Account You will be instructed to signup for a HEOS Account the first time you try to access any music service from the main "Music" menu of the HEOS App. Settings , delete your account or sign out of your account. Front panel Display Rear panel 108 Remote Index - Marantz SR6012 | Owner s Manual In English - SR6012 - Page 109
. You can change the displayed name. Settings Tips Appendix Rooms Drag one room into another to group them Dining L + Dining R Song Name 1 Kitchen Song Name 2 SR6012 Song Name 3 Rooms Music Now Playing . Front panel Display Rear panel 109 Remote Index - Marantz SR6012 | Owner s Manual In English - SR6012 - Page 110
1 Tap the "Music" tab and select a music source. 0 All music services displayed may not be available in your location. Settings Tips Music Appendix This Phone Music Servers USB Music Playlists History Rooms Music Now Playing . Front panel Display Rear panel 110 Remote Index - Marantz SR6012 | Owner s Manual In English - SR6012 - Page 111
Play Next Add to End of Queue Rooms Cancel Music Now Playing Now Playing 0:50 Track 01 Artist Album -2:51 Rooms Music Now Playing Front panel Display Rear panel 111 Remote Index - Marantz SR6012 | Owner s Manual In English - SR6012 - Page 112
Song Name 1 Living+Kitchen Song Name 2 Living Kitchen Drag a room out of this group to ungroup it Bedroom Song Name 3 3 Rooms Music Now Playing Front panel Display Rear panel 112 Remote Index - Marantz SR6012 | Owner s Manual In English - SR6012 - Page 113
Drag one room into another to group them Dining Song Name 1 Living Song Name 2 Kitchen Song Name 4 Bedroom Song Name 3 Rooms Music Now Playing . Front panel Display Rear panel 113 Remote Index - Marantz SR6012 | Owner s Manual In English - SR6012 - Page 114
+Living+... Song Name 1 Dining Living Kitchen Bedroom Drag a room out of this group to ungroup it 3 Rooms Music Now Playing Rooms Music Now Playing . Front panel Display Rear panel 114 Remote Index - Marantz SR6012 | Owner s Manual In English - SR6012 - Page 115
another to group them Dining Song Name 1 Living Song Name 2 Kitchen Song Name 3 Bedroom Song Name 4 3 Rooms Music Now Playing Rooms Music Now Playing . Front panel Display Rear panel 115 Remote Index - Marantz SR6012 | Owner s Manual In English - SR6012 - Page 116
the network. 0 Source input will be switched to "HEOS Music" when AirPlay playback is started. 0 You can stop AirPlay playback by choosing other input source. 0 To see song and artist names together PC Tips Router Appendix This unit . Front panel Display Rear panel 116 Remote Index - Marantz SR6012 | Owner s Manual In English - SR6012 - Page 117
touch or iPad If you update your "iPhone/iPod touch/ AirPlay icon to select the main unit. [Example] iTunes .. AirDrop: ryone AirPlay 4 Select the speaker (devices) you want to use. 4 Choose a song and click play in iTunes. The music will stream to this unit. Front panel Display Rear panel - Marantz SR6012 | Owner s Manual In English - SR6012 - Page 118
It is possible to play iTunes songs on your home's AirPlay compatible speakers (devices) other than those of this unit. 1 Click the AirPlay icon and select "Multiple". 2 Check the speakers you want to be set if using version 12 or later of iTunes. Front panel Display Rear panel 118 Remote Index - Marantz SR6012 | Owner s Manual In English - SR6012 - Page 119
Tips Appendix Spotify Connect function Spotify is the world's most popular streaming service. If you subscribe to Spotify Premium, you can control your new speaker The music will stream to this unit. Audio streaming/ control Control . Front panel Display Rear panel 119 Remote Index - Marantz SR6012 | Owner s Manual In English - SR6012 - Page 120
0 This section explains how to use convenient functions that can be used for each input source. 0 These functions can only be set in the MAIN ZONE. (HEOS Music) uio p ENTER OPTION . Front panel Display Rear panel 120 Remote Index - Marantz SR6012 | Owner s Manual In English - SR6012 - Page 121
select "HEOS Favorites", then press ENTER. MUSIC TuneIn Internet Radio HEOS Favorites Music Servers USB Music . 3 Browse the content and select something to play. Front panel Display Rear panel 121 Remote Index - Marantz SR6012 | Owner s Manual In English - SR6012 - Page 122
you want to remove from HEOS Favorites, then press OPTION. 2 Use ui to select "Remove from HEOS Favorites", then press ENTER. Settings Tips Appendix Front panel Display Rear panel 122 Remote Index - Marantz SR6012 | Owner s Manual In English - SR6012 - Page 123
- +12.0 dB (Default: 0.0 dB) 5 Use uio p to select "Exit", then press ENTER. 0 Select "Reset" and press ENTER if you want to restore the adjustment values of the various channels to "0.0 dB" (Default). 0 Headphone Out" is set to "TV". (v p. 174) Front panel Display Rear panel 123 Remote Index - Marantz SR6012 | Owner s Manual In English - SR6012 - Page 124
in the menu "HDMI Audio Out" is set to "TV". (v p. 174) 0 This cannot be set when the input mode is set to "7.1CH IN". Front panel Display Rear panel 124 Remote Index - Marantz SR6012 | Owner s Manual In English - SR6012 - Page 125
from a different source on TV during audio playback. You can set this for each input source. n Supported input sources: CDz / Tuner / HEOS Music / Phono z This cannot be set when any of 0 "Video Select" settings are stored for each input source. Front panel Display Rear panel 125 Remote Index - Marantz SR6012 | Owner s Manual In English - SR6012 - Page 126
Adjusting the picture quality for your viewing environment (Picture Mode) n Supported input sources : CBL/SAT / DVD / Blu-ray / Game Adjusts the picture quality manually. 4 Press ENTER. 0 "Picture Mode" settings are stored for each input source. Front panel Display Rear panel 126 Remote Index - Marantz SR6012 | Owner s Manual In English - SR6012 - Page 127
Stereo" and "Stereo" sound modes can be selected. 0 When "HDMI Audio Out" is set to "TV", the All Zone Stereo mode is not available. (v p. 174) 0 When "Input Mode" is set to other than "7.1CH IN", the All Zone Stereo mode is available. (v p. 190) Front panel Display Rear panel 127 Remote Index - Marantz SR6012 | Owner s Manual In English - SR6012 - Page 128
multi-channel audio formats. It also supports surround playback of audio formats other than multi-channel audio such as 2-channel stereo audio. 0 For audio formats recorded on a disc, see the disc jacket or label. ui MOVIE MUSIC PURE GAME Front panel Display Rear panel 128 Remote Index . - Marantz SR6012 | Owner s Manual In English - SR6012 - Page 129
not support the previously selected sound mode, the most appropriate sound mode for the content is automatically selected. 0 You can also press SOUND MODE on the main unit to switch the sound mode. MOVIE SOUND Stereo Dolby Surround DTS Neural:X Multi Ch Stereo Virtual . Front panel Display Rear - Marantz SR6012 | Owner s Manual In English - SR6012 - Page 130
HDMI signals are played in the Pure Direct mode. 0 When the Pure Direct mode has been selected, the display turns off after about 5 seconds. Front panel Display Rear panel 130 Remote Index - Marantz SR6012 | Owner s Manual In English - SR6012 - Page 131
PURE to select "Auto". Auto surround playback begins. 0 This can also be set by pressing PURE DIRECT on the main unit. Settings Tips Appendix Front panel Display Rear panel 131 Remote Index - Marantz SR6012 | Owner s Manual In English - SR6012 - Page 132
audio images regardless of the speaker layout. Use ceiling speakers and Dolby Atmos Enabled speakers to realize a three-dimensional sound field. z This mode is not supported in a 5.1-channel or less speaker configuration. Front panel Display Rear panel 132 Remote Index - Marantz SR6012 | Owner s Manual In English - SR6012 - Page 133
front height speakers to realize a three-dimensional sound field. z This can be selected when "Speaker Config." - "Surr. Back" is not set to "None". (v p. 210) Front panel Display Rear panel 133 Remote Index - Marantz SR6012 | Owner s Manual In English - SR6012 - Page 134
analog or PCM (2-channel), stereo playback is used. For Dolby Digital or DTS, the music is played back according to the respective channel number. Front panel Display Rear panel 134 Remote Index - Marantz SR6012 | Owner s Manual In English - SR6012 - Page 135
improve sound quality. 0 Display indicator circuit of the main body (display will go off.) 0 The analog video input/output switcher and processor is disabled. Front panel Display Rear panel 135 Remote Index - Marantz SR6012 | Owner s Manual In English - SR6012 - Page 136
2-channel sources in 5.1, 7.1, 9.1 or 11.1-channel playback. It cannot be selected when headphones are used or when the speaker configuration is front speakers only. Front panel Display Rear panel 136 Remote Index - Marantz SR6012 | Owner s Manual In English - SR6012 - Page 137
can be selected when the input signal does not contain Dolby Atmos. z5 This can be selected when the input signal contains Dolby Atmos. Front panel Display Rear panel 137 Remote Index - Marantz SR6012 | Owner s Manual In English - SR6012 - Page 138
the audio format of the input signal and the number of channels. For details, see "Types of input signals, and corresponding sound modes" (v p. 278). Front panel Display Rear panel 138 Remote Index - Marantz SR6012 | Owner s Manual In English - SR6012 - Page 139
Dolby Digital Plus decoder, "y" is displayed. B Shows a decoder that creates sound output. 0 "k" indicates that the Dolby Surround decoder is being used. Settings Tips Appendix Front panel Display Rear panel 139 Remote Index - Marantz SR6012 | Owner s Manual In English - SR6012 - Page 140
instructions for manual of each device for details beforehand. 0 The HDMI ZONE2 function is not compatible with the HDMI Control function. 0 When the HDMI ZONE2 function is used with "HDMI Control" in the menu set to "On", the HDMI ZONE2 function may not fully work. Front panel Display Rear panel - Marantz SR6012 | Owner s Manual In English - SR6012 - Page 141
. Stereo playback. Multi-channel stereo playback. Now Playing Blu-ray Source Sound Mode SSmetaurpt Menu Smart Select 1 Smart Select 2 Smart Select 3 Smart Select 4 Help . Front panel Display Rear panel 141 Remote Index - Marantz SR6012 | Owner s Manual In English - SR6012 - Page 142
been changed, always reset the power to connected devices after the change. 0 The Smart Menu function may not work properly depending on the specifications of your TV. In this case, set "Smart Menu" to "Off". (v p. 178) Settings Tips Appendix Front panel Display Rear panel 142 Remote Index - Marantz SR6012 | Owner s Manual In English - SR6012 - Page 143
once a set time has elapsed. This is convenient for viewing and listening while going to sleep. The sleep timer function can be set for each zone. . Front panel Display Rear panel 143 Remote Index - Marantz SR6012 | Owner s Manual In English - SR6012 - Page 144
Using the sleep timer 1 Press MAIN or ZONE2 to select the operating zone with the remote control. The button for the selected zone is lit. 2 Press SLEEP and display the time you want to set up sleep timers on the connected devices themselves. Front panel Display Rear panel 144 Remote Index - Marantz SR6012 | Owner s Manual In English - SR6012 - Page 145
SMART SELECT 1 - 4 buttons, you will always be able to easily call up the same playback environment. The Smart Select function can be memorized for each zone. SMART SELECT 1 - 4 Front panel Display Rear panel 145 Remote Index . - Marantz SR6012 | Owner s Manual In English - SR6012 - Page 146
the settings 1 Press MAIN or ZONE2 to select the operating zone with the remote control. The button for the selected zone is lit. 2 Press SMART SELECT. The Smart Select settings Player HEOS Music Volume 40 40 40 40 Settings Tips Appendix Front panel Display Rear panel 146 Remote Index - Marantz SR6012 | Owner s Manual In English - SR6012 - Page 147
displayed the number for the SMART SELECT button you pressed. o Changing the Smart Select Name The MAIN ZONE Smart Select name displayed on the TV screen or display of this unit can be changed to a is memorized. 0 Tuner / Internet Radio Station Front panel Display Rear panel 147 Remote Index - Marantz SR6012 | Owner s Manual In English - SR6012 - Page 148
prevent accidental operation of this unit, you can disable operation of the buttons on the front panel. X M-DAX DIMMER STATUS TUNER PRESET CH - TUNER PRESET CH + . Settings Tips . All button operations except X and VOLUME are disabled. Front panel Display Rear panel 148 Remote Index - Marantz SR6012 | Owner s Manual In English - SR6012 - Page 149
"FP LOCK zOff". (z The currently set mode.) 3 Press STATUS to enter the setting. The Panel lock function is canceled. 0 Even when the Panel lock function is set, you can operate the unit using the remote control unit. Settings Tips Appendix Front panel Display Rear panel 149 Remote Index - Marantz SR6012 | Owner s Manual In English - SR6012 - Page 150
select "RC LOCK zOff". (z The currently set mode.) 3 Press STATUS to enter the setting. Infrared light receiving function on the main unit is enabled. Front panel Display Rear panel 150 Remote Index - Marantz SR6012 | Owner s Manual In English - SR6012 - Page 151
ZONE2 (HDMI ZONE2 function). MAIN ZONE ZONE2 HDMI ZONE2 HDMI . 0 When a TV is connected to the HDMI ZONE2 OUT connector, and the MAIN ZONE and ZONE2 are set to the same input source, the MAIN ZONE audio may be mixed down to 2-channel audio. Front panel Display Rear panel 151 Remote Index - Marantz SR6012 | Owner s Manual In English - SR6012 - Page 152
case, the MAIN ZONE audio will also be converted to 2-channel PCM if the MAIN ZONE and ZONE2 are set to the same input source. However, depending on the playback device, the playback signal may not be converted to PCM even if this setting is configured. Front panel Display Rear panel 152 Remote - Marantz SR6012 | Owner s Manual In English - SR6012 - Page 153
buttons MUTE : POWER X VOLUME df Settings Tips Appendix 1 Press ZONE2 to set the operating zone to ZONE2 with the remote control. The ZONE2 button lights. 2 Press POWER X to turn pressing ZONE2 SOURCE and then turning the INPUT SELECTOR. . Front panel Display Rear panel 153 Remote Index - Marantz SR6012 | Owner s Manual In English - SR6012 - Page 154
level set at "Mute Level" in the menu. (v p. 231) 0 To cancel mute, either adjust the sound volume or press MUTE : again. Settings Tips Appendix Front panel Display Rear panel 154 Remote Index - Marantz SR6012 | Owner s Manual In English - SR6012 - Page 155
timing between video and audio. 165 Volume Sets the MAIN ZONE (room where the unit is located) volume setting. 166 speaker. 170 Picture Adjust Adjusts picture quality. 172 HDMI Setup Makes settings for HDMI Audio Out, HDMI Pass Through and panel Display Rear panel 155 Remote Index - Marantz SR6012 | Owner s Manual In English - SR6012 - Page 156
measured and the optimum settings are made automatically. Sets up the speakers manually or changes Audyssey® Setup settings. Page 186 188 189 189 190 191 202 Displays network information. preferences. Used to check the network connection. 223 Front panel Display Rear panel 156 Remote Index - Marantz SR6012 | Owner s Manual In English - SR6012 - Page 157
Forgot Password HEOS Account If you forgot your password, we'll send you an email with instructions about how to reset it. 【When the user is signed in the HEOS Account】 Signed in As Displays your Account. Page 225 225 225 225 225 225 225 225 Front panel Display Rear panel 157 Remote Index - Marantz SR6012 | Owner s Manual In English - SR6012 - Page 158
to the guidance displayed on the TV screen. Page 226 226 229 231 231 232 232 233 236 237 238 238 Page 9 of the separate manual "Quick Start Guide" Front panel Display Rear panel 158 Remote Index - Marantz SR6012 | Owner s Manual In English - SR6012 - Page 159
MAIN on the remote control unit to set the operating zone to the MAIN ZONE. The MAIN button lights. 2 Press SETUP. The menu is displayed on the TV screen. Exiting the menu, press SETUP while the menu is displayed. The menu display disappears. . Front panel Display Rear panel 159 Remote Index - Marantz SR6012 | Owner s Manual In English - SR6012 - Page 160
adjustment of the subwoofer level. o Subwoofer 1 Level / Subwoofer 2 Level Adjusts the volume level for the Subwoofer 1 and Subwoofer 2. -12.0 dB - +12.0 dB (Default: 0.0 dB) Front panel Display Rear panel 160 Remote Index - Marantz SR6012 | Owner s Manual In English - SR6012 - Page 161
disc are output as is. 0 "Loudness Management" can be set when Dolby Digital, Dolby Digital Plus, Dolby TrueHD and Dolby Atmos signal is input. Front panel Display Rear panel 161 Remote Index - Marantz SR6012 | Owner s Manual In English - SR6012 - Page 162
of the different sources, we recommend setting to the values below. 0 Dolby Digital sources: 0 dB 0 DTS movie sources: 0 dB 0 DTS music sources: -10 dB Front panel Display Rear panel 162 Remote Index - Marantz SR6012 | Owner s Manual In English - SR6012 - Page 163
" and in the menu "Subwoofer Mode" is set to "LFE+Main". (v p. 216) o Set Defaults The "Surround Parameter" settings are returned to the default settings. Front panel Display Rear panel 163 Remote Index - Marantz SR6012 | Owner s Manual In English - SR6012 - Page 164
set to "7.1CH IN". 0 "M-DAX" settings are stored for each input source. 0 This can also be set by pressing M-DAX on the main unit. Front panel Display Rear panel 164 Remote Index - Marantz SR6012 | Owner s Manual In English - SR6012 - Page 165
. Settings Tips Appendix o Adjust The timing mismatch between the picture and sound needs to be corrected manually. 0 ms - 500 ms (Default : 0 ms) 0 You can also finely adjust the your TV even when "Auto Lip Sync" is set to "On". Front panel Display Rear panel 165 Remote Index - Marantz SR6012 | Owner s Manual In English - SR6012 - Page 166
dB: Display ---dB (Min), in the range -79.5 dB to 18.0 dB. 0 "Scale" settings are reflected in all the zones. o Limit Make a setting for maximum volume. 60 (-20 dB) / 70 (-10 dB) / 80 (0 dB) Off (Default) is " -79.5 dB - 18.0 dB". (v p. 166) Front panel Display Rear panel 166 Remote Index - Marantz SR6012 | Owner s Manual In English - SR6012 - Page 167
for both time and frequency characteristics of the listening area based on Audyssey® Setup measurement results. Selection is done from three types of compensation curves. We recommend using headphones, "MultEQ® XT32" is automatically set to "Off". Front panel Display Rear panel 167 Remote Index - Marantz SR6012 | Owner s Manual In English - SR6012 - Page 168
Contents Connections Playback o Dynamic EQ Solves the problem of deteriorating sound quality as volume is decreased by taking into account human perception compressed dynamic range. 0 Setting is enabled when "Dynamic EQ" is "On". (v p. 168) Front panel Display Rear panel 168 Remote Index - Marantz SR6012 | Owner s Manual In English - SR6012 - Page 169
Dynamic Volume Solves the problem of large variations in volume Volume. 0 If "Dynamic Volume" is set to "Yes" in "Audyssey® Setup", the setting is automatically changed to "Medium". (v p. 191) Settings Tips in the menu is set to "On". Front panel Display Rear panel 169 Remote Index - Marantz SR6012 | Owner s Manual In English - SR6012 - Page 170
(Default: 0.0 dB) 0 Front Dolby, Surround Dolby and Back Dolby speakers can only be set when 63 Hz/125 Hz/250 Hz/500 Hz/1 kHz. Front panel Display Rear panel 170 Remote Index - Marantz SR6012 | Owner s Manual In English - SR6012 - Page 171
in Audyssey® Setup. 0 "Curve Copy" is displayed after Audyssey® Setup has been performed. 0 "Curve Copy" cannot be used when using headphones. o Set Defaults The "Graphic EQ" settings are returned to the default settings. Settings Tips Appendix Front panel Display Rear panel 171 Remote - Marantz SR6012 | Owner s Manual In English - SR6012 - Page 172
. A mode suited for watching movies in a bright room during the day. A mode suited for watching movies in a dark room at night. Adjusts the picture quality manually. No picture quality adjustment is done with this unit. Front panel Display Rear panel 172 Remote Index - Marantz SR6012 | Owner s Manual In English - SR6012 - Page 173
(color saturation). -50 - +50 (Default : 0) o Noise Reduction Reduce overall video noise. Low / Medium / High / Off (Default : Off) o Enhancer Emphasize picture sharpness. 0 - +12 (Default : 0) Appendix Front panel Display Rear panel 173 Remote Index - Marantz SR6012 | Owner s Manual In English - SR6012 - Page 174
Contents Connections Playback Settings Tips Appendix HDMI Setup Make settings for HDMI Audio Out, HDMI Pass Through and HDMI Control settings. NOTE 0 When "HDMI Pass " is set to "TV", audio is output as 2-channel from the HDMI OUT connector. Front panel Display Rear panel 174 Remote Index - Marantz SR6012 | Owner s Manual In English - SR6012 - Page 175
be set when "HDMI Control" is set to "On" or "HDMI Pass Through" is set to "On". ("HDMI Pass Through" (v p. 174), "HDMI Control" (v p. 176)) Front panel Display Rear panel 175 Remote Index - Marantz SR6012 | Owner s Manual In English - SR6012 - Page 176
to the HDMI MONITOR 1 connector. 0 Please consult the operating instructions for each connected device to check the settings. 0 Refer to If the "ARC" settings have been changed, always reset the power to connected devices after the change. Front panel Display Rear panel 176 Remote Index - Marantz SR6012 | Owner s Manual In English - SR6012 - Page 177
. (v p. 187) This unit does not link with power to a TV. 0 "Power Off Control" can be set when "HDMI Control" is set to "On". (v p. 176) Front panel Display Rear panel 177 Remote Index - Marantz SR6012 | Owner s Manual In English - SR6012 - Page 178
0 If the "Smart Menu" settings have been changed, always reset the power to connected devices after the change. 0 The Smart Menu function may not work properly depending on the specifications of your TV. In this case, set "Smart Menu" to "Off". Front panel Display Rear panel 178 Remote Index - Marantz SR6012 | Owner s Manual In English - SR6012 - Page 179
) 0 When connecting multiple Dolby Vision TVs, the signal will only be optimal for one TV. A TV connected to the HDMI MONITOR 1 connector has priority. Front panel Display Rear panel 179 Remote Index - Marantz SR6012 | Owner s Manual In English - SR6012 - Page 180
analog video signals. Use i/p Scaler function for analog and HDMI video signal. Use i/p Scaler function for HDMI video signals. Do not use i/p Scaler function. Front panel Display Rear panel 180 Remote Index - Marantz SR6012 | Owner s Manual In English - SR6012 - Page 181
1080i / 720p / 1080p / 1080p:24Hz / 4K / 4K (60/50) : The resolution supported by the TV connected to the HDMI MONITOR OUT connector is detected automatically and the appropriate output resolution is set to anything other than "Off". (v p. 180) Front panel Display Rear panel 181 Remote Index - Marantz SR6012 | Owner s Manual In English - SR6012 - Page 182
, set to "Top". o Info Displays status of operation temporarily when the input source is switched. On (Default): Off: Turn display on. Turn display off. Front panel Display Rear panel 182 Remote Index - Marantz SR6012 | Owner s Manual In English - SR6012 - Page 183
(Default): Select if your TV and playback devices support standard 4K 60p 4:2:0 8 bit video signals. Enhanced: Select if your TV, playback devices, and cables support high quality 4K 60p 4:4:4, 4:2:2 or 4K 60p 4:2:0 10 bit video signals. Front panel Display Rear panel 183 Remote Index - Marantz SR6012 | Owner s Manual In English - SR6012 - Page 184
the "4K Signal Format" setting and supported resolutionsH Support Resolution Color Space Pixel Depth 4K Signal 0 "Custom" is displayed for the setting item if our service engineers or custom installers has configured the HDMI signal format for panel Display Rear panel 184 Remote Index - Marantz SR6012 | Owner s Manual In English - SR6012 - Page 185
. NOTE 0 When a format other than the video format of the connected TV is set, the picture will not be displayed properly. Settings Tips Appendix Front panel Display Rear panel 185 Remote Index - Marantz SR6012 | Owner s Manual In English - SR6012 - Page 186
to "HDMI" combined with the audio signal assigned at "Input Assign" - "DIGITAL", you will also need to select "Digital" in the "Input Mode". (v p. 190) Front panel Display Rear panel 186 Remote Index - Marantz SR6012 | Owner s Manual In English - SR6012 - Page 187
sources. 1 / 2: - : Assign the component video input connector to the selected input source. Do not assign a component video input connector to the selected input source. Front panel Display Rear panel 187 Remote Index - Marantz SR6012 | Owner s Manual In English - SR6012 - Page 188
: Change the display name for input source. The Source Rename settings are returned to the default settings. 0 Up to 12 characters can be input. Front panel Display Rear panel 188 Remote Index - Marantz SR6012 | Owner s Manual In English - SR6012 - Page 189
in the input volume levels between the different sources. -12 dB - +12 dB (Default : 0 dB) 0 "Source Level" settings are stored for each input source. Front panel Display Rear panel 189 Remote Index - Marantz SR6012 | Owner s Manual In English - SR6012 - Page 190
input source is "TV Audio" is fixed to ARC. 0 The sound mode cannot be set if the input mode is set to "7.1CH IN". Front panel Display Rear panel 190 Remote Index - Marantz SR6012 | Owner s Manual In English - SR6012 - Page 191
Subwoofer SL Surround speaker (L) SR Surround speaker (R) 0 If you perform Audyssey® Setup, Audyssey MultEQ® XT32, Audyssey Dynamic EQ®, Audyssey Dynamic Volume® and Audyssey LFC™ functions are enabled. (v p. 167) SL Listening position SR . Front panel Display Rear panel 191 Remote Index - Marantz SR6012 | Owner s Manual In English - SR6012 - Page 192
would normally sit alone within the listening environment. Before starting Audyssey® Setup, place the Sound calibration microphone in the main listening position. Audyssey connected. Unplug the headphones before performing Audyssey® Setup. Front panel Display Rear panel 192 Remote Index - Marantz SR6012 | Owner s Manual In English - SR6012 - Page 193
Contents Connections Playback Procedure for speaker settings (Audyssey® Setup) Preparation Measurement Calculation & Store Check Finish Settings frequency : Maximum/Highest Frequency 0 Low pass filter : Off 0 Standby mode : Off . Front panel Display Rear panel 193 Remote Index - Marantz SR6012 | Owner s Manual In English - SR6012 - Page 194
also change the number of surround back speakers and subwoofer. 0 Dolby Speaker Setup Set the distance between the Dolby Atmos Enabled speaker and the ceiling. Follow the instructions on the screen display and press "Next" to proceed further. .. Front panel Display Rear panel 194 Remote Index - Marantz SR6012 | Owner s Manual In English - SR6012 - Page 195
select "Begin Test" and then press ENTER. Start the measurement of the first position. Audyssey Setup Select "Begin Test" to start the calibration. NOTE: You will hear a series of loud and how to adjust" (v p. 200). Repeat Last Test Next Front panel Display Rear panel 195 Remote Index - Marantz SR6012 | Owner s Manual In English - SR6012 - Page 196
measurement of the second position starts. Measurements can be made in up to eight positions. Audyssey Setup Place the microphone ear level of the listener seated at the 2nd listening position, which should be sure the power is not turned off. Front panel Display Rear panel 196 Remote Index - Marantz SR6012 | Owner s Manual In English - SR6012 - Page 197
following screen is displayed during the analysis. Configure the settings as preferred. Audyssey Setup Audyssey Dynamic EQ maintains bass, clarity and surround sound at low volumes letting you for commercials shown during television programs. Front panel Display Rear panel 197 Remote Index - Marantz SR6012 | Owner s Manual In English - SR6012 - Page 198
delay common in subwoofers. NOTE 0 Do not change the speaker connection or subwoofer volume after Audyssey® Setup. If these are changed, run Audyssey® Setup again in order to configure the optimum equalizer settings. Settings Tips Appendix Front panel Display Rear panel 198 Remote Index - Marantz SR6012 | Owner s Manual In English - SR6012 - Page 199
0 Sound calibration microphone is not detected. 0 Connect the included Sound calibration microphone to the SETUP MIC jack of this unit. 0 Not all speakers could be detected. 0 Check the is correct, press p to select "Ignore", then press ENTER. Front panel Display Rear panel 199 Remote Index - Marantz SR6012 | Owner s Manual In English - SR6012 - Page 200
so that the subwoofer level is within the 72 to 78 dB range. G Error message H Audyssey Setup Your Subwoofer 1's level is too high. If your subwoofer has a volume control on it, select operation from step 2, 3. Back Skip SW Level Matching . Front panel Display Rear panel 200 Remote Index - Marantz SR6012 | Owner s Manual In English - SR6012 - Page 201
by MultEQ® XT32) even when you have changed each setting manually. Audyssey Setup Your AV receiver can automatically measure the acoustics of your room Channel Select Dolby Speaker Setup Check Results Restore... Start Settings Tips Appendix . Front panel Display Rear panel 201 Remote Index - Marantz SR6012 | Owner s Manual In English - SR6012 - Page 202
Audyssey MultEQ® XT32, Audyssey Dynamic EQ® or Audyssey Dynamic Volume®. (v p. 167) 0 "Manual Setup" can be used without changing the settings. Please set if necessary. Amp Assign Select the power speakers for up to 11.1channels for MAIN ZONE. Front panel Display Rear panel 202 Remote Index - Marantz SR6012 | Owner s Manual In English - SR6012 - Page 203
-amp connection to 2-channels. 0 You can connect speakers for up to 9.1channels for MAIN ZONE. Speakers to output audio are automatically switched for playing back up to 7.1channels in accordance with in this unit for ZONE2 to 2-channels. Front panel Display Rear panel 203 Remote Index - Marantz SR6012 | Owner s Manual In English - SR6012 - Page 204
" setting. (v p. 217) 0 You can connect speakers for up to 9.1channels for MAIN ZONE. Speakers to output audio are automatically switched for playing back up to 7.1channels in accordance with the channels are output from HEIGHT2 speaker terminals. Front panel Display Rear panel 204 Remote Index - Marantz SR6012 | Owner s Manual In English - SR6012 - Page 205
ceiling speakers used in MAIN ZONE. None: Uses no height ZONE. None (Default): Uses no Dolby Atmos Enabled speakers. 2ch: Uses a set of (two) Dolby Atmos Enabled speakers. 4ch: Uses two sets of (four) Dolby Atmos Enabled speakers. Settings Tips Appendix Front panel Display Rear panel - Marantz SR6012 | Owner s Manual In English - SR6012 - Page 206
- Top Middle - Top Rear - Rear Height - Front Height Top Middle Front Height Top Rear Front Height Rear Height Top Front Top Rear Top Front Rear Height Top Middle Rear Height Front Dolby - Surround Dolby - Back Dolby - Front panel Display Rear panel 206 Remote Index - Marantz SR6012 | Owner s Manual In English - SR6012 - Page 207
OUT connectors HEIGHT1 HEIGHT2 Front Dolby Top Rear Front Dolby Rear Height Front Height Surround Dolby Front Height Back Dolby Top Front Surround Dolby Top Front Back Dolby Front Dolby Surround Dolby Front Dolby Back Dolby Front panel Display Rear panel 207 Remote Index - Marantz SR6012 | Owner s Manual In English - SR6012 - Page 208
is set to "11.1ch", selects the PRE OUT connector the external power amplifier used in MAIN ZONE. The PRE OUT connectors that can be selected differ depending on the combination of "Floor" - you cannot set speakers other than "Front" to "Large". Front panel Display Rear panel 208 Remote Index - Marantz SR6012 | Owner s Manual In English - SR6012 - Page 209
Dolby" are automatically set to "None". 0 When "Subwoofer" is set to "None" and you set "Front" to "Small", "Subwoofer" is automatically set to "1 spkr". Front panel Display Rear panel 209 Remote Index - Marantz SR6012 | Owner s Manual In English - SR6012 - Page 210
bass frequencies. Use a small speaker that has inadequate playback capacity for very low bass frequencies. Select when the top front speakers are not connected. Front panel Display Rear panel 210 Remote Index - Marantz SR6012 | Owner s Manual In English - SR6012 - Page 211
when the surround Dolby speakers are not connected. o Top Rear Set the presence and size of the top rear speakers. Large: Small (Default): None: Use a large speaker low bass frequencies. Select when the top rear speakers are not connected. Front panel Display Rear panel 211 Remote Index - Marantz SR6012 | Owner s Manual In English - SR6012 - Page 212
speaker that has inadequate playback capacity for very low bass frequencies. Select when the rear height speakers are not connected. o Back Dolby Set the presence and size "Amp Assign" are set to "None", "None" is automatically set for Height2. Front panel Display Rear panel 212 Remote Index - Marantz SR6012 | Owner s Manual In English - SR6012 - Page 213
the distance between the speakers to less than 20.0 ft (6.00 m). Settings Tips Appendix o Dolby Speaker Setup Set the distance between the Dolby Atmos Enabled speaker and the ceiling. 3.0 ft - 11.0 ft / are returned to the default settings. Front panel Display Rear panel 213 Remote Index - Marantz SR6012 | Owner s Manual In English - SR6012 - Page 214
the PHONES connector on this unit, you cannot set "Levels". o Set Defaults The "Levels" settings are returned to the default settings. Settings Tips Appendix Front panel Display Rear panel 214 Remote Index - Marantz SR6012 | Owner s Manual In English - SR6012 - Page 215
base frequencies that can be played back through each speaker. See the speaker manual for information concerning speaker crossover frequency. o Speaker Selection Selects how to can be set regardless of the "Speaker Config." setting. (v p. 208) Front panel Display Rear panel 215 Remote Index - Marantz SR6012 | Owner s Manual In English - SR6012 - Page 216
the input signal or selected sound mode. (v p. 208) Select "LFE+Main" if you want the bass signals to always be produced from the subwoofer. Front panel Display Rear panel 216 Remote Index - Marantz SR6012 | Owner s Manual In English - SR6012 - Page 217
B is used. A+B : Both front speakers A and B are used. 0 This can be set when "Assign Mode" is set to "7.1ch + Front B". (v p. 204) Settings Tips Appendix Front panel Display Rear panel 217 Remote Index - Marantz SR6012 | Owner s Manual In English - SR6012 - Page 218
device manually, Setup". (v p. 219) o Connect Using Select the method for connecting to the home network (LAN). Wired (Ethernet): Wireless (Wi-Fi) (Default): Use a LAN cable to connect to a network. Use the wireless LAN (Wi-Fi) function to connect to a network. Front panel Display Rear panel - Marantz SR6012 | Owner s Manual In English - SR6012 - Page 219
Wi-Fi Setup Connect to Marantz SR6012" from "SET UP NEW AIRPLAY SPEAKER..." at the bottom of the Wi-Fi configuration screen of your iOS device. 3. Tap "Next" on the screen of the iOS device. 0 The iOS device firmware version needs to support iOS 7 or later. Front panel Display Rear panel - Marantz SR6012 | Owner s Manual In English - SR6012 - Page 220
the TV screen within 2 minutes. o Manual Enter the name (SSID) and password from a PC or tablet that supports wireless LAN connection. 1. Press and Marantz SR6012" when the message "Connect your Wi-Fi device to Wi-Fi network called "Marantz SR6012 panel Display Rear panel 220 Remote Index - Marantz SR6012 | Owner s Manual In English - SR6012 - Page 221
000.000.000.000 000.000.000.000 Save Cancel Configures the network settings automatically or manually Settings Tips Appendix o DHCP Selects how to connect to the network. On (Default): by your provider. Normally input "255.255.255.0". . Front panel Display Rear panel 221 Remote Index - Marantz SR6012 | Owner s Manual In English - SR6012 - Page 222
which you purchased your computer. 0 When using the Marantz 2016 AVR Remote App or HEOS App, use with the "Network Control" setting set to "Always On". NOTE 0 When "Network Control" is set to "Always On", the unit consumes more standby power. Front panel Display Rear panel 222 Remote Index - Marantz SR6012 | Owner s Manual In English - SR6012 - Page 223
0 Up to 30 characters can be input. 0 The default Friendly Name on first use is "Marantz SR6012". o Set Defaults Restores Friendly Name, which you had changed, to the default setting. Diagnostics Used with the router. Check the router settings. Front panel Display Rear panel 223 Remote Index - Marantz SR6012 | Owner s Manual In English - SR6012 - Page 224
Contents Connections Playback o Internet Access Checks whether this unit has access to the Internet (WAN). OK Error: Failed to connect to the Internet. Check the Internet connection environment or router settings. Settings Tips Appendix Front panel Display Rear panel 224 Remote Index - Marantz SR6012 | Owner s Manual In English - SR6012 - Page 225
a new HEOS Account. o Forgot Password If you have forgotten the password, an email explaining how to reset the password will be sent. You have already signed in o Signed in As The currently signed in o Sign Out Sign out from the HEOS Account. Front panel Display Rear panel 225 Remote Index - Marantz SR6012 | Owner s Manual In English - SR6012 - Page 226
level, it is recommended to set "ECO Mode" to "Off". 0 ECO Mode can also be switched by pressing ECO G on the remote control unit. Front panel Display Rear panel 226 Remote Index - Marantz SR6012 | Owner s Manual In English - SR6012 - Page 227
(Default): Off: Always display the meter on the TV screen. Display the meter when changing the mode or volume. Do not display the meter. Front panel Display Rear panel 227 Remote Index - Marantz SR6012 | Owner s Manual In English - SR6012 - Page 228
o Auto Standby Set so the unit power automatically switches to standby. n MAIN ZONE Sets the time for switching to auto standby when there are no audio or about 2 hours. Off (Default): Does not automatically switch ZONE2 to the standby state. Front panel Display Rear panel 228 Remote Index - Marantz SR6012 | Owner s Manual In English - SR6012 - Page 229
Contents Connections Playback Settings Tips Appendix ZONE2 Setup Makes settings for audio playback with ZONE2. 0 Values set for " Set whether to playback in stereo or monaural. Stereo (Default): Mono: Stereo playback. Monaural playback. Front panel Display Rear panel 229 Remote Index - Marantz SR6012 | Owner s Manual In English - SR6012 - Page 230
set when "Volume Level" is set to "Variable". (v p. 230) 0 The dB value is displayed when the "Scale" setting is " -79.5 dB - 18.0 dB". (v p. 166) Front panel Display Rear panel 230 Remote Index - Marantz SR6012 | Owner s Manual In English - SR6012 - Page 231
Settings Tips Appendix Zone Rename Change the display title of each zone to one you prefer. MAIN ZONE / ZONE2 Set Defaults: The default setting is restored for the edited zone name. 0 Up select name. 0 Up to 16 characters can be input. Front panel Display Rear panel 231 Remote Index - Marantz SR6012 | Owner s Manual In English - SR6012 - Page 232
see "DC OUT jack" (v p. 80). n When setting for zone (MAIN ZONE / ZONE2) Trigger out is activated through linkage to the power of the zone set to "On". n When setting for input source Activate trigger out by pressing DIMMER on the main unit. Front panel Display Rear panel 232 Remote Index - Marantz SR6012 | Owner s Manual In English - SR6012 - Page 233
firmware when in standby mode. On: Off (Default): Turns on Automatic Updates. Turns off Automatic Updates. n Time Zone Change the time zone. Set the time zone that matches the area where you live. 0 This menu cannot be selected when "Allow Update" is set to "Off". Front panel Display Rear - Marantz SR6012 | Owner s Manual In English - SR6012 - Page 234
update and upgrade. 0 This setting causes Incompatibilities between this unit and HEOS App. Settings Tips Appendix o Upgrade Notification When the latest Upgrade firmware . 0 This menu cannot be selected when "Allow Update" is set to "Off". Front panel Display Rear panel 234 Remote Index - Marantz SR6012 | Owner s Manual In English - SR6012 - Page 235
Update" function and "Add New Feature" will be announced on the Marantz website each time related plans are defined. See the Marantz See "Troubleshooting" - "Update/upgrade update restarts. If the error continues, check the network environment. Front panel Display Rear panel 235 Remote Index - Marantz SR6012 | Owner s Manual In English - SR6012 - Page 236
for MAIN ZONE. The information displayed differs according to the input source. This item shows information about settings for ZONE2. o Firmware Version: DTS Version: Displays information for the current firmware. Displays the current DTS version. Front panel Display Rear panel 236 Remote - Marantz SR6012 | Owner s Manual In English - SR6012 - Page 237
. Settings Tips Appendix Usage Data To help us improve our products and customer service, Marantz collects anonymous information about how you use this unit (such as frequently used ACTIVE SPEAKERS SW FL C FR SL SR SBL SBR 50.0 . Front panel Display Rear panel 237 Remote Index - Marantz SR6012 | Owner s Manual In English - SR6012 - Page 238
restored correctly, "Loaded" appears on the display and the unit automatically restarts. Setup Lock Protect settings from inadvertent changes. o Lock On: Off (Default): is set to "On", no setting items are displayed except for "Setup Lock". Front panel Display Rear panel 238 Remote Index - Marantz SR6012 | Owner s Manual In English - SR6012 - Page 239
remote control. 1 Press and hold ZONE2 and SETUP. The MAIN and ZONE2 buttons blink. o Canceling the settings 1 Press and hold ZONE2 and SETUP while configuring the setting. The MAIN and ZONE2 buttons blink and the setting is canceled. SETUP . Front panel Display Rear panel 239 Remote Index - Marantz SR6012 | Owner s Manual In English - SR6012 - Page 240
257 Various online services cannot be played 258 The HDMI Control function does not work 258 Cannot connect to a wireless LAN network 259 When using HDMI ZONE2, the devices does not function properly 260 Update/upgrade error messages 261 Front panel Display Rear panel 240 Remote Index - Marantz SR6012 | Owner s Manual In English - SR6012 - Page 241
set the volume level at power on for "Power On Volume" in the menu. You can set this for each zone. ("Volume" (v p. 166), "Power On Volume" (v p. 230)) I want to have the subwoofer always output audio adjusted to your desired level. (v p. 169) Front panel Display Rear panel 241 Remote Index - Marantz SR6012 | Owner s Manual In English - SR6012 - Page 242
0 Perform Audyssey® Setup. This automatically makes the Tuner, CD, Phono, HEOS Music, USB or Bluetooth. (v p. 125) I want to skip unused input (ZONE2) that is played back in MAIN ZONE. (v p. 127) I want to minimize manual of your TV for details. Front panel Display Rear panel 242 Remote Index - Marantz SR6012 | Owner s Manual In English - SR6012 - Page 243
Connections Playback Troubleshooting If a problem should arise, first check the following: 1. Are the connections correct? 2. Is the set being operated as described in the owner's manual? 3. Are contact the store where you purchased this unit. Front panel Display Rear panel 243 Remote Index - Marantz SR6012 | Owner s Manual In English - SR6012 - Page 244
was disconnected from the connector and came in contact with the rear panel of this unit. After unplugging the power cord, take unit's amplifier circuit has failed. Unplug the power cord and contact our customer service center. Power does not turn off even when the power button is pressed, - Marantz SR6012 | Owner s Manual In English - SR6012 - Page 245
sensor will not be exposed to strong light. 0 The operation target zone does not correspond to the zone setting specified on the remote control unit. Press the MAIN or ZONE2 button mode is set to "Pure Direct", the display is off. (v p. 130) Front panel Display Rear panel 245 Remote Index - Marantz SR6012 | Owner s Manual In English - SR6012 - Page 246
out of a TV that is connected via HDMI. 0 Audio signals input to 7.1CH IN connectors on this unit cannot be output to the TV. Front panel Display Rear panel 246 Remote Index - Marantz SR6012 | Owner s Manual In English - SR6012 - Page 247
" to "LFE+Main". (v p. 216) DTS sound is not output. 0 Check that the digital audio output setting on the connected device is set to "DTS". Front panel Display Rear panel 247 Remote Index - Marantz SR6012 | Owner s Manual In English - SR6012 - Page 248
. 0 These cannot be selected when you have not performed Audyssey® Setup. (v p. 191) 0 Switch to a sound mode other than Bluetooth device in ZONE2, remove any obstructions between the Bluetooth device and this unit and use it within a range of about 98.4 ft/30 m. Front panel Display Rear panel - Marantz SR6012 | Owner s Manual In English - SR6012 - Page 249
Change the settings of the router channel to which this unit is connected to. (See the instruction manual of the wireless router for details on how to change the channel.) - Switch to a wired this case, make the wired LAN connection. (v p. 219) Front panel Display Rear panel 249 Remote Index - Marantz SR6012 | Owner s Manual In English - SR6012 - Page 250
DVI-D connection. 0 With the DVI-D connection, on some device combinations, devices may not function properly due to the copy guard copyright protection (HDCP). (v p. 266) Front panel Display Rear panel 250 Remote Index - Marantz SR6012 | Owner s Manual In English - SR6012 - Page 251
an aspect ratio other than 16:9 or 4:3 - 4K video When using HDMI ZONE2, the video output in MAIN ZONE is interrupted. 0 When ZONE2 is operated with the same input source selected for MAIN ZONE and ZONE2, video in MAIN ZONE may be interrupted. Front panel Display Rear panel 251 Remote Index - Marantz SR6012 | Owner s Manual In English - SR6012 - Page 252
other than the pure direct mode. (v p. 129) 0 Set the "TV Format" setting in the menu to a selection that is appropriate for the TV. (v p. 185) Front panel Display Rear panel 252 Remote Index - Marantz SR6012 | Owner s Manual In English - SR6012 - Page 253
the same LAN as this unit. (v p. 77) 0 The firmware on iTunes / iPhone / iPod touch / iPad is not compatible with AirPlay. Update the firmware to the latest version. Audio is not output. 0 The volume operations through the remote control unit. Front panel Display Rear panel 253 Remote Index - Marantz SR6012 | Owner s Manual In English - SR6012 - Page 254
the formats supported by this unit. (v p. 269) 0 You are attempting to play a file that is copyright protected. Files that are copyright protected cannot be played on this unit. 0 Playback may not be possible if the album art file size exceeds 2 MB. Front panel Display Rear panel 254 Remote - Marantz SR6012 | Owner s Manual In English - SR6012 - Page 255
unit. 0 Remove obstructions between the Bluetooth device and this unit. 0 To prevent electromagnetic interference, locate this unit away from microwave ovens, wireless LAN devices and other Bluetooth devices. 0 Reconnect the Bluetooth device. Front panel Display Rear panel 255 Remote Index - Marantz SR6012 | Owner s Manual In English - SR6012 - Page 256
format that is not supported by this unit. To obtain the IP address manually, set the IP address on service. Select a radio station in service. Cannot connect to favorite radio stations. 0 Radio station is not currently in service. Register radio stations in service. Front panel Display Rear panel - Marantz SR6012 | Owner s Manual In English - SR6012 - Page 257
the settings to allow this unit. For details, see the owner's manual of the server or NAS. Server is not found, or it ) Files on PC or NAS are not displayed. 0 Files of a type not supported by this unit are not displayed. (v p. 271) Music stored on a NAS panel Display Rear panel 257 Remote Index - Marantz SR6012 | Owner s Manual In English - SR6012 - Page 258
Playback Settings Tips Appendix Various online services cannot be played Various online services cannot be played. 0 The online service may have been discontinued. The HDMI the HDMI MONITOR 1 connector to connect to the TV. (v p. 65) Front panel Display Rear panel 258 Remote Index - Marantz SR6012 | Owner s Manual In English - SR6012 - Page 259
" or "Manual" method to connect. Cannot connect to the network using iPhone/iPod touch/iPad. 0 Update the iPhone/iPod touch/iPad firmware to the latest version. 0 When configuring the settings via a wireless connection, iOS 7 or later needs to be supported. Front panel Display Rear panel 259 - Marantz SR6012 | Owner s Manual In English - SR6012 - Page 260
that is compatible with the TV. When using HDMI ZONE2, MAIN ZONE audio is played back as PCM. 0 When the same input source is selected for MAIN ZONE and ZONE2, the audio format is limited according to the specifications of the TV in ZONE2. Front panel Display Rear panel 260 Remote Index - Marantz SR6012 | Owner s Manual In English - SR6012 - Page 261
the X on the main unit for more than 5 seconds, or remove and re-insert the power cord. The update restarts automatically. Please contact customer service in your area. This unit may be broken. Contact our Customer Service Center in your area. Front panel Display Rear panel 261 Remote Index - Marantz SR6012 | Owner s Manual In English - SR6012 - Page 262
problem. We recommend restarting the unit before returning the settings to the default settings. (v p. 243) If the operations are not improved by restarting the unit, follow the steps below. Various settings are reset on the unit. (v p. 238) . Front panel Display Rear panel 262 Remote Index - Marantz SR6012 | Owner s Manual In English - SR6012 - Page 263
Tips Appendix Resetting network settings If network contents cannot be played or the unit cannot connect to the network, restarting the unit may improve the problem. We . (v p. 238) NOTE 0 Do not turn the power off until reset is complete. Front panel Display Rear panel 263 Remote Index - Marantz SR6012 | Owner s Manual In English - SR6012 - Page 264
bits (65536 shades) to produce colors in higher definition. Both devices linked via HDMI must support Deep Color. 0 x.v.Color This function lets HDTVs display colors more accurately. It enables display larger than the traditional RGB color model. Front panel Display Rear panel 264 Remote Index - Marantz SR6012 | Owner s Manual In English - SR6012 - Page 265
through the HDMI cable between this unit and the TV. This function allows you to enjoy surround playback on this unit for the TV. Front panel Display Rear panel 265 Remote Index - Marantz SR6012 | Owner s Manual In English - SR6012 - Page 266
2.8 MHz o Supported video signals manual of your television or player for more information. 0 When connecting this unit to a device that is compatible with the Deep Color, 4K and ARC functions, use a "High Speed HDMI cable with Ethernet" that bears the HDMI logo. Front panel Display Rear panel - Marantz SR6012 | Owner s Manual In English - SR6012 - Page 267
connector 0 The MAIN ZONE Video Conversion function is compatible with the following formats: NTSC, PAL, SECAM, NTSC4.43, PAL-N, PAL-M and PAL-60. 0 When component video signals are used, only 480i and 576i signals are converted to HDMI signals. Front panel Display Rear panel 267 Remote Index - Marantz SR6012 | Owner s Manual In English - SR6012 - Page 268
480i/576i 480p/576p 720p 1080i 1080p 480i/576i 480i/576i HDMI 480p/576p 720p 1080i 1080p 1080p 24Hz z The HDMI connector on the front panel supports YCbCr 4:2:0 format only. 4K 30/25/24Hz 4K 60/50Hz z Front panel Display Rear panel 268 Remote Index - Marantz SR6012 | Owner s Manual In English - SR6012 - Page 269
the computer's settings. z2 The Apple Lossless Audio Codec (ALAC) decoder is distributed under the Apache License, Version 2.0 (http://www.apache.org/licenses/LICENSE-2.0). Front panel Display Rear panel 269 Remote Index - Marantz SR6012 | Owner s Manual In English - SR6012 - Page 270
of this unit and Bluetooth device in the following locations as radio wave interference may cause malfunctions. 0 Hospitals, trains, aircraft, petrol kiosks and places where flammable gases are generated 0 Near automatic doors and fire alarms Front panel Display Rear panel 270 Remote Index - Marantz SR6012 | Owner s Manual In English - SR6012 - Page 271
on your computer or NAS for full support. There are other server software available too. Please check supported formats. o Specifications of supported files WMAz1 MP3 WAV MPEG-4 AACz1 , Version 2.0 (http://www.apache.org/licenses/LICENSE-2.0). Front panel Display Rear panel 271 Remote Index - Marantz SR6012 | Owner s Manual In English - SR6012 - Page 272
" settings are stored for each sound mode. Last function memory This function stores the settings which were made before going into the standby mode. Front panel Display Rear panel 272 Remote Index - Marantz SR6012 | Owner s Manual In English - SR6012 - Page 273
D Dz5 D Dz5 Rear Height L/R Front Dolby Atmos Enabled L/R Dz3 Dz3 D D D D D D D Dz5 D Dz5 Surround Dolby Atmos Enabled L/R Dz3 D D D D Dz5 Back Dolby Atmos Enabled L/R Dz3 D D D D Dz5 Subwoofer Dz6 D Dz6 D D D D D D D D D D D D D D D D Front panel Display Rear panel 273 Remote - Marantz SR6012 | Owner s Manual In English - SR6012 - Page 274
the "Surround Parameter" - "Speaker Select" settings. (v p. 163) z6 Audio is output when "Subwoofer Mode" in the menu is set to "LFE+Main". (v p. 216) Appendix Front panel Display Rear panel 274 Remote Index - Marantz SR6012 | Owner s Manual In English - SR6012 - Page 275
S S Surround Parameter Loudness Management z1 S S Dynamic Compression z2 S S S S S S S S S S S S S S S S S S S S S Dialog Control z3 S S Low Frequency z4 S S S S Speaker Select S S S S S S S S S S S S S S S Front panel Display Rear panel 275 Remote Index - Marantz SR6012 | Owner s Manual In English - SR6012 - Page 276
z11 S S S S S S S S S S S S S S S S S S S S S S S S S S S S S S S S S S S S S S S S S S S S S S S S S S S S S S S S S S S S S S S S S S S S S S S S S S S S S S S S Front panel Display Rear panel 276 Remote Index - Marantz SR6012 | Owner s Manual In English - SR6012 - Page 277
when "Dynamic EQ" is set to "On". (v p. 168) z8 This item cannot be set when Audyssey® Setup (Speaker Calibration) has not been performed. z9 This item cannot be selected when a DTS:X format with a sampling , PCM 48 kHz or 44.1 kHz. Appendix Front panel Display Rear panel 277 Remote Index - Marantz SR6012 | Owner s Manual In English - SR6012 - Page 278
DTS ES Express Dscrt6.1 Mtrx6.1 DTS Dolby Atmos Dolby TrueHD Dolby Digital Plus Dolby Digital (EX) DSD (Super Audio CD) F F S S F Fz5 F S S S S S S S S F Sz6 S Sz7 F Sz10 S S F F S S S Front panel Display Rear panel 278 Remote Index - Marantz SR6012 | Owner s Manual In English - SR6012 - Page 279
Mtrx6.1 DTS Dolby Atmos Dolby TrueHD Dolby Dolby Digital Digital Plus (EX) DSD (Super Audio CD) F S S S S S S S S S S S S S S S S S S S S S S S S S S S S S S S S S Sz10 S S S S S S S S S S S S S Front panel Display Rear panel 279 Remote Index - Marantz SR6012 | Owner s Manual In English - SR6012 - Page 280
the Dolby Atmos signal contains the Dolby Digital Plus signal. z8 The default sound mode for the AirPlay playback is "Direct". z9 This item can be selected when the input signals contain surround back a sampling frequency of over 48 kHz is input. Front panel Display Rear panel 280 Remote Index - Marantz SR6012 | Owner s Manual In English - SR6012 - Page 281
listening area. Based on several room measurements, MultEQ® XT32 calculates an equalization solution that corrects for both time and frequency response problems in the listening area and also performs a fully automated surround system setup. Front panel Display Rear panel 281 Remote Index - Marantz SR6012 | Owner s Manual In English - SR6012 - Page 282
Dolby Atmos Introduced first in the cinema, Dolby Atmos brings a revolutionary sense of dimension and immersion to the Home Theater experience. Dolby Atmos is an adaptable and employ inceiling speakers or products with Dolby speaker technology. Front panel Display Rear panel 282 Remote Index - Marantz SR6012 | Owner s Manual In English - SR6012 - Page 283
to faithfully reproduce the sound of the studio master. This format provides the facility to support up to 8 audio channels with a sampling frequency of 96 kHz/24 bit resolution and and up to 5.1-channels of digital discrete surround sound. Front panel Display Rear panel 283 Remote Index - Marantz SR6012 | Owner s Manual In English - SR6012 - Page 284
is a lossless audio format created by Digital Theater System (DTS). This format provides the facility to support up to 8 audio channels with a sampling frequency of 96 kHz/24 bit resolution and up to of all speakers in your surround sound system. Front panel Display Rear panel 284 Remote Index - Marantz SR6012 | Owner s Manual In English - SR6012 - Page 285
"MPEG-1" video compression standard. It compresses the data volume to about one eleventh its original size while maintaining sound quality equivalent to a music CD. Front panel Display Rear panel 285 Remote Index - Marantz SR6012 | Owner s Manual In English - SR6012 - Page 286
. Downmix This function converts the number of channels of surround audio to a lower number of channels and plays back according to the system's configuration. Front panel Display Rear panel 286 Remote Index - Marantz SR6012 | Owner s Manual In English - SR6012 - Page 287
the interlace system, this system provides images with less flickering and jagged edges. o Network AirPlay AirPlay sends (plays) contents recorded in iTunes or on an iPhone/iPod touch/iPad to Alliance, compatible with more secure AES encryption. Front panel Display Rear panel 287 Remote Index - Marantz SR6012 | Owner s Manual In English - SR6012 - Page 288
Names (SSID: Service Set Identifier) When Bluetooth device to be connected. Protection circuit This is a function to prevent damage to devices within the power supply when an abnormality such as an overload, excess voltage occurs or over temperature for any reason. Front panel Display Rear panel - Marantz SR6012 | Owner s Manual In English - SR6012 - Page 289
with iPod, iPhone, or iPad may affect wireless performance. AirPlay, iPad, iPhone, iPod touch, and Retina are trademarks of of Audyssey Laboratories. The Bluetooth® word mark and logos are registered trademarks owned by Bluetooth SIG, Inc. and any panel Display Rear panel 289 Remote Index - Marantz SR6012 | Owner s Manual In English - SR6012 - Page 290
item incorporates copy protection technology that is protected by U.S. patents and other intellectual property rights of Rovi Corporation. Reverse engineering and disassembly are prohibited. Front panel Display Rear panel 290 Remote Index - Marantz SR6012 | Owner s Manual In English - SR6012 - Page 291
W (6 Ω/ohms, 1 kHz with 0.7 % T.H.D.) Surround back / Height1 / Height2: 110 W + 110 W (8 Ω/ohms, 20 Hz - 20 kHz with 0.08 % T.H.D.) 150 W + 150 W (6 Ω/ohms, 1 kHz with 0.7 % T.H.D.) 4 - 16 Ω/ohms Appendix Front panel Display Rear panel 291 Remote Index - Marantz SR6012 | Owner s Manual In English - SR6012 - Page 292
- 102 dB Dynamic range - 100 dB Format - Digital audio interface 2.5 mV ±1 dB (20 Hz to 20 kHz) 74 dB (IHF-A) 0.03 % (1 kHz, 3 V) Tips Appendix Front panel Display Rear panel 292 Remote Index - Marantz SR6012 | Owner s Manual In English - SR6012 - Page 293
dB (IHF-A weighted, Direct mode) STEREO ― 67 dB (IHF-A weighted, Direct mode) MONO ― 0.7 % (1 kHz) STEREO ― 1.0 % (1 kHz) Tips [AM] 520 kHz - 1710 kHz 18 μV Appendix Front panel Display Rear panel 293 Remote Index - Marantz SR6012 | Owner s Manual In English - SR6012 - Page 294
, 5 GHz z1 The Wi-Fi® CERTIFIED Logo and the Wi-Fi CERTIFIED On-Product Logo are registered trademarks of the Wi-Fi Alliance. Appendix Front panel Display Rear panel 294 Remote Index - Marantz SR6012 | Owner s Manual In English - SR6012 - Page 295
range: Modulation scheme: Supported profiles: Corresponding codec: Transmission range (A2DP): Bluetooth Specification Version 3.0 + EDR (Enhanced Data Rate) Bluetooth Specification Power Class 1 and design are subject to change without notice. Front panel Display Rear panel 295 Remote Index - Marantz SR6012 | Owner s Manual In English - SR6012 - Page 296
Contents Connections o Dimensions (Unit : in. (mm)) Playback Settings Tips Appendix 1 7/8 7/8 (47) (22) 1 3/8 (32) 9 7/8 (248) 15 3/8 (388) 13 3/4 ) 5/8 (14.5) 2 (50) o Weight: 28 lbs 4 oz (12.8 kg) . 13 1/2 (340) 2 1/4 (55) 2 (50) Front panel Display Rear panel 296 Remote Index - Marantz SR6012 | Owner s Manual In English - SR6012 - Page 297
Bluetooth device 90 Blu-ray Disc player 70, 84 v C Cable TV 69 v D Direct sound mode 135 Display 20 Dolby Atmos 282 Dolby sound mode 132, 282 DTS sound mode 133, 283 DVD player 70, 84 v E ECO Mode 226 External control device 79 v F Firmware Update 233 FM/AM antenna 75, 94 Front panel - Marantz SR6012 | Owner s Manual In English - SR6012 - Page 298
mode 134 Protection circuit 288 Pure direct 130 v Q Queue 86, 104, 111 v R Rear panel 22 Remote control unit 26 Resetting factory settings 262 Resetting network settings 263 v S Satellite tuner 69 Set-top box 69 Setup Assistant 158 Sleep timer 143 Smart select 145 Sound mode 129, 273 - Marantz SR6012 | Owner s Manual In English - SR6012 - Page 299
74, 85 ZONE2 61, 151 v V Video camcorder 71 Video Conversion 180, 267 Video Select 125 Video settings 155, 172 Volume 84, 123 Tips Appendix Front panel Display Rear panel 299 Remote Index - Marantz SR6012 | Owner s Manual In English - SR6012 - Page 300
that is used in the product. Marantz provides the source code based on the GPL and LPGL licenses at the actual cost upon your request to our customer service center. However, note that we make 10.74 1.4.3 2011.4.12 2007 2015.01 version 29 Version Front panel Display Rear panel 300 Remote Index - Marantz SR6012 | Owner s Manual In English - SR6012 - Page 301
in advertising or otherwise to promote the sale, use or other dealings in this Software entirety, including the disclaimer of warranties. 2. Redistributions in binary LIMITED TO, PROCUREMENT OF SUBSTITUTE GOODS OR SERVICES; LOSS OF USE, DATA, OR PROFITS panel Display Rear panel 301 Remote Index - Marantz SR6012 | Owner s Manual In English - SR6012 - Page 302
(INCLUDING NEGLIGENCE OR OTHERWISE) ARISING IN ANY WAY OUT OF THE USE OF THIS SOFTWARE, EVEN IF ADVISED OF THE POSSIBILITY OF SUCH DAMAGE. Front panel Display Rear panel 302 Remote Index - Marantz SR6012 | Owner s Manual In English - SR6012 - Page 303
software without specific prior written permission. THIS SOFTWARE IS PROVIDED "AS IS" AND WITHOUT ANY EXPRESS OR IMPLIED WARRANTIES, INCLUDING, WITHOUT LIMITATION, THE IMPLIED WARRANTIES OF MERCHANTABILITY AND FITNESS FOR A PARTICULAR PURPOSE. Front panel Display Rear panel 303 Remote Index - Marantz SR6012 | Owner s Manual In English - SR6012 - Page 304
Service Switch code, contributed by National ICT Australia Ltd (NICTA) is licensed under the terms of the NICTA Public Software Licence (which is substantially similar to the "Three-Clause BSD License", with some additional language pertaining to Australian law). Front panel Display Rear panel - Marantz SR6012 | Owner s Manual In English - SR6012 - Page 305
. THE SOFTWARE IS PROVIDED "AS IS", WITHOUT WARRANTY OF ANY KIND, EXPRESS OR IMPLIED, INCLUDING BUT NOT LIMITED TO THE WARRANTIES OF MERCHANTABILITY, FITNESS FOR A PARTICULAR PURPOSE AND in the OpenSSL Toolkit (http://www.openssl.org/)" Front panel Display Rear panel 305 Remote Index - Marantz SR6012 | Owner s Manual In English - SR6012 - Page 306
(INCLUDING NEGLIGENCE OR OTHERWISE) ARISING IN ANY WAY OUT OF THE USE OF THIS SOFTWARE, EVEN IF ADVISED OF THE POSSIBILITY OF SUCH DAMAGE. Front panel Display Rear panel 306 Remote Index - Marantz SR6012 | Owner s Manual In English - SR6012 - Page 307
OF CONTRACT, TORT OR OTHERWISE, ARISING FROM, OUT OF OR IN CONNECTION WITH THE SOFTWARE OR THE USE OR OTHER DEALINGS IN THE SOFTWARE. Front panel Display Rear panel 307 Remote Index - Marantz SR6012 | Owner s Manual In English - SR6012 - Page 308
www.mozilla.org/MPL/ Software distributed under the License is distributed on an "AS IS" basis, WITHOUT WARRANTY OF ANY KIND, either express or implied. See the License for the specific language governing rights and limitations under the License. Front panel Display Rear panel 308 Remote Index - Marantz SR6012 | Owner s Manual In English - SR6012 - Page 309
(INCLUDING NEGLIGENCE OR OTHERWISE) ARISING IN ANY WAY OUT OF THE USE OF THIS SOFTWARE, EVEN IF ADVISED OF THE POSSIBILITY OF SUCH DAMAGE. Front panel Display Rear panel 309 Remote Index - Marantz SR6012 | Owner s Manual In English - SR6012 - Page 310
Jean-loup Gailly and Mark Adler This software is provided 'as-is', without any express or implied warranty. In no event will the authors be held liable for any damages arising from the use of /connect/third-party-licenses Settings Tips Appendix Front panel Display Rear panel 310 Remote Index - Marantz SR6012 | Owner s Manual In English - SR6012 - Page 311
. 311 3520 10522 00AM Copyright © 2017 D&M Holdings Inc. All Rights Reserved.
-
 1
1 -
 2
2 -
 3
3 -
 4
4 -
 5
5 -
 6
6 -
 7
7 -
8
-
9
-
10
-
11
-
12
-
13
-
14
-
15
-
16
-
17
-
18
-
19
-
20
-
21
-
22
-
23
-
24
-
25
-
26
-
27
-
28
-
29
-
30
-
31
-
32
-
33
-
34
-
35
-
36
-
37
-
38
-
39
-
40
-
41
-
42
-
43
-
44
-
45
-
46
-
47
-
48
-
49
-
50
-
51
-
52
-
53
-
54
-
55
-
56
-
57
-
58
-
59
-
60
-
61
-
62
-
63
-
64
-
65
-
66
-
67
-
68
-
69
-
70
-
71
-
72
-
73
-
74
-
75
-
76
-
77
-
78
-
79
-
80
-
81
-
82
-
83
-
84
-
85
-
86
-
87
-
88
-
89
-
90
-
91
-
92
-
93
-
94
-
95
-
96
-
97
-
98
-
99
-
100
-
101
-
102
-
103
-
104
-
105
-
106
-
107
-
108
-
109
-
110
-
111
-
112
-
113
-
114
-
115
-
116
-
117
-
118
-
119
-
120
-
121
-
122
-
123
-
124
-
125
-
126
-
127
-
128
-
129
-
130
-
131
-
132
-
133
-
134
-
135
-
136
-
137
-
138
-
139
-
140
-
141
-
142
-
143
-
144
-
145
-
146
-
147
-
148
-
149
-
150
-
151
-
152
-
153
-
154
-
155
-
156
-
157
-
158
-
159
-
160
-
161
-
162
-
163
-
164
-
165
-
166
-
167
-
168
-
169
-
170
-
171
-
172
-
173
-
174
-
175
-
176
-
177
-
178
-
179
-
180
-
181
-
182
-
183
-
184
-
185
-
186
-
187
-
188
-
189
-
190
-
191
-
192
-
193
-
194
-
195
-
196
-
197
-
198
-
199
-
200
-
201
-
202
-
203
-
204
-
205
-
206
-
207
-
208
-
209
-
210
-
211
-
212
-
213
-
214
-
215
-
216
-
217
-
218
-
219
-
220
-
221
-
222
-
223
-
224
-
225
-
226
-
227
-
228
-
229
-
230
-
231
-
232
-
233
-
234
-
235
-
236
-
237
-
238
-
239
-
240
-
241
-
242
-
243
-
244
-
245
-
246
-
247
-
248
-
249
-
250
-
251
-
252
-
253
-
254
-
255
-
256
-
257
-
258
-
259
-
260
-
261
-
262
-
263
-
264
-
265
-
266
-
267
-
268
-
269
-
270
-
271
-
272
-
273
-
274
-
275
-
276
-
277
-
278
-
279
-
280
-
281
-
282
-
283
-
284
-
285
-
286
-
287
-
288
-
289
-
290
-
291
-
292
-
293
-
294
-
295
-
296
-
297
-
298
-
299
-
300
-
301
-
302
-
303
-
304
-
305
-
306
-
307
-
308
-
309
-
310
-
311
 |
 |

.
AV Surround Receiver
SR6012
Owner’s Manual
Contents
Connections
Playback
Settings
Tips
Appendix
1
Front panel
Display
Rear panel
Remote
Index