MSI MAG B560M MORTAR WIFI User Manual - Page 32
M2_1~2: M.2 Slots (Key M), Important, Video Demonstration
 |
View all MSI MAG B560M MORTAR WIFI manuals
Add to My Manuals
Save this manual to your list of manuals |
Page 32 highlights
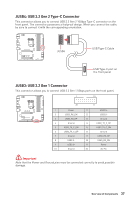
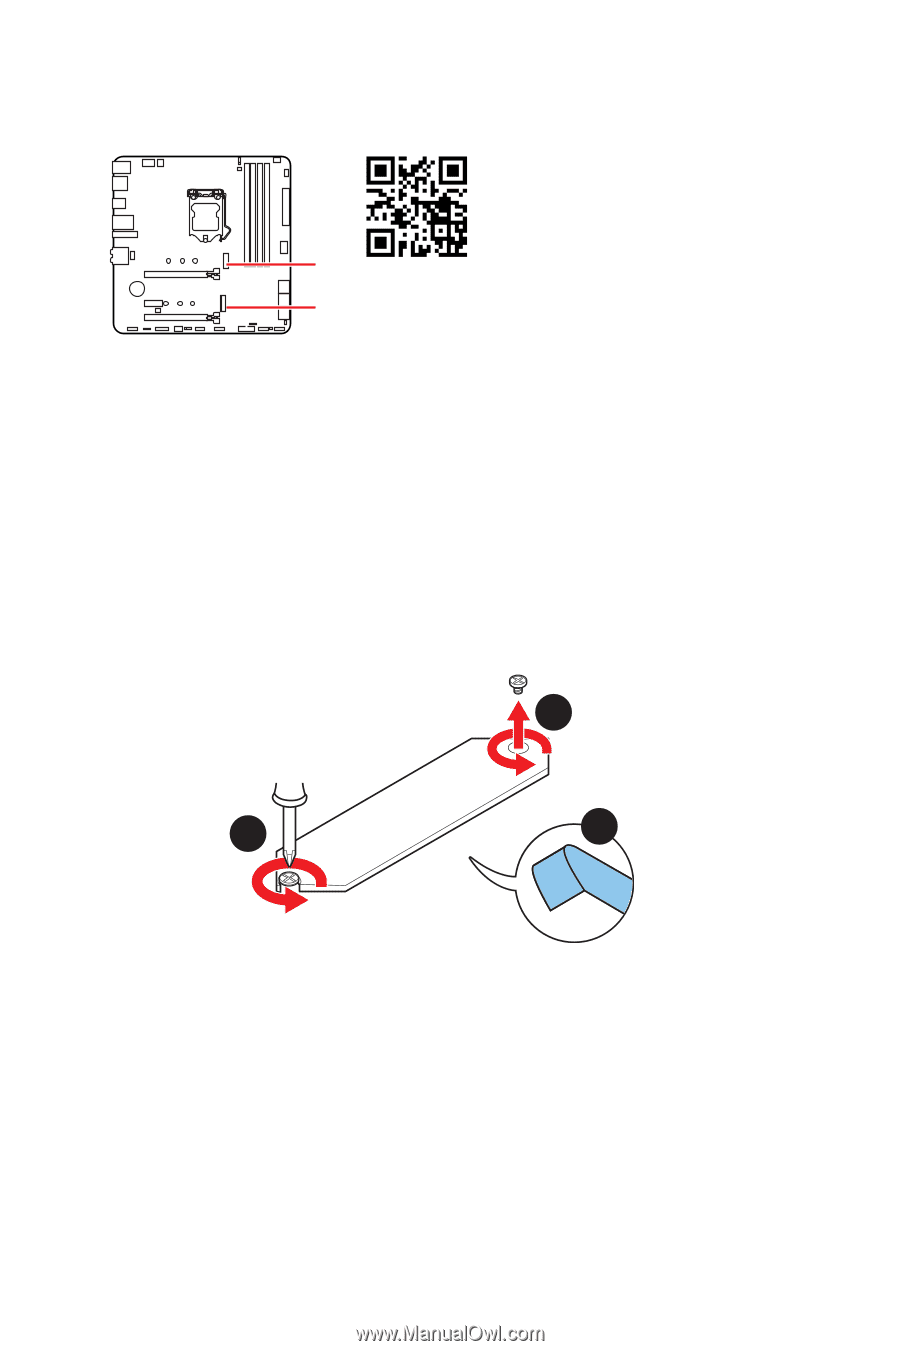
M2_1~2: M.2 Slots (Key M) M2_1 M2_2 ⚽⚽Video Demonstration Watch the video to learn how to Install M.2 SSD. https://youtu.be/2UeWMgjwogU ⚠⚠Important ∙∙Intel® RST only supports PCIe M.2 SSD with UEFI ROM. ∙∙Intel® Optane™ Memory Ready for M2_2 slot. Installing M.2 module 1. Loosen the screws of M.2 SHIELD FROZR heatsink. 2. Remove the M.2 SHIELD FROZR and remove the protective films from the thermal pads of heatsink. 1 1 2 32 Overview of Components
-
 1
1 -
2
-
3
-
4
-
5
-
6
-
7
-
8
-
9
-
10
-
11
-
12
-
13
-
14
-
15
-
16
-
17
-
18
-
19
-
20
-
21
-
22
-
23
-
24
-
25
-
26
-
 27
27 -
 28
28 -
 29
29 -
 30
30 -
 31
31 -
 32
32 -
 33
33 -
 34
34 -
 35
35 -
 36
36 -
 37
37 -
38
-
39
-
40
-
41
-
42
-
43
-
44
-
45
-
46
-
47
-
48
-
49
-
50
-
51
-
52
-
53
-
54
 |
 |
32
Overview of Components
M2_1~2: M.2 Slots (Key M)
Installing M.2 module
1.
Loosen the screws of M.2 SHIELD FROZR heatsink.
2.
Remove the M.2 SHIELD FROZR and remove the protective films from the thermal
pads of heatsink.
2
1
1
M2_1
M2_2
⚠
Important
∙
Intel® RST only supports PCIe M.2 SSD with UEFI ROM.
∙
Intel® Optane™ Memory Ready for M2_2 slot.
⚽
Video Demonstration
Watch the video to learn how to Install
M.2 SSD.
https://youtu.be/2UeWMgjwogU