LiftMaster CAPXLV Quick Start Guide - English French Spanish
LiftMaster CAPXLV Manual
 |
View all LiftMaster CAPXLV manuals
Add to My Manuals
Save this manual to your list of manuals |
LiftMaster CAPXLV manual content summary:
- LiftMaster CAPXLV | Quick Start Guide - English French Spanish - Page 1
CAPXL AND CAPXLV QUICK START GUIDE SETUP - myQ Business ® ™ IF YOU NEED ACCESS TO myQ® Business™ PLEASE CALL LIFTMASTER CUSTOMER CARE AT 800-323-2276 TO background image, and register or link with Phone.com for VoIP calling service. 2. Click Save. Shady Acres CAPXLV 2. Select the Facility type ( - LiftMaster CAPXLV | Quick Start Guide - English French Spanish - Page 2
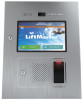
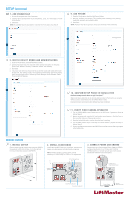
CAPXLV and confirm archived video clips appear in the Activity Log. INSTALLATION 1. INSTALL CAPXLV Remove knock outs as required and mount the CAPXLV to a pedestal, a flat solid surface, or into the optional trim kit and back box accessory (CAPXLTK). 2. INSTALL ACCESSORIES Install radio and Wi-Fi - LiftMaster CAPXLV | Quick Start Guide - English French Spanish - Page 3
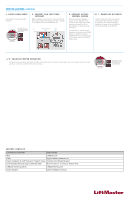
.Dealer.LiftMaster.com Dealer Installation & myQ® Business™ Support Videos YouTube.com/LiftmasterSupport Commercial/professional support: 800-528-2806 Mon-Fri 5:00 a.m. to 6:00 p.m. Arizona Time LiftMaster training academy LiftMasterTraining.com Dealer Extranet partner.LiftMaster.com/login - LiftMaster CAPXLV | Quick Start Guide - English French Spanish - Page 4
- LiftMaster CAPXLV | Quick Start Guide - English French Spanish - Page 5
CONFIGURATION DU GUIDE DE DÉMARRAGE RAPIDE CAPXL ET CAPXLV - Installation myQ Business ® ™ SI VOUS AVEZ BESOIN D'ACCÉDER À myQ® Business™ PRIÈRE D'APPELER L'ASSISTANCE À LA CLIENTÈLE LIFTMASTER CUSTOMER CARE AU 800 282-2276 POUR CRÉER UN COMPTE. 1. CRÉER UNE nouvelleINSTALLATION® myQ™ BUSINESS - LiftMaster CAPXLV | Quick Start Guide - English French Spanish - Page 6
LES ACCESSOIRES Installer la radio et les antennes Wi-Fi, la serrure pour service des postes, le lecteur de carte en option et la carte d'entrée d'appel rapide en option. REMARQUE : Le CAPXLV comprend une caméra. Trousse d'accessoires de mise à niveau CAPXL (CAPXLCAM) pour le CAPXL ou pour le - LiftMaster CAPXLV | Quick Start Guide - English French Spanish - Page 7
ÉES D'ASSISTANCE ASSISTANCE LIFTMASTER Web FAQ Installation par le détaillant et myQ® Business™ Vidéos d'assistance Assistance commerciale et professionnelle : 800 528-2806 Académie de formation LiftMaster Extranet des détaillants RESSOURCES LiftMaster.com Support.Dealer.LiftMaster.com YouTube.com - LiftMaster CAPXLV | Quick Start Guide - English French Spanish - Page 8
- LiftMaster CAPXLV | Quick Start Guide - English French Spanish - Page 9
CAPXL Y CAPXLV GUÍA DE INICIO RÁPIDO CONFIGURACIÓN - myQ Business, ® ™ SI NECESITA ACCEDER A myQ® Business™ LLAME AL CENTRO DE ATENCIÓN AL CLIENTE DE LIFTMASTER AL 800-323-2276 PARA CONFIGURAR UNA CUENTA. 1. CREAR UNA NUEVA myQ® Business™ FACILITY 1. A. Si se trata de una instalación existente: - LiftMaster CAPXLV | Quick Start Guide - English French Spanish - Page 10
Audio/Video para confirmar que la entrada de video funciona. 4. Apague el modo Administrador del CAPXL. y juego adaptador (CAPXLTK). 2. INSTALAR LOS ACCESORIOS Instale las antenas de radio y de Wi-Fi, el tierra. Para obtener más información, consulte el manual completo. ENTRADA DE ENERGÍA ELÉCTRICA - LiftMaster CAPXLV | Quick Start Guide - English French Spanish - Page 11
web Preguntas frecuentes Videos sobre la Instalación del distribuidor y® myQ™ Para empresas Soporte técnico comercial y profesional: 800-528-2806 Academia de capacitación de LiftMaster Extranet para distribuidores RECURSOS LiftMaster.com Support.Dealer.LiftMaster.com YouTube.com/LiftmasterSupport - LiftMaster CAPXLV | Quick Start Guide - English French Spanish - Page 12
01-39217D Wi-Fi® is a registered trademark of Wi-Fi Alliance. Wi-Fi® est une marque de commerce de Wi-Fi Alliance. Wi-Fi® es una marca comercial registrada de Wi-Fi Alliance. © 2020 LiftMaster All rights reserved. Tous droits réservés. Todos los derechos reservados.
-
 1
1 -
 2
2 -
 3
3 -
 4
4 -
 5
5 -
 6
6 -
 7
7 -
8
-
9
-
10
-
11
-
12
 |
 |
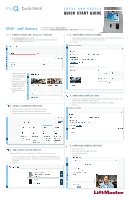
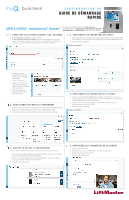
QUICK START GUIDE
CAPXL AND CAPXLV
SETUP – myQ
®
Business
™
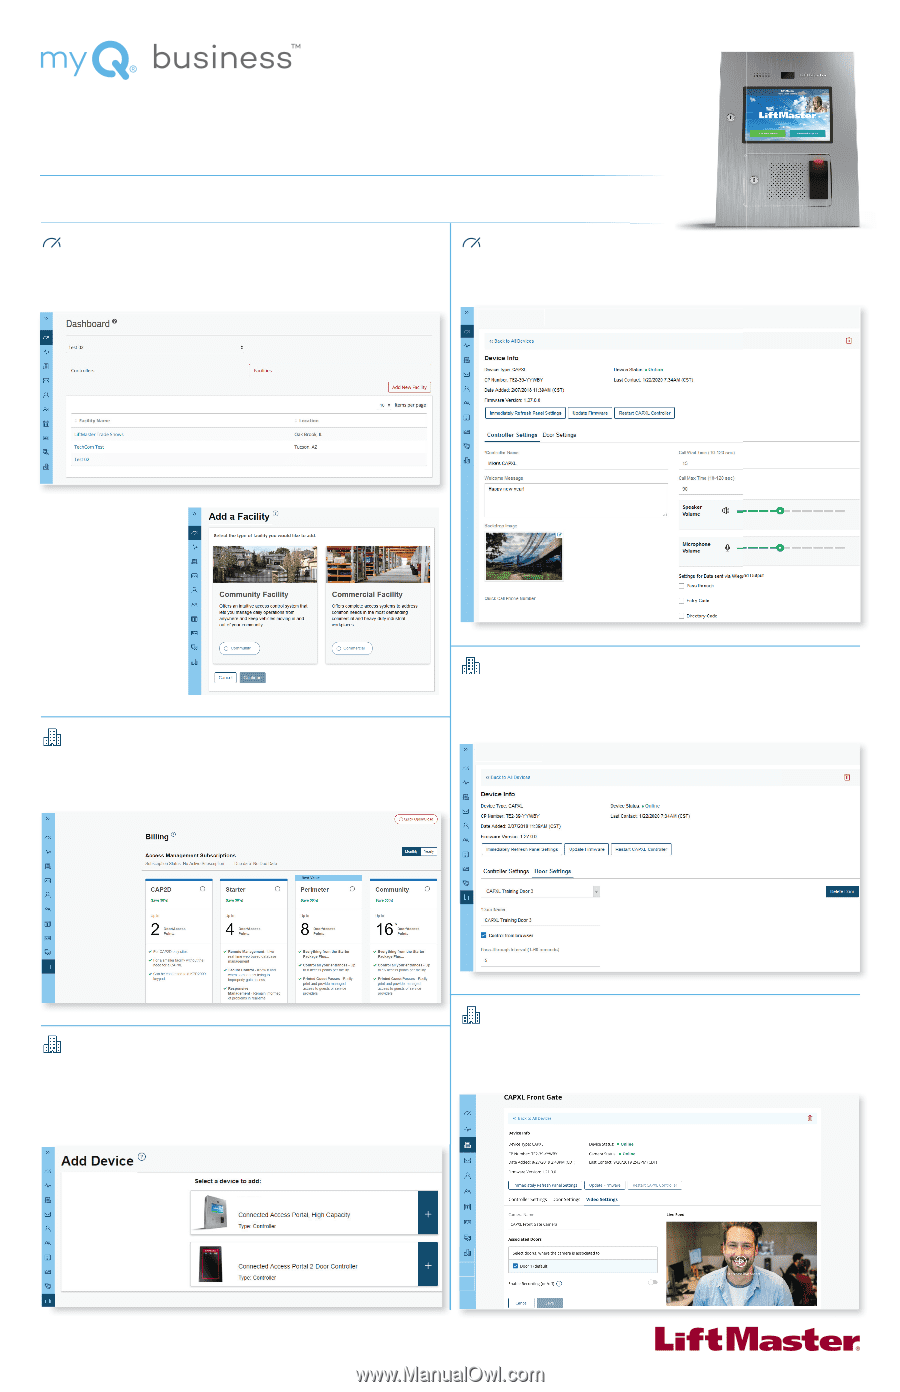
2. SELECT A SUBSCRIPTION PLAN
1.
Click profile name in upper right corner then select Billing.
2.
Select a subscription Plan and Add on features if desired.
3.
Enter payment information and select monthly or yearly payments.
1. CREATE A NEW myQ
®
Business
™
FACILITY
1. A.
If existing facility:
Skip to Step 3.
B.
If new facility:
On left navigation bar, click Dashboard, then Facilities tab.
Click the Add New Facility button.
2. Select the Facility type
(Community Facility or
Commercial Facility).
3. Click Continue.
4. Click Confirm. (You will
not be able to change
facility type once the
facility is created.)
5. Enter the Facility
information and click
Save.
IF YOU NEED ACCESS TO
myQ
®
Business
™
PLEASE CALL
LIFTMASTER CUSTOMER CARE
AT
800-323-2276
TO SETUP AN ACCOUNT.
4. CONFIGURE CAPXLV SETTINGS
1.
Enter CAPXLV settings such as the welcome message, custom background image, and
register or link with Phone.com for VoIP calling service.
2. Click Save.
6. CONFIGURE CAMERA SETTINGS
1. Enter camera name
2.
Select which doors will trigger event clips
3. Select Recording (on/off)
4. Click Save
3. ADD CAPXLV TO THE FACILITY
Open the CAPXLV box and locate the CP # on the inside of the enclosure.
1.
On the Left navigation bar, select Facility, then click the Device Management tab.
2.
Click on the Add Devices button, Select CAPXLV [+], and enter the CP # and name
the CAPXLV.
3. Click Save.
5. CONFIGURE DOOR SETTINGS
1.
Click the Doors Settings tab to edit Door settings including hold open schedule, relay
hold durations, DTMF tone, and Door name.
2.
Click the Add Door button to add additional doors [max 4 per CAPXLV].
3. Click Save.
Shady Acres CAPXLV
Shady Acres CAPXLV
CAPXL or CAPXLV
CAP2D