LG OLED77B2AUA Owners Manual - Page 5
Antenna/Cable
 |
View all LG OLED77B2AUA manuals
Add to My Manuals
Save this manual to your list of manuals |
Page 5 highlights
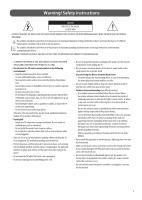
•• Do not apply foreign substances (oils, lubricants, etc.) to the screw parts when assembling the product. (Doing so may damage the product.) •• If you install the TV on a stand, you need to take actions to prevent the product from overturning. Otherwise, the product may fall over, which may cause injury. •• Do not use any unapproved items to ensure the safety and lifespan of the product. •• Any damages or injuries by using unapproved items are not covered by the warranty. •• Make sure that the screws are fastened tightly. (If they are not fastened securely enough, the TV may tilt forward after being installed.) •• Do not fasten the screws with excessive force otherwise they may strip and become loose. •• If there is a problem with swivel angle adjustment, lift the product slightly and put it back down. Securing TV to the Wall 1 Insert and tighten the eye-bolts or TV brackets and bolts on the back of the TV. • If there are bolts inserted at the eye-bolts position, remove the bolts first. 2 Mount the wall brackets with the bolts to the wall. Match the location of the wall bracket and the eye-bolts on the rear of the TV. 3 Connect the eye-bolts and wall brackets tightly with a sturdy rope or cable. Make sure to keep the rope parallel to the flat surface. •• Use a platform or cabinet that is strong and large enough to support the TV securely. •• Brackets, bolts, and ropes are optional. You can obtain additional accessories from your local dealer. Mounting to the Wall An optional wall mount can be used with your LG Television. Consult with your local dealer for a wall mount that supports the VESA standard used by your TV model. Carefully attach the wall mount bracket at the rear of the TV. Install the wall mount bracket on a solid wall perpendicular to the floor. If you are attaching the TV to other building materials, please contact qualified personnel to install the wall mount. Detailed instructions will be included with the wall mount. We recommend that you use an LG brand wall mount. The LG wall mount is easy to adjust or to connect the cables. When you do not use LG's wall mount bracket, use a wall mount bracket where the device is adequately secured to the wall with enough space to allow connectivity to external devices. If you are using a non-adjustable mount, attach the mount to the wall. Attach the cables to the TV first, then attach the TV to the mount. •• Remove the stand before installing the TV on a wall mount by performing the stand attachment in reverse. •• For more information of screws and wall mount bracket, refer to the Separate Purchase. •• If you intend to mount the product to a wall, attach VESA standard mounting interface (optional parts) to the back of the product. When you install the set to use the wall mounting bracket (optional parts), fix it carefully so as not to drop. •• When mounting a TV on the wall, make sure not to install the TV by hanging the power and signal cables on the back of the TV. •• Do not install this product on a wall if it could be exposed to oil or oil mist. This may damage the product and cause it to fall. •• Please use the accessory cable holder when hanging on the wall. (Only OLED48/83C2*) Antenna/Cable Connect an antenna, cable, or cable box to watch TV while referring to the following. The illustrations may differ from the actual items and an RF cable is optional. Copper wire •• Make sure not to bend the copper wire of the RF cable. •• Complete all connections between devices, and then connect the power cord to the power outlet to prevent damage to your TV. •• Use a signal splitter to use 2 TVs or more. •• DTV Audio Supported Codec: MPEG, Dolby Digital •• This TV cannot receive Ultra HD (3840 x 2160 pixels) broadcasts directly because the related standards have not been confirmed (Depending upon country). •• Use the AV cover for aesthetic purposes. Connecting too many cables may cause lifting problems. In such a case, remove the AV cover before use. 5
-
 1
1 -
 2
2 -
 3
3 -
 4
4 -
 5
5 -
 6
6 -
 7
7 -
 8
8 -
 9
9 -
 10
10 -
 11
11 -
12
-
13
-
14
-
15
-
16
-
17
-
18
-
19
-
20
-
21
-
22
-
23
-
24
-
25
-
26
-
27
-
28
-
29
 |
 |
