Jenn-Air JS42PPDUDE Owners Manual 1 - Page 5
Install Produce Preserver, on some models
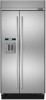 |
View all Jenn-Air JS42PPDUDE manuals
Add to My Manuals
Save this manual to your list of manuals |
Page 5 highlights
■■ Depending on your model, you may want to select the maximum ice feature to increase the production of ice. Style 2 (Non-Dispenser Models) IMPORTANT: After connecting the refrigerator to a water source or replacing the water filter, fill and discard two full containers of ice to prepare the water filter for use, before using the ice. Do not use with water that is microbiologically unsafe or of unknown quality without adequate disinfection before or after the system. NOTE: If your model has a base grille filter system, make sure the base grille filter is properly installed and the cap is in the horizontal position. 1. Turn on the ice maker. Lower the wire shutoff arm as shown. Please refer to "Ice Maker and Storage Bin" for further instructions on the operation of your ice maker. Installing the Produce Preserver (on some models) CAUTION: IRRITANT MAY IRRITATE EYES AND SKIN. DANGEROUS FUMES FORM WHEN MIXED WITH OTHER PRODUCTS. Do not mix with cleaning products containing ammonia, bleach or acids. Do not get in eyes, on skin or clothing. Do not breathe dust. Keep out of reach of children. FIRST AID TREATMENT: Contains potassium permanganate. If swallowed, call a Poison Control Center or doctor immediately. Do not induce vomiting. If in eyes, rinse with water for 15 minutes. If on skin, rinse with water. 1. Wash the interior of a crisper drawer with a solution of mild dish soap and warm water, and dry thoroughly. 2. Find the package containing the Produce Preserver inside the refrigerator, and install the Produce Preserver into the crisper drawer according to the instructions provided in the package. NOTES: ■■ Allow 24 hours to produce the first batch of ice. ■■ Allow 3 days to completely fill ice container. ■■ Depending on your model, you may want to select the maximum ice feature to increase the production of ice. Installing the Status Indicator (on some models) The Produce Preserver comes with a status indicator, which should be activated and installed at the same time the pouch is installed. Install Produce Preserver (on some models) The produce preserver absorbs ethylene to slow the ripening process of many produce items. As a result, certain produce items will stay fresh longer. Ethylene production and sensitivity varies depending on the type of fruit or vegetable. To preserve freshness, it is best to separate produce with sensitivity to ethylene from fruits that produce moderate to high amounts of ethylene. Apples Sensitivity to Ethylene High Ethylene Production Very High Asparagus Medium Very Low Berries Low Low Broccoli High Very Low Cantaloupe Medium High Carrots Low Very Low Citrus Fruit Medium Very Low Grapes Low Very Low Lettuce High Very Low Pears High Very High Spinach High Very Low 1. Place the indicator face-down on a firm, flat surface. 2. Apply pressure to the bubble on the back of the indicator until the bubble pops to activate the indicator. 3. Slide open the cap on the Produce Preserver housing. 4. Place the indicator in the top of the housing facing outward. 5. Slide the cap closed, and check that the indicator is visible through the rectangular hole in the cap. NOTE: The cap will not easily close if the indicator's rear bubble has not been popped. Replacing the Produce Preserver The disposable packets should be replaced every 6 months or when the status indicator changes completely from white to red. To order replacements, see "Accessories" in the User Instructions or User Guide. 1. Remove the used packets from the produce preserver housing. 2. Remove the used status indicator. 3. Install the replacement packets and status indicator using the instructions included in the package. 5
-
 1
1 -
 2
2 -
 3
3 -
 4
4 -
 5
5 -
 6
6 -
 7
7 -
 8
8 -
 9
9 -
 10
10 -
 11
11 -
12
-
13
-
14
-
15
-
16
-
17
-
18
-
19
-
20
-
21
-
22
-
23
-
24
-
25
-
26
-
27
-
28
-
29
-
30
-
31
-
32
-
33
-
34
-
35
-
36
-
37
-
38
-
39
-
40
-
41
-
42
-
43
-
44
-
45
-
46
-
47
-
48
-
49
-
50
-
51
-
52
-
53
-
54
-
55
-
56
-
57
-
58
-
59
-
60
-
61
-
62
-
63
-
64
 |
 |
