Invacare MVPJRF80 Owners Manual - Page 43
Square And Extended Rear Frames Detail B, Detail B - Square And Extended Rear Frames
 |
View all Invacare MVPJRF80 manuals
Add to My Manuals
Save this manual to your list of manuals |
Page 43 highlights
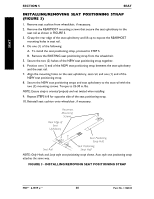
ARMS ARMS SECTION 6 SQUARE AND EXTENDED REAR FRAMES (DETAIL "B") 1. Position the arm socket on the wheelchair frame as shown in FIGURE 1. 2. Position the top coved washer between the arm socket and the wheelchair frame. NOTE: The slot in the arm socket is used with either the top or the bottom mounting holes in the arm socket depending on the half arm height desired. 3. Install the top hex screw through the wheelchair frame, coved washer, the mounting hole in the arm socket and washer. Loosely tighten with locknut. 4. Position the bottom coved washer between the arm socket and the wheelchair frame. 5. Install the bottom hex screw through the wheelchair frame, coved washer, the slot in the arm socket and washer. Loosely tighten with locknut. 6. Securely tighten the two (2) hex screws and locknuts that secure the arm socket to the wheelchair frame. 7. Install a washer onto the hex screw and insert the hex screw into the arm socket to one (1) of three (3) positions depending on desired height. 8. Install a washer on the end of the hex screw and securely tighten with locknut. 9. Install the half arm into the arm socket. DETAIL "A" - CURVED REAR FRAME ARM SOCKET Top Coved Locknuts Washer Wheelchair Frame Top Mounting Hole Coved Washer Slot Bottom Mounting Hole Washer Arm Socket Shown for Clarity DO NOT Remove Bottom Coved Washer Washer Top Hex Screw Axle Mounting Bracket Bottom Hex Screw DETAIL "B" - SQUARE AND EXTENDED REAR FRAMES Locknuts Half Arm Arm Coved Socket Washers Wheelchair Frame TOP Hex Screw Part No. 1106638 Washers Hex Screw FIGURE 1 - INSTALLING THE HALF ARM 43 BOTTOM Hex Screw MVP™ & MVP jr.™
-
 1
1 -
2
-
3
-
4
-
5
-
6
-
7
-
8
-
9
-
10
-
11
-
12
-
13
-
14
-
15
-
16
-
17
-
18
-
19
-
20
-
21
-
22
-
23
-
24
-
25
-
26
-
27
-
28
-
29
-
30
-
31
-
32
-
33
-
34
-
35
-
36
-
37
-
 38
38 -
 39
39 -
 40
40 -
 41
41 -
 42
42 -
 43
43 -
 44
44 -
 45
45 -
 46
46 -
 47
47 -
 48
48 -
49
-
50
-
51
-
52
-
53
-
54
-
55
-
56
-
57
-
58
-
59
-
60
 |
 |
