Hisense 120L9G-CINE120A Quick Start Guide - Page 13
Adjust The Upper-right Corner Of The Image
 |
View all Hisense 120L9G-CINE120A manuals
Add to My Manuals
Save this manual to your list of manuals |
Page 13 highlights
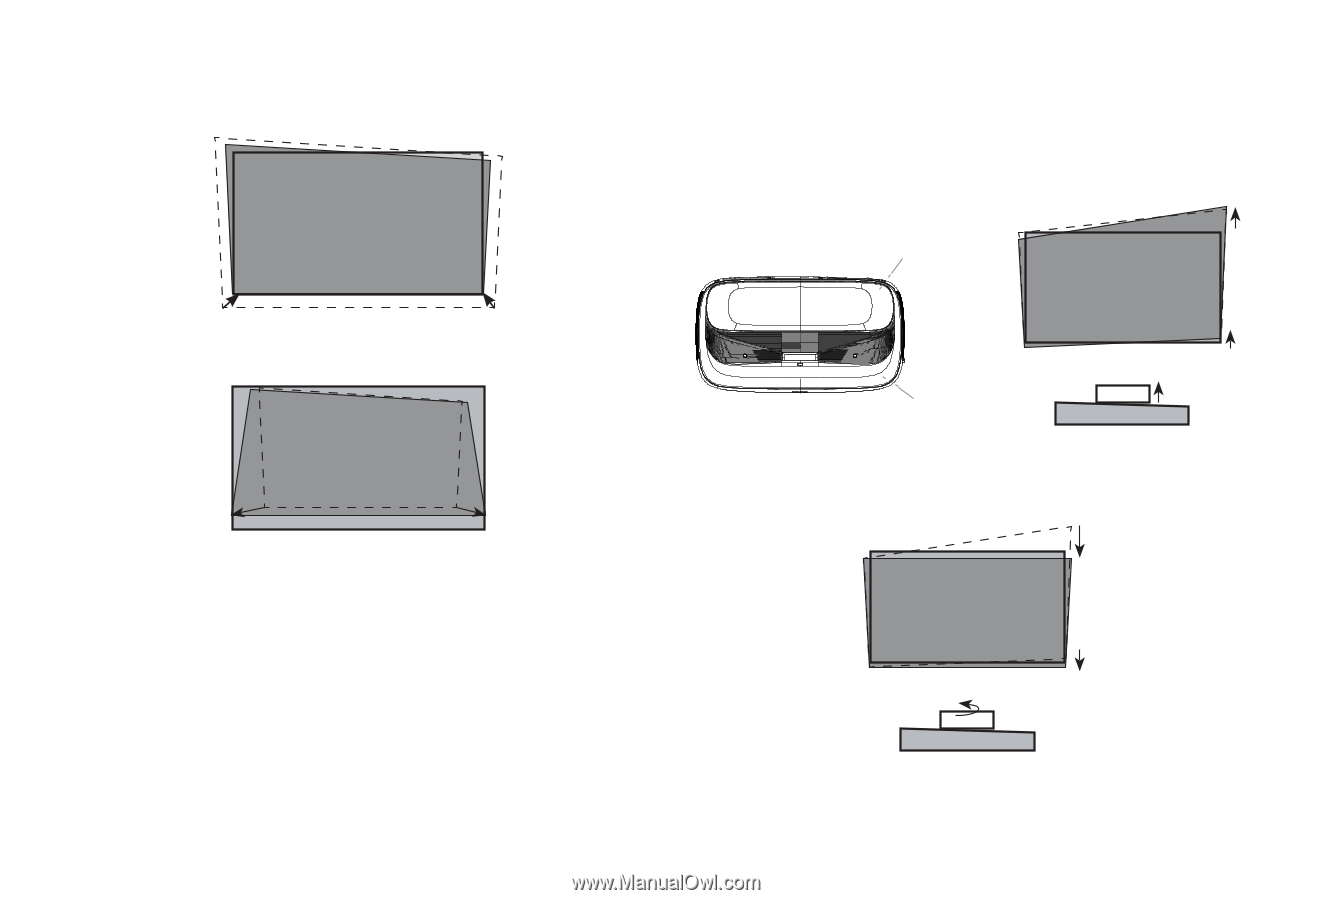
• If the bottom of the image is wider than the screen, then move the Laser Cinema closer to the screen. ADJUST THE UPPER-RIGHT CORNER OF THE IMAGE 1. If the top of the image is lower on the left and higher on the right, then use the wrench to rotate the front-right foot and the back-right foot clockwise to the same height. back-right foot If the bottom of the image is narrower than the screen, then move the Laser Cinema farther from the screen. NOTE: Make sure the bottom of the image always stays parallel with the screen. If not, rotate the Laser Cinema following previous instructions. front-right foot 2. Now, rotate the Laser Cinema counterclockwise so that the bottom of the image is parallel with the screen. 3. Repeat the steps above until the top of the image is parallel with the screen. 11
-
 1
1 -
2
-
3
-
4
-
5
-
6
-
7
-
 8
8 -
 9
9 -
 10
10 -
 11
11 -
 12
12 -
 13
13 -
 14
14 -
 15
15 -
 16
16 -
 17
17 -
 18
18 -
19
-
20
-
21
-
22
-
23
-
24
-
25
-
26
 |
 |