HP D2D4009fc HP StoreOnce 2700, 4500 and 4700 Backup system Maintenance and Se - Page 22
Hardware Report, HP StoreOnce Backup CLI Reference Guide
 |
View all HP D2D4009fc manuals
Add to My Manuals
Save this manual to your list of manuals |
Page 22 highlights
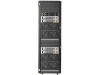
Figure 9 Removing a p1224 card, example shows an HP StoreOnce 4700 Backup 4. Install the new p1224 card (1) and check that it is seated properly. Close the blue PCIe card retaining latch (2). Figure 10 Inserting a p1224 card, example shows an HP StoreOnce 4700 Backup 5. Make sure the card is connected to the SuperCapacitor module and to the internal and external SAS data storage. 6. Replace the cover, as described in the appropriate HP ProLiant Maintenance and Service guide, and power on the HP StoreOnce Backup system. 7. Once rebooted, the HP StoreOnce Backup system will identify the new RAID controller and will remap the existing disk storage volumes and enclosures to the controller. It will take 5 to 10 minutes for the process to complete. During this time the product will be online but several warning events will be generated and the GUI Hardware Report will show errors being reported and cleared. 8. Run the StoreOnce CLI command, hardware show firmware, to check that the firmware on the new HP p1224 RAID controller is correct; it will be listed under the node (server) details. Run the StoreOnce CLI command, hardware update firmware, with appropriate parameters to update it, if necessary. See the HP StoreOnce Backup CLI Reference Guide for more details. 22 The HP p1224 RAID controller
-
 1
1 -
2
-
3
-
4
-
5
-
6
-
7
-
8
-
9
-
10
-
11
-
12
-
13
-
14
-
15
-
16
-
 17
17 -
 18
18 -
 19
19 -
 20
20 -
 21
21 -
 22
22 -
 23
23 -
 24
24 -
 25
25 -
 26
26 -
 27
27 -
28
-
29
-
30
-
31
-
32
-
33
-
34
-
35
-
36
-
37
 |
 |
