Harbor Freight Tools 68148 User Manual - Page 9
Operating Instructions - hammer
 |
View all Harbor Freight Tools 68148 manuals
Add to My Manuals
Save this manual to your list of manuals |
Page 9 highlights
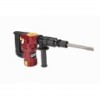
OPERATING INSTRUCTIONS Read the ENTIRE IMPORTANT SAFETY INFORMATION section at the beginning of this manual including all text under subheadings therein before set up or use of this product. Tool Set Up TO PREVENT SERIOUS INJURY FROM ACCIDENTAL OPERATION: Turn Power Switch off and unplug the tool from its electrical outlet before adjusting tool or installing accessories. Work Piece and Work Area Set Up 1. Designate a work area that is clean and well-lit. The work area must not allow access by children or pets to prevent distraction and injury. 2. Route the power cord along a safe route to reach the work area without creating a tripping hazard or exposing the power cord to possible damage. The power cord must reach the work area with enough extra length to allow free movement while working. 3. Secure loose work pieces using a vise or clamps (not included) to prevent movement while working. 4. There must not be objects, such as utility lines, nearby that will present a hazard while working. Mounting Tool Bits and Locking Side Handle 1. WARNING! Before installing new bit, verify Demolition Hammer is unplugged. 2. Pull the Chuck (35) back to open. NOTE: If the Chuck is difficult to open, lightly tap it with a hammer. 3. Insert the shank portion of the chisel into Chuck as far as it will go. Release the Chuck 4. Pull chisel to verify it is secure. 5. The Side Handle (62) can swing around to either side of the tool. To adjust its position, turn it counterclockwise and slide to the desired position. Turn it clockwise to lock it in place. General Operating Instructions 1. Once the chisel is installed and the Side Handle set in the desired position, set the tip of the bit is set against the work area. 2. Place one hand on the Side Handle and the other hand around the Main Handle (74). 3. Press the Trigger (69) to activate the Demolition Hammer. 4. NOTE: For continuous operation, press the Trigger Switch and then push the lock button located above the Trigger Switch. To stop the continuous use, press the Trigger Switch down all the way and then release the Trigger Switch. 5. WARNING! Once activated, do not press, bear down or thrust forcibly against the work surface. Hold the Demolition Hammer with just enough pressure so that the tool's own weight supplies the needed force. 6. NOTE: If the Demolition Hammer has not been used for a long period of time or is being used in low temperatures, keep the tool running for about five minutes to allow for warm-up. Make SKU 68148 For technical questions, please call 1-800-444-3353. Page 9
-
 1
1 -
2
-
3
-
 4
4 -
 5
5 -
 6
6 -
 7
7 -
 8
8 -
 9
9 -
 10
10 -
 11
11 -
 12
12 -
 13
13 -
 14
14
 |
 |
