GE 27950EE1 User Guide - Page 16
Answering System Setup - review
 |
View all GE 27950EE1 manuals
Add to My Manuals
Save this manual to your list of manuals |
Page 16 highlights
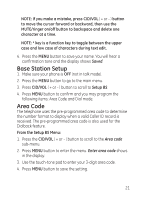
4. Plug one end of the straight telephone line cord into the jack on the bottom of the base. 5. Feed the line cord through the groove and plug the end into the modular telephone jack. 6. Slip the mounting holes (on the bottom of the base) over the wall plate posts and firmly slide the unit down into place. Answering System Setup This section shows you how to set up your answering system to receive incoming calls. Before you begin the set up process, you must turn on the answering system. • Press the ANS ON/OFF button to turn the answering system on and off. The Message Indicator lights when the answering system is on. The indicator blinks when you have new messages. NOTE: The answering system displays "- -" when it is off. Voice Instructions If you need additional assistance; while in standby mode, press the REVIEW button on the base and follow the voice instructions. Speaker Volume Use the volume (5 or 6) buttons to adjust speaker volume on the base to a comfortable level. L1 is the minimum speaker volume and L8 is the maximum. Recording the Outgoing Announcement For best results when recording, you should be about nine inches from the microphone, and eliminate as much background noise as possible. 1. Press and hold the ANNOUNCE button on the base until the speaker announces "RECORD ANNOUNCEMENT AFTER TONE". 16
-
 1
1 -
2
-
3
-
4
-
5
-
6
-
7
-
8
-
9
-
10
-
 11
11 -
 12
12 -
 13
13 -
 14
14 -
 15
15 -
 16
16 -
 17
17 -
 18
18 -
 19
19 -
 20
20 -
 21
21 -
22
-
23
-
24
-
25
-
26
-
27
-
28
-
29
-
30
-
31
-
32
-
33
-
34
-
35
-
36
-
37
-
38
-
39
-
40
-
41
-
42
-
43
-
44
-
45
-
46
-
47
-
48
-
49
-
50
-
51
-
52
-
53
-
54
-
55
-
56
-
57
-
58
-
59
-
60
-
61
-
62
-
63
-
64
-
65
-
66
-
67
-
68
-
69
-
70
-
71
-
72
-
73
-
74
-
75
-
76
-
77
-
78
-
79
-
80
-
81
-
82
-
83
-
84
-
85
-
86
-
87
-
88
-
89
-
90
-
91
-
92
-
93
-
94
-
95
-
96
-
97
-
98
-
99
-
100
-
101
-
102
-
103
-
104
-
105
-
106
-
107
-
108
-
109
-
110
-
111
-
112
-
113
-
114
-
115
-
116
 |
 |
